
Can you demolish a kitchen yourself? Yes, with careful planning, the right tools, and a focus on safety, you can successfully complete a DIY kitchen demolition. This guide will walk you through the entire process, from initial preparations to safe tear-down, ensuring your kitchen renovation prep is off to a solid start. We’ll cover everything you need to know about kitchen gutting, removing kitchen cabinets, and preparing for your kitchen remodel.
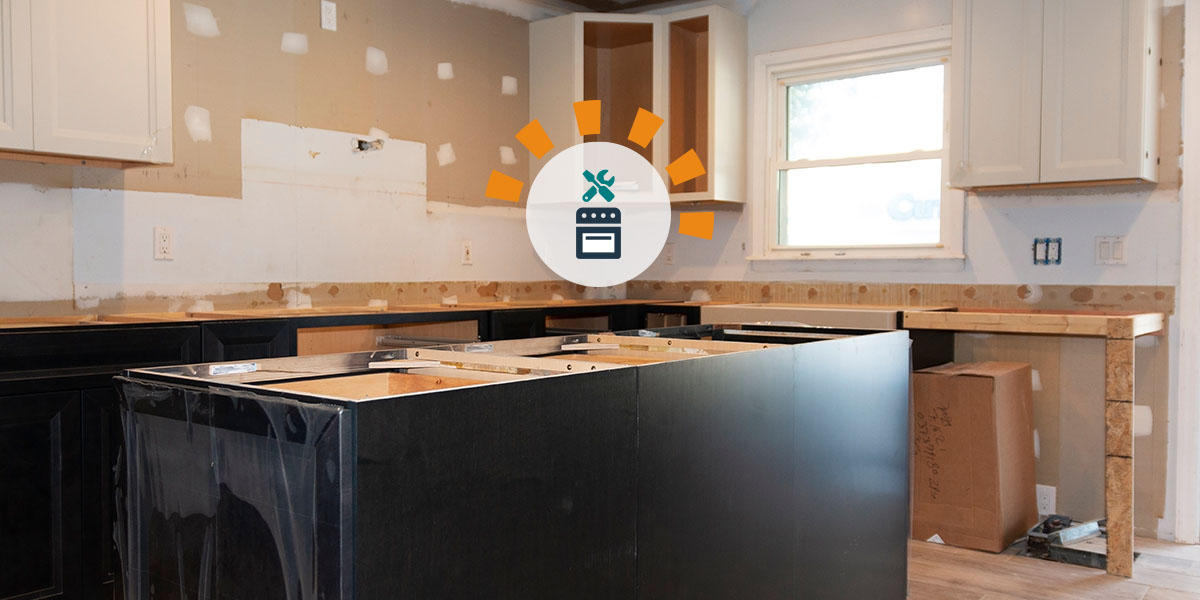
Image Source: www.dumpsters.com
Getting Started with Your Kitchen Tear Out
Embarking on a kitchen tear out can feel daunting, but breaking it down into manageable steps makes it achievable. This is the first crucial phase of your kitchen renovation prep. Before you even think about swinging a hammer, it’s essential to plan and gather everything you’ll need. A successful DIY kitchen demolition relies heavily on meticulous preparation.
Planning Your Demolition Project
A well-thought-out plan is the bedrock of any successful DIY project. This is where your kitchen renovation prep truly begins.
Site Assessment and Scope Definition
- What are you removing? Be specific. Are you just removing cabinets and countertops, or is the flooring, backsplash, sink, and appliances all part of the kitchen tear out?
- Structural considerations: Are any walls you plan to remove load-bearing? If so, you’ll need professional help to support them before demolition. It’s always best to consult an engineer or contractor if you suspect this.
- Utilities check: Identify the location of all electrical wiring, plumbing lines, gas lines, and HVAC vents within the kitchen. Marking these clearly is paramount for safe kitchen demolition.
Budgeting for Demolition
Even a DIY kitchen demolition has costs. Consider these:
- Tool rental/purchase: Some specialized tools might be necessary.
- Waste disposal: Dumpster rental or disposal fees at the local transfer station.
- Personal protective equipment (PPE): Essential for your safety.
- Potential professional help: For electrical, plumbing, or structural concerns.
Gathering Essential Demolition Tools Kitchen
Having the right demolition tools kitchen makes the job safer and more efficient. Don’t skimp on quality here; your safety depends on it.
Essential Tools for Kitchen Gutting
- Safety Gear:
- Safety Glasses/Goggles: Protect your eyes from dust and debris.
- Work Gloves: Heavy-duty gloves to prevent cuts and splinters.
- Dust Masks/Respirators: Crucial for protecting your lungs from dust, especially if asbestos or lead paint is present.
- Hard Hat: Recommended if there’s a risk of falling debris.
- Steel-Toed Boots: Protect your feet from dropped objects.
- Basic Hand Tools:
- Pry Bar (Crowbar): For leverage to remove stubborn items.
- Hammer: For breaking apart materials and hammering nails.
- Screwdrivers (Phillips and Flathead): For unscrewing fixtures and cabinet hardware.
- Adjustable Wrench/Pipe Wrench: For disconnecting plumbing.
- Utility Knife: For cutting caulk and sealant.
- Power Tools (Use with Caution and Knowledge):
- Reciprocating Saw (Saber Saw): Excellent for cutting through wood, metal, and even some plumbing. Blades will vary for material type.
- Orbital Sander/Palm Sander: Useful for removing old finishes or paint before tackling heavier demolition.
- Angle Grinder: For cutting metal pipes or fixtures. Use with the appropriate metal-cutting disc.
- Power Drill/Impact Driver: For removing screws and fasteners.
- Demolition Specific Tools:
- Sledgehammer: For breaking up tougher materials like concrete or tile. Use with extreme care and only when necessary.
- Putty Knife/Scraper: For removing caulk, paint, and adhesive.
- Pliers (various types): For gripping, cutting wires, and removing nails.
- Chisels: For chipping away at stubborn materials.
- Heavy-Duty Trash Bags/Buckets: For collecting smaller debris.
- Wheelbarrow: For hauling larger debris to your disposal area.
Preparing the Work Area for Kitchen Tear Down
Before you begin the actual kitchen tear down, transforming your kitchen into a safe demolition zone is critical. This step is integral to your kitchen renovation prep.
Shutting Off Utilities
This is the single most important safety step in safe kitchen demolition.
- Water: Locate the main water shut-off valve for your house and turn it off. Then, open faucets at the lowest point in your house to drain the pipes. For the kitchen, you can often shut off specific valves under the sink for the faucet and dishwasher.
- Electricity: Crucially, turn off the power to the kitchen circuits at your main electrical panel. Do not rely on just turning off the breaker for the kitchen lights; it’s best to turn off the main breaker for the entire kitchen area if possible, or at least all circuits labeled for the kitchen. Use a voltage tester to confirm power is off at outlets and light fixtures before you touch any wires.
- Gas: If you have a gas stove or other gas appliances, contact your gas company or a qualified plumber to have the gas line safely disconnected and capped. Never attempt to do this yourself unless you have the proper training and equipment.
Protecting Other Areas of Your Home
- Seal off the kitchen: Use heavy-duty plastic sheeting and painter’s tape to seal off doorways leading from the kitchen to other parts of your house. This helps contain dust and debris.
- Cover floors: Lay down thick drop cloths, old blankets, or plywood to protect flooring in adjacent hallways and rooms from damage and dirt tracked in by your footwear.
- Remove valuables and furniture: Take out anything you don’t want to get dirty or damaged. This includes portable appliances, decor, and even items stored in pantry shelves if they are not being removed as part of the demolition.
Waste Disposal Strategy
Plan how you will manage the waste generated by your kitchen tear out.
- Dumpster Rental: For major renovations, renting a dumpster is often the most efficient method. Ensure you know the size you need and any local regulations regarding placement.
- Junk Removal Service: If you prefer not to manage a dumpster, a junk removal service can haul everything away.
- Local Transfer Station: Smaller demolition projects might allow you to haul debris yourself to a local transfer station or landfill. Check their accepted materials and fees.
- Sorting Debris: Consider sorting materials as you go. Wood, metal, drywall, and general trash can often be disposed of separately, which might be required by some disposal facilities or even earn you a rebate for recyclable materials.
The Kitchen Demolition Process: Step-by-Step
With preparations complete, you’re ready to dive into the actual kitchen demolition. This phase requires patience and a systematic approach to ensure safe kitchen demolition.
Phase 1: Removing Fixtures and Appliances
This is generally the safest part of the kitchen tear out.
Appliances
- Refrigerator: Disconnect water line if applicable, then unplug and move it out.
- Stove/Oven: Ensure gas and electricity are OFF. Disconnect any gas lines or electrical plugs. Secure doors to prevent accidental opening.
- Dishwasher: Turn off the power and water supply. Disconnect the drain hose and water line. Unscrew mounting brackets. It might be necessary to gently pry it out from the cabinet base.
- Microwave (Over-the-Range): Locate mounting screws, usually on the underside or inside the cabinet it’s mounted to. Support the microwave as you remove the last screws, as they can be heavy. Disconnect power.
- Garbage Disposal: Ensure power is OFF at the breaker. Disconnect the drain pipe and then the electrical connection (usually a plug or hardwired). You might need to twist the mounting ring to detach it from the sink drain.
Plumbing Fixtures
- Sink: Disconnect the P-trap and supply lines. Loosen any clips or putty holding it to the countertop. Lift it out.
- Faucet: Disconnect water supply lines from the faucet. Loosen the mounting nuts from underneath the sink.
Electrical Fixtures
- Lighting: With power confirmed OFF at the breaker, remove any light covers. Unscrew the fixture base. Carefully disconnect the wire nuts connecting the fixture wires to the house wiring. Cap the exposed wires with new wire nuts.
- Outlets and Switches: With power confirmed OFF, remove the cover plates. Unscrew the outlet or switch from the electrical box. Gently pull it out to access the wires. Disconnect the wires by unscrewing the terminal screws or releasing them from push-in connectors. Cap each wire securely with wire nuts.
Phase 2: Removing Cabinetry
Removing kitchen cabinets is a significant step in your kitchen tear out. This is where you might start to see the transformation.
Preparing Cabinets for Removal
- Empty contents: Ensure all shelves and drawers are completely empty.
- Remove doors and drawers: This makes the cabinet boxes lighter and easier to handle. Use a screwdriver to remove hinges from doors and cabinet frames. Labeling doors can be helpful if you plan to reuse them or sell them. Remove drawers by sliding them out or disengaging runners.
- Remove hardware: Unscrew knobs, pulls, and any visible hardware.
Demolishing Kitchen Cabinets
- Upper Cabinets:
- Locate mounting screws: These are typically found on the inside of the cabinet, screwed into wall studs or blocking.
- Pry carefully: Use a pry bar to gently loosen the cabinet from the wall. Work your way around, loosening screws as you find them.
- Support and remove: If cabinets are stubborn, you might need a helper to support them as you remove the last screws. Gently lower them to the floor.
- Base Cabinets:
- Check for connections: Base cabinets might be screwed to each other, to the countertop (if still in place), or to the wall.
- Remove countertop first if attached: If your cabinets are permanently affixed to a countertop that you’re also removing, it’s usually easier to remove the countertop first. This often involves finding screws or clips underneath, or cutting through sealant with a utility knife.
- Unscrew from wall and adjacent cabinets: Use your pry bar and screwdriver to detach them.
- Tackle stubborn ones: Sometimes, base cabinets are glued or screwed into the subfloor. You may need to carefully cut any fasteners or use your pry bar for leverage.
Phase 3: Removing Countertops and Backsplash
These elements often come off after cabinets or in conjunction with them.
Countertop Removal
- Check for fasteners: Countertops are usually attached from underneath the cabinets with screws or clips.
- Cut sealant: Use a utility knife to cut through any caulk or adhesive around the edges, especially where it meets the backsplash or wall.
- Lift carefully: Countertops can be heavy, especially granite or quartz. Get help if needed. If the countertop is in sections, remove them individually.
Backsplash Removal
- Tile Backsplash:
- Score grout lines: Use a utility knife to score around the edges of tiles to break the grout seal.
- Pry carefully: Start from an edge or a corner. Use a putty knife or a grout saw to get under the tiles. A small pry bar can be useful for stubborn tiles. Work gently to avoid damaging the wall behind it.
- For stubborn adhesive: You might need to use a scraper or even a heat gun on a low setting to soften old adhesive.
- Sheet Backsplash (e.g., laminate, vinyl):
- Score and peel: Start at a corner or seam and use a utility knife to score. Peel back the material. It may come off in large sheets or small pieces depending on the adhesive.
Phase 4: Tackling Flooring and Wall Demolition
This is often the most labor-intensive part of kitchen gutting.
Flooring Removal
The method depends heavily on the type of flooring.
- Tile Flooring:
- Score grout lines: Use a grout saw or utility knife.
- Chip away: Use a hammer and chisel or a floor scraper with a chisel bit on a reciprocating saw to break the tiles.
- Pry up pieces: Once broken, use a pry bar to lift them.
- Vinyl/Linoleum Flooring:
- Score and peel: Similar to backsplash, score the material and try to peel it up.
- Adhesive removal: You’ll likely be left with adhesive. Use a floor scraper or a heat gun to soften it for easier removal.
- Hardwood/Laminate Flooring:
- Find the starting edge: Usually along a wall.
- Pry up planks: Use a pry bar to lift and disconnect planks. Keep them in order if you plan to reuse them.
- Carpet:
- Cut into strips: Use a sharp utility knife to cut the carpet into manageable strips.
- Pull up the carpet: Grab a strip and pull it up, away from the tack strips along the walls.
- Remove tack strips and underlayment: Carefully pry up the tack strips, and remove any carpet padding.
Wall Demolition (Non-Load Bearing)
This is where you might need a sledgehammer, but only if you’re sure the wall isn’t structural.
- Identify utilities: Double-check for hidden wires or pipes before hitting anything.
- Start small: Begin by removing drywall. Use a utility knife to score and cut out sections. A reciprocating saw can also be used for drywall.
- Break up drywall: Once the drywall is removed, you can see the studs. For simple kitchen tear down, you might remove the studs as well.
- Use a sledgehammer with caution: If you need to break up thicker materials or studs, a sledgehammer is effective. Always wear full PPE and ensure no one is behind you. Stand to the side when swinging.
- Protect yourself from nails: As you tear down, be mindful of exposed nails. Hammer them flat or remove them as you go to prevent injuries.
Safe Kitchen Demolition Practices
Throughout the entire kitchen tear out, prioritizing safety is non-negotiable.
Personal Protective Equipment (PPE) is Non-Negotiable
We’ve listed the essential PPE, but it bears repeating: wear it always. Don’t take shortcuts. Eye protection, respiratory protection, and sturdy footwear are your first line of defense.
Working with Utilities: When to Call a Professional
- Electrical: If you are uncomfortable with electrical wiring, or if your utility check reveals complex wiring, hire a qualified electrician to disconnect power and cap wires safely.
- Plumbing: For main water line shut-offs or if you encounter unexpected pipe configurations, a plumber is your best bet.
- Gas: Never attempt to disconnect gas lines yourself. Always use a licensed professional.
Asbestos and Lead Paint Awareness
Older homes (pre-1978) may contain asbestos in flooring, ceiling tiles, insulation, or even textured paint. Lead paint was also common.
- Testing: If you suspect the presence of these materials, get them tested by a certified professional before disturbing them.
- Professional Abatement: If asbestos or lead is confirmed, do not proceed with DIY demolition in those areas. Hire a licensed abatement company. Disturbing these materials can release hazardous fibers or dust into the air, posing serious health risks.
Debris Management and Safety
- Clear pathways: Keep your work area clean and free of debris to prevent tripping hazards.
- Securely bag waste: Use heavy-duty bags for smaller debris.
- Proper dumpster loading: Stack heavy items at the bottom of the dumpster. Don’t overfill it.
- Beware of sharp objects: Metal pipes, broken glass, and exposed nails are common hazards. Handle them with care.
Finalizing Your Kitchen Gutting
Once the bulk of the demolition is complete, there are a few final steps to ensure your site is ready for the next phase of your kitchen remodel.
Cleaning Up the Demolition Site
A thorough cleanup is essential for safe kitchen demolition and preparation for the next steps.
- Sweep and vacuum: Use a broom and dustpan for large debris, then vacuum with a shop vac to pick up finer dust and small particles.
- Wipe down surfaces: Clean exposed walls and subflooring to remove remaining dust and grime.
- Inspect for hazards: Do a final sweep of the area to ensure all sharp objects, nails, and debris have been removed.
Inspecting the Subfloor and Walls
After removing flooring and drywall, you’ll have a clearer view of the underlying structures.
- Subfloor: Check for any water damage, rot, or structural issues that need repair before new flooring is installed.
- Walls: Inspect for any damage to studs or any remaining plumbing or electrical that needs to be addressed by professionals.
Preparing for the Next Phase: Kitchen Renovation Prep
Your DIY kitchen demolition is complete! You’ve successfully prepared the space for the exciting part – the renovation.
- Take measurements: Re-measure your space accurately for new cabinets, countertops, and appliances.
- Finalize plans: Based on what you found during demolition, you might need to adjust your renovation plans.
- Call in contractors: If you’re hiring professionals for electrical, plumbing, or other specialized work, this is the time to schedule them.
Frequently Asked Questions About Kitchen Demolition
Q1: How long does kitchen demolition take?
A1: The time it takes for kitchen demolition can vary greatly. A simple kitchen tear out involving just cabinets and countertops might take a weekend for a DIYer. A full kitchen gutting, including flooring and potentially some wall removal, could take several days to a week or more, depending on your experience, the size of the kitchen, and the materials used.
Q2: Do I need a permit for kitchen demolition?
A2: This depends on your local municipality. Some areas require permits for any significant demolition work, even if it’s DIY. It’s always best to check with your local building department before starting to avoid fines or having to undo work.
Q3: What’s the dirtiest part of kitchen demolition?
A3: Removing old flooring (especially tile), breaking up concrete, and demolishing drywall are typically the messiest parts. Dust becomes a significant issue during these stages.
Q4: Can I reuse old kitchen cabinets?
A4: Yes, if they are in good condition, you can often sell or donate them. Removing them carefully, as outlined in this guide, will make them more valuable to a potential buyer or recipient.
Q5: How do I dispose of old appliances?
A5: Many appliance retailers offer haul-away services when you purchase new ones. Otherwise, check with your local waste management or transfer station for appliance drop-off options. Some may have specific recycling programs for metal appliances.
By following these steps and prioritizing safety, your DIY kitchen demolition can be a rewarding and successful experience, setting the stage for your dream kitchen!