
Can I take my kitchen faucet apart myself? Yes, you absolutely can take your kitchen faucet apart yourself. This guide will show you how to do it step-by-step, helping you tackle common issues like leaks and improve your faucet’s performance.
A leaky kitchen faucet is more than just an annoyance; it’s a waste of water and can drive up your utility bills. Fortunately, many common faucet problems can be fixed with a little know-how and the right approach. Taking your kitchen faucet apart is a manageable DIY task that can save you money on plumber visits. This detailed guide will walk you through the entire process of kitchen faucet disassembly, making it easy for you to perform essential kitchen faucet repair and maintenance.
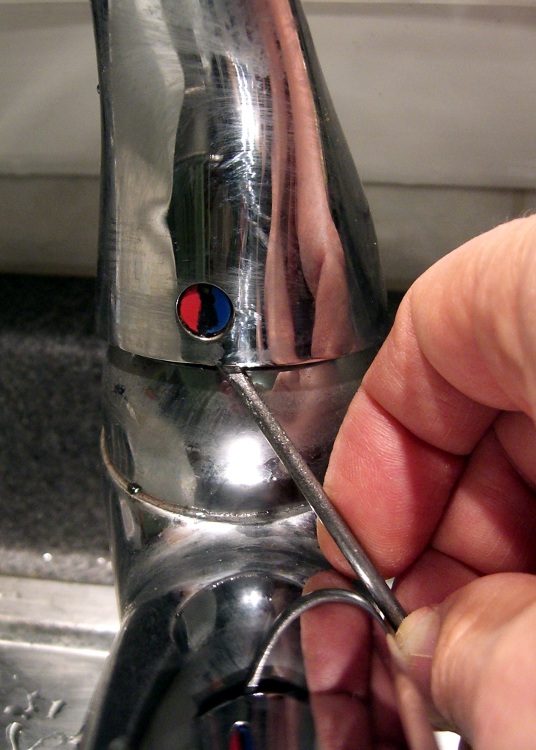
Image Source: softsolder.com
Why Take Your Faucet Apart?
There are several reasons why you might need to disassemble your kitchen faucet:
- Drip Leak Repair: The most common reason is a dripping faucet. This usually points to a worn-out washer, O-ring, or cartridge.
- Low Water Pressure: Blockages in the aerator or internal components can restrict water flow.
- Stiff Handle: A faucet handle that is difficult to move often indicates a problem with the cartridge or valve stem.
- Replacing Faucet Parts: You might need to replace worn-out parts to prolong the life of your faucet.
- Deep Cleaning: Over time, mineral deposits can build up inside your faucet, affecting its function and appearance.
Essential Plumbing Tools for Faucet Repair
Before you begin, gather the right tools. Having these handy will make the process smoother and prevent damage to your faucet.
Basic Toolkit for Kitchen Faucet Disassembly:
- Adjustable Wrench: For loosening and tightening nuts and fittings.
- Pliers: Slip-joint pliers or channel-lock pliers can be very useful.
- Screwdrivers: Both Phillips head and flathead screwdrivers are essential.
- Allen Wrench Set (Hex Keys): Many faucet handles are secured with small set screws that require Allen wrenches.
- Basin Wrench: This specialized tool is invaluable for reaching nuts in tight spaces under the sink.
- Utility Knife or Small Pry Tool: To gently pry off decorative caps or trim pieces.
- Bucket or Towels: To catch any residual water and protect your cabinet.
- Penetrating Oil (e.g., WD-40): To loosen stubborn or corroded parts.
- Plumber’s Grease or Silicone Lubricant: For lubricating O-rings and cartridges during reassembly.
- Replacement Faucet Parts: Having the correct parts (washers, O-rings, cartridge) on hand before you start is crucial.
Preparing for Faucet Disassembly
Proper preparation is key to a successful and stress-free kitchen faucet disassembly.
Steps Before You Start:
- Turn Off the Water Supply: This is the most critical step. Look under your sink for the hot and cold water shut-off valves. Turn them clockwise until they are snug. If you can’t find or turn these valves, you may need to turn off the main water supply to your house.
- Test the Water Shut-Off: Turn on the faucet to relieve any remaining pressure and confirm the water is completely off. Let the water drain out.
- Clear the Area: Remove everything from under the sink to give yourself ample working space. Place towels or a bucket beneath the faucet connections to catch any drips.
- Identify Your Faucet Type: Faucets vary in design. Knowing whether you have a compression faucet, cartridge faucet, ball faucet, or ceramic disc faucet will help you understand the internal mechanisms and the specific faucet parts you might need to replace.
Step-by-Step Guide to Kitchen Faucet Disassembly
The exact steps for taking a kitchen faucet apart will depend on the type of faucet you have. However, most follow a similar pattern. We’ll cover the general process, highlighting key components like the faucet handle removal.
Step 1: Removing Decorative Caps and Trim
Many faucets have decorative caps or trim pieces that hide screws.
- Locate the Caps: These are often small, round caps on the top or front of the faucet handle. They might be labeled with H or C for hot and cold.
- Gentle Removal: Use a small flathead screwdriver or a utility knife to gently pry off these caps. Be careful not to scratch the faucet finish.
Step 2: Faucet Handle Removal
Once the decorative caps are off, you’ll usually find a screw holding the handle in place.
- Unscrew the Handle Screw: Use the appropriate screwdriver (Phillips or flathead) or an Allen wrench to remove the screw. Keep the screw in a safe place.
- Pull Off the Handle: Gently wiggle and pull the faucet handle upwards or away from the faucet body. If the handle is stuck, a gentle tap or a bit of penetrating oil might help. For particularly stubborn handles, a specialized handle puller might be necessary.
Step 3: Accessing the Cartridge or Valve Stem
After the handle is removed, you’ll see the internal components. This is where the type of faucet becomes important.
- For Cartridge Faucets: You’ll typically see a retaining nut or clip holding the cartridge in place.
- Removing the Retaining Nut: Use an adjustable wrench to unscrew the retaining nut. Turn it counter-clockwise.
- Removing the Clip: Some cartridges are held in by a small metal clip. Use pliers to carefully pull this clip out.
- For Compression Faucets: You’ll see a packing nut around the valve stem.
- Unscrew the Packing Nut: Use an adjustable wrench to loosen and remove the packing nut.
Step 4: Removing the Faucet Cartridge or Valve Stem
This is the core of many kitchen faucet repairs.
- Cartridge Faucets:
- Pull Out the Cartridge: Once the retaining nut or clip is removed, you should be able to pull the cartridge straight up and out of the faucet body. You might need pliers to grip and gently twist or pull it. Note its orientation for proper reinstallation.
- Compression Faucets:
- Unscrew the Stem: After removing the packing nut, you can usually unscrew the entire valve stem assembly by turning it counter-clockwise with a wrench.
- Inspect the Washer: At the bottom of the stem, you’ll find a rubber washer held in place by a screw. This is often the culprit for drips.
Step 5: Replacing Faucet Parts (Cartridge or Washer/O-rings)
This is where you’ll fix the problem.
- For Cartridge Faucets (Cartridge Replacement):
- Match the New Cartridge: Take your old cartridge to a hardware store to ensure you get an exact match. Faucet parts are not universal.
- Install the New Cartridge: Insert the new cartridge into the faucet body, making sure it’s oriented correctly (aligning any tabs or notches).
- For Compression Faucets (Washer and O-ring Replacement):
- Replace the Washer: Unscrew the old washer at the bottom of the valve stem and replace it with a new one of the same size. You might also need to replace the screw holding it.
- Replace O-rings: Examine the valve stem for any worn or damaged O-rings and replace them. Apply a bit of plumber’s grease to the new O-rings before installation.
Step 6: Cleaning Internal Components
While the faucet is apart, it’s a good opportunity to clean out any mineral deposits or debris.
- Rinse Parts: Rinse all removed metal parts with water.
- Soak Stubborn Deposits: For hard water buildup, soak parts in a solution of equal parts white vinegar and water for a few hours, then scrub gently with an old toothbrush.
- Clean the Faucet Body: Use a soft cloth and mild soap to clean the inside of the faucet body where the cartridge or stem sits.
Step 7: Reassembling the Faucet
Reassembly is the reverse of disassembly.
- Install New Parts: Place the new cartridge or valve stem assembly back into the faucet body.
- Secure the Cartridge/Stem: Reinstall the retaining nut or clip for cartridge faucets, or the packing nut for compression faucets. Tighten them firmly but avoid overtightening.
- Reattach the Faucet Handle: Place the handle back onto the stem and secure it with the screw.
- Replace Decorative Caps: Snap or press the decorative caps back into place.
Step 8: Testing for Leaks
Once everything is reassembled, it’s time to test your work.
- Slowly Turn Water Back On: Turn the shut-off valves under the sink back on slowly, counter-clockwise.
- Check for Leaks: Inspect all connections under the sink and around the faucet for any signs of dripping.
- Operate the Faucet: Turn the faucet on and off, checking for proper operation and any remaining leaks. If you still have a drip leak repair issue, you may need to re-check the components or consider replacing other faucet parts.
Specific Faucet Types and Their Disassembly Nuances
While the general steps apply, different faucet types have unique features that affect kitchen faucet disassembly.
Cartridge Faucets
These are very common in modern kitchens. The water flow is controlled by a removable cartridge.
- Key Components: Cartridge, retaining nut/clip, handle, spout.
- Common Issues: Worn cartridge, faulty O-rings.
- Faucet Cartridge Replacement: This is usually the primary repair. Ensure the new cartridge matches the old one precisely. Brand and model are important.
Compression Faucets
Older style faucets that use rubber washers and valve seats to stop water flow.
- Key Components: Valve stem, washer, O-rings, packing nut, handle.
- Common Issues: Worn washers, damaged valve seats.
- Drip Leak Repair: Often involves replacing the washer and checking the valve seat for nicks.
Ball Faucets
These have a rotating metal or plastic ball inside that controls water flow.
- Key Components: Ball, springs, seats, O-rings, handle, cap.
- Common Issues: Worn springs and seats, leaks around the handle base.
- Faucet Handle Removal: Usually involves an Allen screw, followed by a cap that may need a spanner wrench.
Ceramic Disc Faucets
These are known for their durability, using two ceramic discs that slide against each other to control water flow.
- Key Components: Ceramic disc cartridge, seals, handle.
- Common Issues: Cracked ceramic discs (rare) or worn seals.
- Faucet Spout Replacement: If the spout is the issue, it often unscrews or lifts off after removing other components.
Troubleshooting Common Faucet Problems
Even after disassembly and repair, you might encounter issues.
Persistent Dripping
- Re-check Cartridge/Washer: Ensure the new part is installed correctly and is the exact match.
- Inspect Valve Seat: For compression faucets, the valve seat (where the washer presses) might be corroded or have a groove. You can sometimes resurface it with a valve seat dresser tool or replace it if possible.
- Check for Debris: Make sure no small debris is preventing a proper seal.
Low Water Pressure
- Clean the Aerator: The aerator at the tip of the spout can get clogged with sediment. Unscrew it (usually by hand or with pliers), rinse it, and re-screw it.
- Check Internal Passages: Ensure the cartridge or valve stem is clear of blockages.
- Inspect Supply Lines: Check the flexible supply lines under the sink for kinks or internal blockages.
Leaks from the Base of the Spout
- Replace O-rings: The spout usually moves on O-rings. Removing the spout will reveal these. Lubricate and replace them if worn. This is a common aspect of faucet maintenance.
When to Call a Professional Plumber
While many kitchen faucet repairs are DIY-friendly, there are times when it’s best to seek professional help.
- Unfamiliar Faucet Types: If you have a very old or unusually designed faucet, and you’re unsure how to proceed.
- Corroded Parts: If parts are severely corroded and won’t budge, forcing them could cause more damage.
- Persistent Leaks: If you’ve tried multiple fixes and the leak persists, there might be a deeper issue within the faucet body or water supply lines.
- Lack of Confidence: If you feel uncomfortable with any part of the process, it’s safer to call a plumber.
- Damaged Pipes or Fittings: If you suspect damage to the pipes or shut-off valves under your sink.
Faucet Maintenance Tips
Regular faucet maintenance can prevent many problems and extend the life of your faucet.
- Clean the Aerator Monthly: This simple step improves water flow and pressure.
- Wipe Down Faucet Regularly: Use a soft cloth to dry the faucet after use to prevent water spots and mineral buildup.
- Address Leaks Promptly: Don’t ignore drips; fix them as soon as you notice them to prevent water waste and potential damage.
- Lubricate O-rings: Periodically, especially if you notice the handle becoming stiff, consider reapplying plumber’s grease to the O-rings.
- Know Your Faucet Model: Keep a record of your faucet’s brand and model number. This makes finding the correct faucet parts much easier when you need them for kitchen faucet repair.
Frequently Asked Questions (FAQ)
Q1: How often should I replace my kitchen faucet cartridge?
A1: There’s no set schedule. You typically replace a faucet cartridge when it fails, causing leaks or operational issues. With regular maintenance, some cartridges can last many years.
Q2: What’s the difference between a washer and a cartridge?
A2: In compression faucets, rubber washers create a seal. In cartridge faucets, a ceramic or plastic cartridge handles the sealing and flow control. Cartridge faucets are generally more durable.
Q3: Can I use Teflon tape on faucet threads?
A3: Generally, Teflon tape (pipe thread tape) is used on threaded pipe connections, not on the internal seals of faucets. For faucet components, plumber’s grease or specific sealants are more appropriate.
Q4: My faucet handle is stuck. What can I do?
A4: Try applying a small amount of penetrating oil around the base of the handle or where it connects to the stem. Let it sit for a while, then try gently wiggling it. If it’s still stuck after the faucet handle removal screw is out, you may need a handle puller.
Q5: Where can I buy faucet parts?
A5: You can find faucet parts at home improvement stores (like Home Depot, Lowe’s), hardware stores, and online retailers. It’s essential to have your faucet’s make and model to ensure you get the correct parts.
By following these steps, you can confidently tackle kitchen faucet disassembly, perform essential kitchen faucet repair, and keep your faucet in great working order. Regular faucet maintenance will save you money and hassle in the long run, ensuring your kitchen remains functional and leak-free.