
Thinking about upgrading your kitchen’s look? You might be wondering, “What is the best way to place recessed lighting in a kitchen?” The answer lies in thoughtful planning to ensure both style and function. “Can I do this myself?” Yes, with the right guidance, a DIY approach to recessed lighting installation can transform your kitchen. This guide will walk you through the steps for a successful DIY kitchen lighting project, covering everything from planning the layout to the final touches that will make your kitchen remodel lighting truly shine. We’ll explore various kitchen ceiling lights options, including recessed can lights and low profile lights, and discuss how they contribute to effective task lighting kitchen needs and overall ambiance.
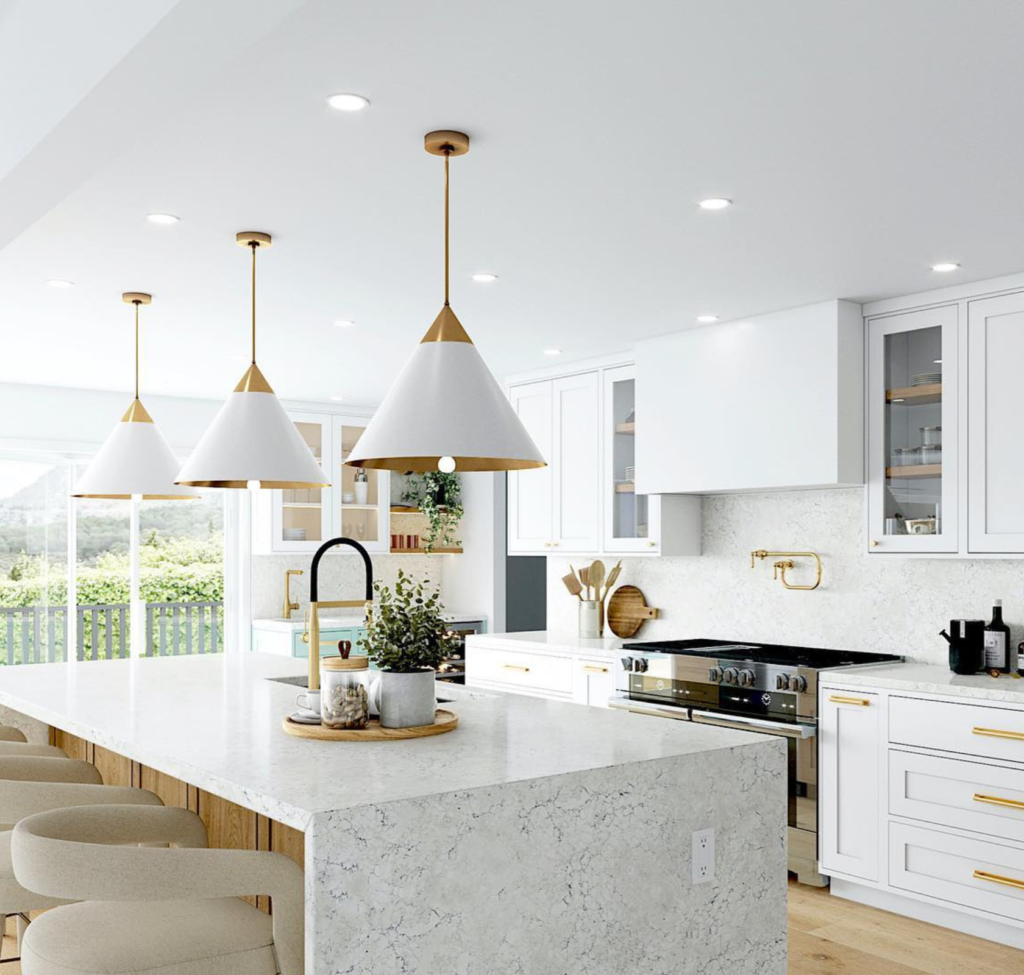
Image Source: blog.1800lighting.com
Planning Your Kitchen Lighting Layout
A well-planned lighting scheme is crucial for any kitchen. It’s not just about brightness; it’s about creating zones for different activities, enhancing the kitchen’s aesthetics, and ensuring safety. This section will guide you through the foundational steps of designing your recessed lighting layout.
Determining Lighting Needs
Before you even pick up a drill, you need to figure out what kind of lighting your kitchen requires. Consider these factors:
- Task Lighting: This is essential for areas where you prepare food, cook, and clean. Good task lighting kitchen ensures you can see clearly without shadows. Think about your countertops, sink, and stove.
- Ambient Lighting: This provides general illumination for the entire room. It creates a comfortable atmosphere and allows you to move around safely.
- Accent Lighting: While not strictly necessary for functionality, accent lighting can highlight architectural features, artwork, or cabinetry, adding depth and visual interest.
Calculating the Number of Recessed Lights
How many lights do you need? This depends on the size of your kitchen and the type of lights you choose. A common rule of thumb is to place lights on 4 to 6-foot centers. For a more precise calculation, consider the lumen output of your chosen bulbs and the square footage of your kitchen.
Rule of Thumb:
- For every 10 square feet of kitchen space, aim for 1 to 1.5 watts of incandescent light or its LED equivalent (around 150-200 lumens).
Let’s break down a simple calculation:
- Kitchen Size: 10 feet x 12 feet = 120 square feet.
- Total Lumens Needed: 120 sq ft / 10 sq ft * 150 lumens = 1800 lumens (minimum).
This gives you a starting point. You’ll then divide this total by the lumen output of individual bulbs to determine the number of fixtures. For example, if each bulb provides 800 lumens, you’d need approximately 1800 / 800 = 2.25 lights. You would then round up and adjust based on your layout.
Spacing Recommendations
Proper spacing is key to avoiding dark spots and overly bright areas.
General Area Lighting
For general illumination, space recessed can lights evenly across the ceiling.
- Formula for spacing: Ceiling Height (in feet) x 2 = Spacing (in feet)
Example: If your ceiling is 8 feet high, spacing lights about 16 feet apart would be a starting point. However, for even coverage, you’ll typically use closer spacing.
Task Area Lighting
When planning for task lighting kitchen areas, place lights closer to the edges of cabinets or directly above work surfaces.
- Countertops: Place recessed lights about 18-24 inches from the wall to illuminate countertops without casting shadows from your body.
- Islands/Peninsulas: Center lights above these surfaces, ensuring they don’t interfere with pendant lights if you choose to use them as well.
Creating a Lighting Plan Diagram
It’s highly recommended to draw a plan of your kitchen.
- Measure Your Kitchen: Accurately measure the length and width of your kitchen, noting the location of cabinets, appliances, windows, and doors.
- Mark Ceilings: On your diagram, mark the joist locations. You can often find these using a stud finder. Recessed can lights need to be installed between joists.
- Sketch Light Placement: Draw circles on your diagram to represent where each light will go, following the spacing guidelines discussed above. Consider how the light will fall on your countertops and work areas.
- Consider Dimmer Switches: Plan for dimmer switches to control the intensity of your lighting, offering flexibility for different moods and tasks.
Choosing the Right Recessed Lights
The world of recessed can lights has expanded significantly, offering a variety of styles, types, and features to suit your kitchen lighting ideas.
Types of Recessed Housings
The “can” is the part that sits inside the ceiling. There are two main types:
- IC (Insulation Contact) Rated: These housings can be installed directly against ceiling insulation. This is crucial for safety and preventing heat buildup. Most modern recessed can lights are IC-rated.
- Non-IC Rated: These require a minimum clearance of 3 inches from insulation. If you have older wiring or your attic has a lot of insulation, you must ensure you use the correct type or build a barrier around non-IC housings.
Types of Recessed Trims
The trim is the visible part of the fixture that attaches to the ceiling. It impacts both the look and the light distribution.
- Baffle Trim: These have ribbed or grooved interiors that help reduce glare. They are excellent for general ambient lighting.
- Reflector Trim: These have a smooth, shiny surface that reflects light, making them brighter and good for accent lighting or areas needing more illumination. They come in various finishes like white, metal, or black.
- Gimbal Trim: These allow you to adjust the angle of the light, perfect for directing light onto specific areas or features.
- Opal Diffuser Trim: These have a frosted or milky glass that softens the light and diffuses it evenly, creating a more ambient glow.
- Wafer LED Lights (Low Profile Lights): These are ultra-thin, integrated LED fixtures that don’t require a bulky can. They are excellent for shallow ceilings, renovations where you want minimal disruption, or areas with obstructions above the ceiling. They offer a clean, modern look.
LED vs. Incandescent Bulbs
While incandescent bulbs were once standard, LED technology has become the preferred choice for many reasons.
| Feature | LED Lights | Incandescent Lights |
|---|---|---|
| Energy Use | Significantly more energy-efficient (up to 80% less) | Less energy-efficient |
| Lifespan | Much longer (25,000-50,000+ hours) | Shorter (around 1,000-2,000 hours) |
| Heat Output | Low | High (can increase room temperature) |
| Cost | Higher upfront cost, lower long-term cost | Lower upfront cost, higher long-term cost |
| Light Quality | Available in various color temperatures (warm to cool) | Typically warm, yellowish light |
| Durability | More durable, less prone to breakage | Fragile |
When selecting bulbs for kitchen ceiling lights, consider the color temperature (measured in Kelvin, K).
- 2700K-3000K: Warm white, similar to incandescent bulbs, creates a cozy atmosphere. Good for general ambient lighting.
- 3500K-4000K: Cool white or neutral white, bright and clean. Excellent for task lighting in kitchens.
- 5000K+: Daylight or cool daylight, very bright and stark. Best suited for specific task areas where maximum visibility is needed, but can feel too cool for a general kitchen atmosphere.
For task lighting kitchen areas, aim for 3500K-4000K. For ambient lighting, 2700K-3000K is often preferred. Many modern recessed LED fixtures allow you to adjust the color temperature.
Tools and Materials Needed
Gathering the right tools and materials before you start your recessed lighting installation will make the process smoother and safer.
Essential Tools
- Stud Finder: To locate ceiling joists and avoid cutting into them.
- Drill/Driver: For drilling pilot holes and driving screws.
- Reciprocating Saw or Drywall Saw: For cutting holes in the drywall for the cans.
- Wire Strippers/Cutters: To expose wires for making connections.
- Screwdrivers (Phillips and Flathead): For electrical connections and mounting.
- Voltage Tester (Non-Contact): Crucial for safety to ensure power is off before working with wires.
- Measuring Tape: For precise layout measurements.
- Pencil: For marking cut lines.
- Safety Glasses: To protect your eyes from dust and debris.
- Dust Mask: To avoid inhaling drywall dust.
- Ladder: A sturdy, stable ladder is essential.
- Wire Nuts: For splicing wires.
- Electrical Tape: For securing wire nuts and insulating connections.
- Utility Knife: For cutting electrical tape or other materials.
Necessary Materials
- Recessed Light Fixtures (Cans and Trims or Integrated LED Units): Ensure they are the correct type (IC or non-IC) for your ceiling.
- Bulbs (if not integrated LEDs): Choose the appropriate wattage and color temperature.
- Electrical Wire (if extending circuits): Typically 14/2 or 12/2 NM-B wire, depending on your circuit breaker.
- Circuit Breaker (if adding a new circuit): Consult an electrician if you are unsure.
- Electrical Box: For making connections, especially if you’re replacing existing fixtures.
- Cable Clamps: To secure electrical cables entering boxes.
Step-by-Step Recessed Lighting Installation
This guide assumes you have basic electrical knowledge. If you are not comfortable working with electricity, it is highly recommended to hire a qualified electrician for the recessed lighting installation. Always prioritize safety.
Step 1: Turn Off Power
Safety First! Locate the circuit breaker that controls the lights in your kitchen. Flip it to the OFF position. Use your voltage tester to confirm that there is no power at the junction box or where you intend to make connections.
Step 2: Locate Joists and Mark Cutout Locations
- Use your stud finder to locate the ceiling joists in the area where you plan to install your lights. Mark the joist locations lightly with a pencil.
- Your recessed light housings (or integrated LEDs) need to fit between the joists. Hold the trim or template that came with your fixture up to the ceiling to determine the exact size of the hole needed.
- Based on your lighting plan and joist locations, mark the precise center of where each light will be installed. Double-check that your marks are not directly on a joist.
Step 3: Cut the Holes in the Ceiling
- For New Construction (No Drywall Yet): You can often install the cans before drywall. Follow the manufacturer’s instructions, which usually involve attaching the housing to the joists.
- For Existing Drywall:
- Carefully place the template provided with your recessed can lights (or use the housing itself) at your marked center point.
- Trace the outline of the hole.
- Using a drywall saw or reciprocating saw, carefully cut along the traced line. Start by piercing the drywall with the tip of the saw or a drill. Be cautious not to cut too large a hole. It’s easier to enlarge a hole than to fix one that’s too big.
Step 4: Run Electrical Wires (If Necessary)
If you are adding new lights to an existing circuit or creating new circuits, you will need to run electrical wire from your power source (typically a junction box or existing light fixture) to each new light location.
- Fishing Wires: This can be the most challenging part. You might need to drill holes through studs or joists to snake the wire. Consider accessing the ceiling from an attic, basement, or by cutting small access holes in the drywall that can be patched later.
- Connecting Wires:
- At the power source, identify the hot (usually black), neutral (usually white), and ground (bare copper or green) wires.
- Pull the new wire through the ceiling to the first hole.
- Use cable clamps to secure the wire entering and exiting any electrical boxes or housings.
- Strip about 3/4 inch of insulation from the ends of the wires.
- Connect the wires using wire nuts: Black to black, white to white, and ground to ground.
- Tuck the wires neatly into the junction box or housing.
Step 5: Install the Recessed Light Housing
- For Traditional Recessed Cans:
- Carefully feed the housing up through the hole you cut in the drywall.
- The housing has clips or tabs that secure it to the drywall from the inside. Extend these clips to grip the back of the drywall. Ensure the housing is snug against the ceiling.
- Connect the electrical wires from the power source to the corresponding wires in the housing (typically black to black, white to white, ground to ground) using wire nuts.
- For Integrated LED (Wafer) Lights (Low Profile Lights):
- Feed the wires through the center hole.
- The LED fixture is usually held in place by spring clips. Push the clips up against the ceiling to hold the fixture flush.
Step 6: Install the Trim and Bulb
- For Cans:
- Attach the trim to the housing. Most trims have torsion springs or clips that snap into place.
- Insert the appropriate bulb into the socket.
- For Integrated LEDs: The trim is usually part of the fixture itself. Once secured, you’re done with this step.
Step 7: Restore Power and Test
- Once all your fixtures are installed and wired, carefully go back to the circuit breaker.
- Flip the breaker back to the ON position.
- Turn on your new kitchen ceiling lights to test them. Ensure all lights are working correctly. If you installed dimmer switches, test them as well.
Special Considerations and Advanced Techniques
Beyond the basic installation, there are techniques and options that can elevate your kitchen remodel lighting.
Soffit Lighting
If your kitchen has soffits (the decorative bulkheads that often run above cabinets), you can incorporate lighting within them. Soffit lighting can provide beautiful ambient or accent illumination.
- Planning: Similar to ceiling lighting, plan the placement of lights within the soffit to highlight countertops or add a soft glow.
- Installation: This often requires cutting into the soffit material. Use low-profile LED strips or small recessed puck lights designed for soffits. Ensure proper ventilation and electrical connections.
Layered Lighting Approach
The most effective kitchen lighting ideas utilize a layered approach:
- Ambient: General kitchen ceiling lights provide overall brightness.
- Task: Focused lighting directly over work areas (countertops, sink, stove) using recessed lights, under-cabinet lighting, or pendant lights.
- Accent: Used to draw attention to specific features.
Consider using different types of fixtures to achieve this. For instance, recessed can lights for ambient light, low profile lights for brighter task areas, and perhaps a pendant light over the kitchen island.
Using Dimmers and Smart Controls
- Dimmers: Installing dimmer switches on most or all of your recessed lights gives you complete control over the kitchen’s ambiance. You can dim them for a relaxed evening or brighten them for intensive cooking.
- Smart Controls: Integrate your lighting with smart home systems (like Philips Hue, Lutron Caseta, etc.) to control lights via voice commands, smartphone apps, or set schedules. This is a modern way to manage your kitchen remodel lighting.
Dealing with Obstructions
Sometimes, joists, pipes, or ductwork can interfere with your planned layout.
- Relocating Fixtures: You may need to slightly shift the placement of a light fixture.
- Using Different Fixture Types: In tight spaces, low profile lights (wafer LEDs) are often a better choice than traditional cans because they require less clearance.
- Consulting Professionals: If you encounter significant structural or mechanical obstructions, it’s best to consult with a professional to determine the safest and most effective solution.
Ventilation and Heat
Even with LEDs, some heat is generated. Ensure your chosen fixtures are appropriately rated for their location, especially if they are near combustible materials. IC-rated fixtures are designed for direct contact with insulation.
Troubleshooting Common Issues
Even with careful planning, you might encounter minor problems.
Lights Don’t Turn On
- Check Breaker: Ensure the circuit breaker is firmly in the ON position.
- Check Bulb: Make sure the bulb is screwed in correctly or that the integrated LED is properly seated.
- Check Connections: Re-verify all wire connections at the junction box and the fixture. Ensure wire nuts are tight and wires are making good contact.
- Check Switch: If you have a switch, ensure it’s working correctly.
Flickering Lights
- Loose Bulb/Connection: A loose bulb or connection is often the culprit.
- Dimmer Compatibility: If using a dimmer, ensure it’s compatible with your LED bulbs. Not all dimmers work with all LEDs. Look for “dimmable” LEDs and a compatible dimmer switch.
- Faulty Fixture: In rare cases, the fixture itself might be defective.
Lights Are Too Dim or Too Bright
- Bulb Wattage/Lumens: Adjust your bulb choice. If too dim, use bulbs with higher lumens. If too bright, use lower lumen bulbs or ensure you have dimmer controls installed.
- Fixture Type: Some trims diffuse light more than others. A baffle trim might appear dimmer than a reflector trim of the same wattage.
Frequently Asked Questions (FAQ)
Q1: How far apart should recessed lights be spaced in a kitchen?
A1: A general rule of thumb is to space them on 4 to 6-foot centers for even illumination. A more precise calculation is to multiply the ceiling height in feet by 2 to get the ideal spacing in feet. For example, for an 8-foot ceiling, space lights roughly 16 feet apart in a grid, then adjust for room dimensions and task areas.
Q2: What type of recessed lights are best for task lighting in a kitchen?
A2: For task lighting kitchen areas like countertops and sinks, use recessed lights with a wider beam spread and higher lumen output. Cool white (3500K-4000K) color temperature bulbs are ideal for clarity and detail. Consider trims that direct light downwards with minimal glare, like baffle trims or adjustable gimbal trims.
Q3: Can I install recessed lighting without an attic or basement access?
A3: Yes, it is possible, but it can be more challenging. You’ll need to “fish” wires through existing walls and ceilings. This may involve cutting small access holes that you’ll need to patch later. Working from inside the room requires careful planning and potentially specialized tools.
Q4: What are low profile lights, and why are they good for kitchens?
A4: Low profile lights, often referred to as wafer lights or slim LEDs, are integrated LED fixtures that are very thin and do not require a bulky recessed housing can. They are excellent for kitchens with shallow ceiling spaces, existing electrical wiring, or when you want a minimalist look. They offer a sleek appearance and are easier to install in tight spots.
Q5: Do I need a permit for installing recessed lighting?
A5: This varies by location. Many municipalities require a permit for any electrical work that involves adding new circuits or significantly altering existing ones. It’s always best to check with your local building department to determine if a permit is necessary for your recessed lighting installation.
Q6: How do I avoid shadows when placing recessed lights over countertops?
A6: Place your recessed can lights about 18 to 24 inches away from the wall where your countertops are located. This ensures that the light falls directly onto the workspace and isn’t blocked by your body. It also complements under-cabinet lighting, which is another excellent form of task lighting kitchen areas.
Q7: What is soffit lighting, and is it hard to install?
A7: Soffit lighting refers to lights installed within the soffit, the decorative box structure often found above kitchen cabinets. It can be used to add ambient light or highlight the backsplash. Installation can range from simple (inserting small LED pucks) to more complex, depending on the soffit’s construction and the type of lighting used. It’s similar to installing lights in any other drywall surface.
Q8: What’s the difference between recessed can lights and flush mount lights?
A8: Recessed can lights are fixtures installed within the ceiling cavity, with only the trim visible. Flush mount lights, on the other hand, are mounted directly onto the surface of the ceiling, with the entire fixture box visible. For a modern, clean look and to create an illusion of higher ceilings, recessed lighting is often preferred. Flush mount lights can be a good alternative if recessed installation isn’t feasible or desired.
Q9: How do I make my kitchen lighting ideas a reality for a stunning kitchen remodel?
A9: A stunning kitchen remodel lighting plan involves combining ambient, task, and accent lighting. Use recessed lighting for general brightness, add specific task lighting kitchen solutions over work areas, and consider decorative fixtures like pendants or chandeliers for accent. Planning the layout carefully and using dimmers will give you the most flexibility and impact.
Q10: Is it better to use integrated LED fixtures or traditional cans with LED bulbs?
A10: Integrated LED fixtures are often more energy-efficient, have a longer lifespan, and offer a sleeker design. They also eliminate the need to replace bulbs. However, if you prefer flexibility in changing bulb types or color temperatures, traditional cans with dimmable LED bulbs can be a good choice. Both can be excellent options for your kitchen ceiling lights.
This comprehensive guide should provide you with the knowledge to confidently plan and execute your recessed lighting installation for a brighter, more functional, and beautiful kitchen. Remember to always prioritize safety and consult professionals when needed.