
Sure, here is a blog post on how to lay tile in your kitchen floor DIY, with the requested keywords and formatting:
Yes, you can lay tile in your kitchen floor yourself! It’s a rewarding DIY project that can significantly update your kitchen’s look and durability. This guide will walk you through the entire process of kitchen tile installation, from preparing your floor to the final grout application. We’ll cover everything you need to know for a successful DIY kitchen flooring project, whether you’re working with ceramic tile kitchen options or vinyl tile kitchen materials.
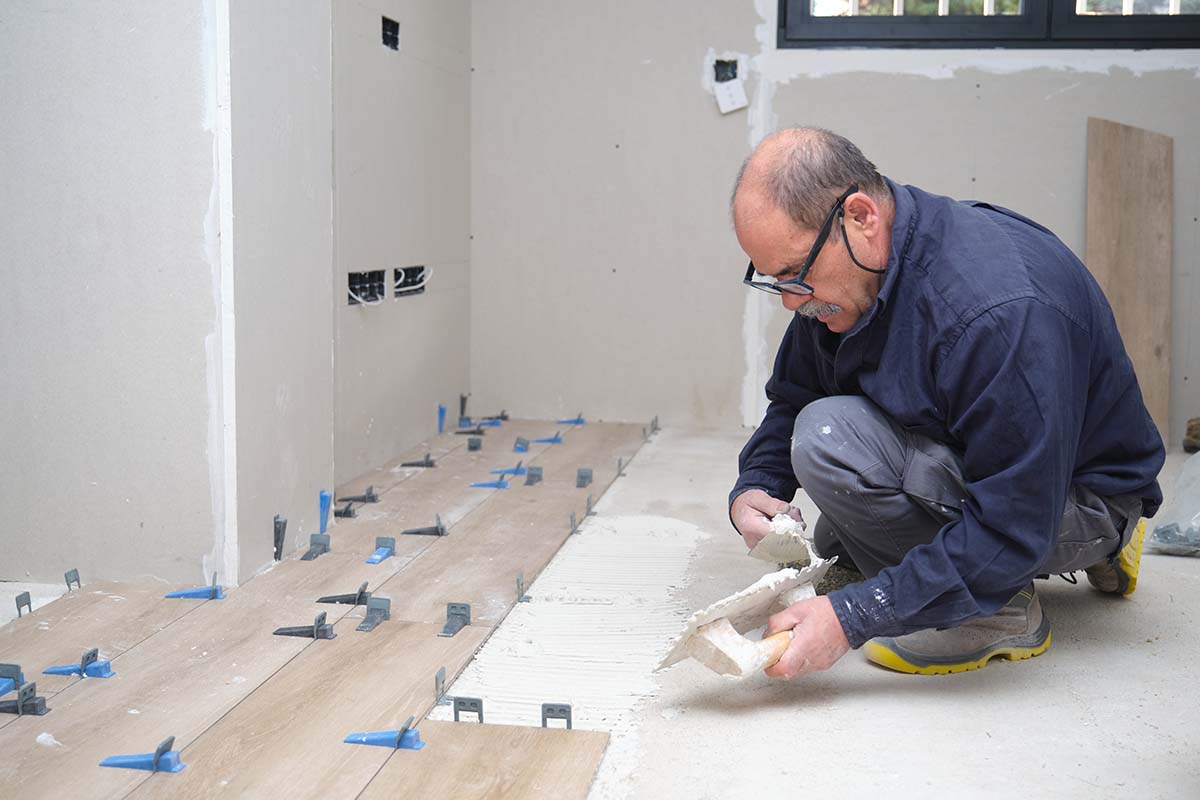
Image Source: acekitchen.co.uk
Planning Your Kitchen Tile Project
Before you even think about buying tiles, a little planning goes a long way. This stage is crucial for a smooth and professional-looking finish.
Choosing Your Tiles
The type of tile you choose impacts the installation process and the final look.
- Ceramic Tile Kitchen: Ceramic tiles are a popular choice. They are durable, water-resistant, and come in a vast array of styles, colors, and patterns. They are generally easier to cut than porcelain.
- Porcelain Tile: Similar to ceramic but fired at higher temperatures, making it denser, less porous, and more durable. It’s excellent for high-traffic areas but can be harder to cut.
- Natural Stone: Materials like granite, marble, or slate offer a luxurious look but require more maintenance, sealing, and specialized installation techniques.
- Vinyl Tile Kitchen: Vinyl tiles are a budget-friendly and easy-to-install option. They are water-resistant and come in many designs, including those mimicking wood or stone. Some are peel-and-stick, while others require adhesive.
Estimating Tile Needs
Measure your kitchen floor area accurately (length x width). Always buy at least 10% extra tile to account for cuts, breakage, and future repairs. This is a good rule of thumb for any kitchen floor renovation.
Gathering Your Tools and Materials
Having everything ready before you start saves time and frustration.
Essential Tools
- Tape measure
- Pencil
- Utility knife
- Safety glasses
- Knee pads
- Gloves
- Tile saw (wet saw or dry saw, depending on tile type)
- Tile nippers (for small cuts)
- Notched trowel (size depends on tile size)
- Margin trowel
- Grout float
- Sponges
- Buckets
- Spirit level
- Chalk line or laser level
- Caulking gun
- Rubber mallet
- Stirring stick or mixer
- Tile spacers
Essential Materials
- Tiles
- Tile adhesive (thin-set mortar for ceramic/porcelain, mastic for some vinyl)
- Grout
- Grout sealer
- Caulk (for edges and corners)
- Backer board (if needed for subfloor)
- Screws (for backer board)
- Painter’s tape
Step 1: Floor Preparation for Tile
Proper floor preparation for tile is the most critical step. A clean, level, and stable subfloor ensures your tiles last and look their best.
Assessing the Subfloor
- Wood Subfloors: These are common. Ensure they are solid, free of rot or damage, and not springy. If the subfloor feels soft or flexible, you may need to add a layer of 1/2-inch cement backer board or an underlayment system specifically designed for tile. Screw down any loose boards.
- Concrete Subfloors: Ensure they are clean, dry, and free of cracks or high spots. Fill any cracks with a concrete patch compound and grind down any high spots.
Cleaning the Floor
Remove all existing flooring, baseboards, and debris. Vacuum thoroughly to remove dust and grit.
- For existing tile or vinyl: You might be able to tile over it if it’s a single layer and well-adhered. However, for best results and longevity, especially with ceramic or porcelain, it’s often recommended to remove the old flooring down to the subfloor.
- For a clean subfloor: Sweep and vacuum meticulously. Mop the floor and let it dry completely. Any dust or debris left behind will interfere with the adhesive.
Checking for Levelness
Use a long, straight edge (like a 6-foot level) to check for dips or high spots.
- Low spots: Fill with self-leveling underlayment, following the manufacturer’s instructions.
- High spots: Grind them down.
Installing Backer Board (If Necessary)
If you’re tiling over a wood subfloor or need extra stability, install cement backer board.
- Cut backer board: Use a utility knife to score the backer board, then snap it along the score line.
- Lay out the board: Position the first piece, ensuring it’s flush with the wall or starting point.
- Fasten the board: Secure the backer board to the subfloor using specialized screws designed for backer board. Drive the screws flush with the surface, not into the subfloor. Space screws about 6-8 inches apart along edges and 10-12 inches in the field.
- Tape the seams: Use fiberglass mesh tape designed for backer board over all the seams.
- Apply thin-set to seams: Cover the tape with a thin layer of thin-set mortar using a trowel. This creates a seamless surface. Let it dry completely.
Step 2: Layout and Dry-Fit
A proper layout prevents awkward cuts at the end and ensures a visually pleasing pattern.
Finding the Center Point
- Measure the width and length of your kitchen.
- Mark the center of each wall.
- Snap chalk lines across the floor, connecting the center marks of opposite walls. These lines will intersect at the center of your room.
Dry-Fitting a Section
Lay out a few tiles along your chalk lines without adhesive. This helps you visualize the pattern and identify where cuts will be needed. Aim to have full tiles meeting at the center or have cuts of equal size at opposite walls, if possible. This looks more balanced than a narrow sliver of tile in a prominent spot.
Planning for Obstacles
Consider doorways, cabinets, and appliances. You’ll want to plan your tile layout so cuts in these areas are less noticeable.
Step 3: Mixing and Applying Tile Adhesive
This is where the tile laying guide truly begins. You’ll use tile adhesive to bond the tiles to the floor.
Mixing Thin-Set Mortar
- Follow manufacturer instructions: This is crucial for the right consistency.
- Use a clean bucket: Add water first, then slowly add the mortar mix while mixing with a drill and paddle mixer or by hand with a sturdy stick.
- Achieve a peanut butter consistency: It should be thick enough to hold its shape but spreadable. It should not be too soupy or too dry.
- Let it slake: Most thin-set mortars need to rest (slake) for 5-10 minutes after mixing, then be stirred again. This allows the chemicals to react.
Applying the Adhesive
- Work in small sections: Thin-set dries, so only mix what you can use within 20-30 minutes.
- Use the flat side of the trowel: Spread a thin layer of adhesive onto the subfloor or backer board.
- Use the notched side of the trowel: Hold the trowel at a 45-degree angle to create uniform ridges. The size of the notches depends on your tile size – larger tiles need larger notches for better coverage.
- Ensure full coverage: The adhesive needs to cover at least 90% of the back of each tile for good adhesion and to prevent moisture from seeping through.
Step 4: Laying the Tiles
This is the core of your kitchen tile installation.
Starting the Layout
- Begin at the intersection of your chalk lines, or at a starting point you’ve determined for the most aesthetically pleasing layout.
- Place your first tile firmly into the adhesive.
Placing Subsequent Tiles
- Use tile spacers: Insert tile spacers between each tile as you lay them. This ensures consistent grout lines. The width of the spacers determines the width of your grout joints.
- Press and twist: Gently press each tile into the adhesive and give it a slight twist. This helps seat the tile properly and ensures good contact with the adhesive.
- Use a level: Periodically check that your tiles are level with each other. If a tile is too high, gently tap it down with a rubber mallet or the handle of your trowel. If it’s too low, lift it, add a little more adhesive, and re-seat it.
- Maintain straight lines: Ensure your rows are straight and parallel to your chalk lines.
Cutting Tiles
Tile cutting techniques are essential for edges, corners, and around obstacles.
- For straight cuts: Use a wet saw. Measure the tile, mark your cut line with a pencil, and guide the tile through the saw. Always wear safety glasses.
- For curved cuts or small notches: Use tile nippers. Practice on scrap pieces first.
- For around pipes or outlets: You might need to make a series of straight cuts to create a more complex shape. A jigsaw with a tile-cutting blade can also be used for some cuts, but a wet saw is generally preferred for precision.
- When cutting, score and snap for some materials: Some tiles can be scored with a scoring tool and snapped over the edge of a table.
Working Around Obstacles
- Cabinets and islands: Lay tiles up to the base of cabinets and islands. You’ll often caulk the gap between the tile and the cabinet base.
- Appliances: If appliances are stationary, tile up to them. If they are movable, plan to tile underneath them, or leave space to slide them back in.
Step 5: Letting the Adhesive Cure
Patience is key here.
- Allow adequate drying time: The tile adhesive needs to cure completely before you walk on the tiles or begin grouting. Check the adhesive manufacturer’s recommendations; this is typically 24-48 hours.
- Remove spacers: Once the adhesive has set but before it’s fully cured, remove all tile spacers.
- Clean up excess adhesive: Use a damp sponge to wipe away any adhesive that squeezed up between the tiles.
Step 6: Grout Application
The grout application fills the gaps and unifies the tile surface.
Choosing Your Grout
- Sanded grout: Used for grout lines 1/8 inch wide or larger. The sand adds strength.
- Unsanded grout: Used for grout lines narrower than 1/8 inch, as the sand can crack in narrow spaces.
- Epoxy grout: More expensive but very durable, stain-resistant, and waterproof. It requires more careful application.
Mixing the Grout
- Follow manufacturer instructions: Similar to thin-set, proper mixing is vital.
- Aim for a thick, paste-like consistency: It should hold its shape when squeezed in your hand.
Applying the Grout
- Work in small sections: Grout can dry out quickly.
- Use a grout float: Load the grout float with grout and spread it over the tiles, holding the float at a 45-degree angle.
- Force grout into joints: Work the grout into all the spaces between tiles, ensuring no air pockets.
- Scrape off excess: Use the edge of the grout float, held at a steeper angle (almost 90 degrees), to scrape off as much excess grout as possible from the tile surface.
Cleaning Excess Grout
This is a crucial step for a clean finish.
- First cleaning: Wait about 15-30 minutes (check grout instructions) for the grout to set slightly. Then, use a damp (not wet) sponge to gently wipe the tiles in a diagonal motion across the grout lines. Rinse the sponge frequently in a separate bucket of clean water.
- Second cleaning: After another 30-60 minutes, the grout will have firmed up more. Use a clean, damp sponge again to remove any remaining grout haze. Avoid digging into the grout lines.
- Buffing: Once the tiles are dry, a clean, dry cloth can be used to buff away any final haze.
Step 7: Sealing and Finishing Touches
These final steps protect your work and give your DIY kitchen flooring a professional polish.
Sealing the Grout
- Wait for grout to cure: Most grouts need 48-72 hours to cure before sealing.
- Apply grout sealer: Use a small brush or applicator to apply a penetrating grout sealer to all grout lines. Wipe off any excess sealer from the tile surface immediately.
- Benefits of sealing: Sealing protects the grout from stains and moisture, making it easier to clean. Reapply sealer periodically as needed.
Caulking the Edges
- Apply caulk: Use paintable silicone caulk to fill the expansion joints at walls, countertops, and around any permanent fixtures. Caulk provides flexibility and prevents water from seeping under the tiles.
- Smooth the caulk line: Use a wet finger or a caulk smoothing tool for a neat finish.
Reinstalling Baseboards
Once everything is dry and sealed, reinstall your baseboards.
Frequently Asked Questions (FAQ)
How long does it take to lay tile in a kitchen?
For a standard-sized kitchen, a DIYer can expect the project to take anywhere from 2 to 5 days, including preparation and drying times. This depends on your experience level, the complexity of the layout, and whether you need to address subfloor issues.
Can I tile directly over my existing vinyl flooring?
In some cases, yes. If the vinyl is a single layer, well-adhered, and in good condition, you might be able to tile over it, especially with certain types of vinyl tile. However, for ceramic or porcelain tile, it’s generally best to remove the old flooring to ensure a stable and level base for the new tiles.
What is the best type of tile for a kitchen floor?
Ceramic, porcelain, and vinyl tiles are all excellent choices for kitchen floors due to their durability, water resistance, and ease of maintenance. Ceramic and porcelain offer a classic look and are very durable, while vinyl is budget-friendly and easy to install.
How do I cut tiles for a kitchen floor?
You’ll typically use a wet saw for straight cuts and more complex shapes. Tile nippers are useful for smaller adjustments or curved cuts. For very precise cuts around pipes or corners, a combination of scoring with a utility knife and then using nippers or a wet saw is often required.
How much tile adhesive do I need?
The amount of adhesive needed depends on the tile size and the coverage specified by the adhesive manufacturer. A general rule of thumb is that one 50-pound bag of thin-set mortar will cover approximately 75-100 square feet, depending on the trowel notch size used. Always check the product packaging for specific coverage rates.
This comprehensive tile laying guide should equip you to tackle your kitchen floor renovation with confidence. Remember to work carefully, take your time, and enjoy the process of transforming your kitchen!