
Yes, you can absolutely install a tile backsplash on drywall! With the right preparation and materials, you can achieve a beautiful and durable kitchen backsplash yourself.
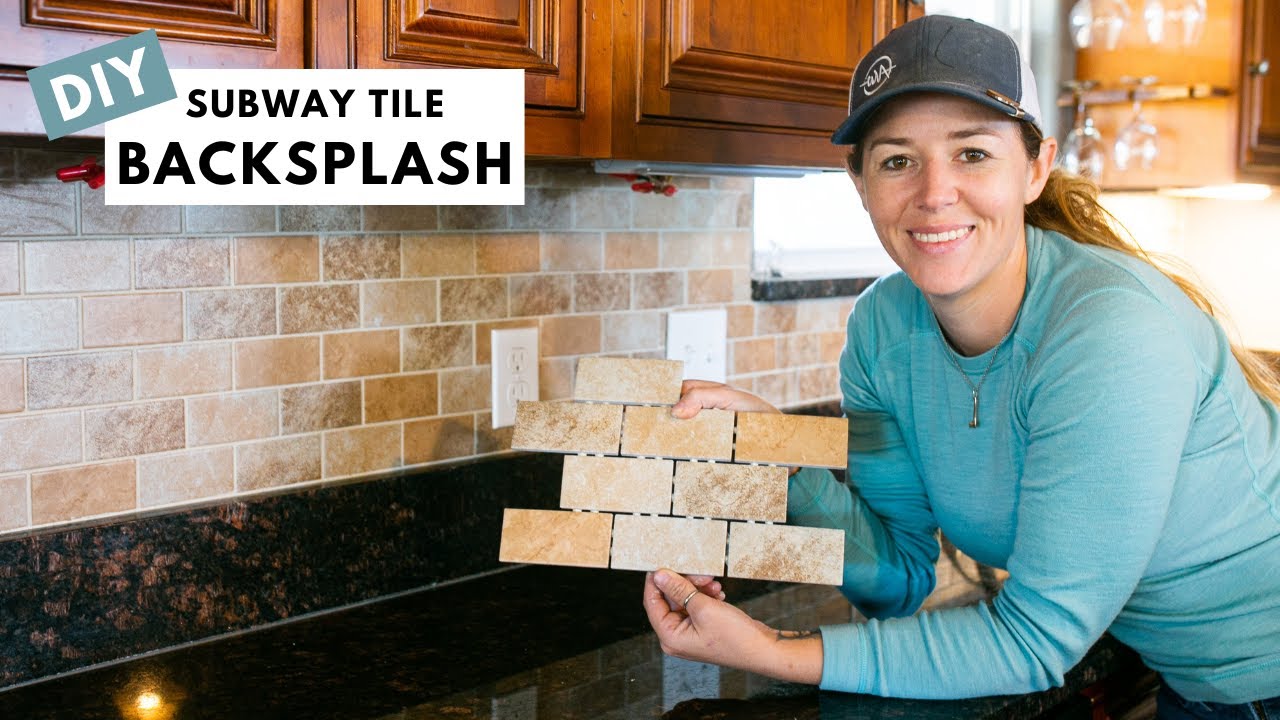
Image Source: i.ytimg.com
Getting Started: Planning Your Kitchen Backsplash Project
Tiling a kitchen is a fantastic way to add style and protection to your walls. Installing a tile backsplash on drywall is a common and achievable DIY project. This guide will walk you through every step, from choosing your backsplash materials to the final sealing.
Choosing Your Backsplash Materials
The world of backsplash materials is vast and exciting. From classic ceramic and porcelain to trendy glass and natural stone, your options are plentiful. Consider the look you want to achieve, your budget, and the durability needed for a kitchen environment.
Popular Backsplash Materials:
- Ceramic Tiles: Versatile, affordable, and easy to work with. They come in countless colors, shapes, and sizes.
- Porcelain Tiles: Similar to ceramic but denser and less porous, making them more durable and water-resistant.
- Glass Tiles: Offer a sleek, modern look and can reflect light beautifully. They can be more delicate to cut.
- Natural Stone Tiles (Marble, Granite, Travertine): Provide a luxurious and unique aesthetic. They often require sealing and can be more expensive and harder to cut.
- Peel and Stick Backsplash: A popular alternative for a quick and easy DIY. These are not traditional tiles but can mimic the look of tile without the need for adhesive and grout. While easy, they might not offer the same longevity or water resistance as traditional tile.
Essential Tools and Supplies for Tile Backsplash Installation
Gathering all your tools before you begin is crucial for a smooth tile backsplash installation. Having everything at hand will prevent frustration and ensure efficiency.
Tool Checklist:
- Measuring Tape: For accurate measurements of your space.
- Pencil: For marking cut lines and tile placement.
- Level: To ensure your tiles are installed straight.
- Wet Saw or Tile Cutter: A wet saw is best for most tile types, especially harder ones like porcelain and natural stone. A snap cutter is suitable for ceramic and some glass tiles.
- Notched Trowel: To spread adhesive tile evenly. The size of the notches depends on the tile size.
- Buckets: For mixing thin-set mortar or for cleaning tools and sponges.
- Sponge: For cleaning excess grout and mortar.
- Grout Float: To press grout into the tile joints.
- Utility Knife: For cutting caulk or scoring drywall if needed.
- Safety Glasses: To protect your eyes from dust and flying debris.
- Work Gloves: To protect your hands.
- Drop Cloths or Plastic Sheeting: To protect countertops and floors.
- Painter’s Tape: To protect adjacent surfaces and create clean lines.
- Caulk Gun: For applying caulk along edges and transitions.
- Spacers: To maintain consistent grout lines between tiles.
Supply Checklist:
- Tiles: Your chosen backsplash material. Order about 10-15% extra for cuts and potential breakage.
- Tile Adhesive (Thin-set Mortar): The best adhesive for most tiling projects. Ensure it’s suitable for your tile type and the substrate (drywall). Some options for adhesive tile are pre-mixed and ready to use, simplifying the process.
- Grout: Choose a grout suitable for kitchen backsplashes. Sanded grout is generally used for wider joints (1/8 inch or larger), while unsanded grout is for narrower joints.
- Grout Sealer: Essential for protecting grout from stains and moisture, especially in a kitchen.
- Caulk: Kitchen-grade, mildew-resistant caulk to seal gaps along countertops and cabinets.
- Primer (Optional but Recommended): A moisture-resistant primer can help seal the drywall and provide a better surface for the adhesive.
- Backer Board (Optional but Recommended for Wet Areas): While you can tile directly on drywall in many kitchen backsplash scenarios, for areas prone to more moisture or for added durability, consider using cement board or other tile backer boards.
Comprehending Wall Prep for Tile: The Foundation of a Great Backsplash
Proper wall preparation is arguably the most critical step in tiling. Neglecting this stage can lead to tiles detaching, grout cracking, and an overall unprofessional finish. For drywall installations, meticulous wall prep for tile is essential.
Step 1: Clear the Workspace
- Remove all items from your countertops.
- Cover countertops and the floor below with drop cloths or plastic sheeting. Use painter’s tape to secure them, creating a protective barrier.
- Remove any outlet covers or switch plates from the wall area you’ll be tiling.
Step 2: Inspect and Repair the Drywall
- Clean the Wall: Wipe down the drywall with a damp cloth to remove any grease, dust, or debris. Let it dry completely.
- Check for Damage: Look for any holes, cracks, or soft spots in the drywall.
- Repair Imperfections:
- Small nail pops or holes can be filled with joint compound or spackle. Sand smooth once dry.
- Larger cracks or gouges may require patching with drywall tape and joint compound. Allow each layer of compound to dry and sand smooth between applications.
- Ensure Smoothness: The wall should be as smooth and flat as possible. Unevenness will be magnified by the tiles.
Step 3: Prime the Drywall (Recommended)
- Why Prime? Priming drywall for tile serves several purposes:
- It seals the porous surface, preventing the drywall from absorbing too much moisture from the thin-set mortar or adhesive.
- It creates a better bonding surface for the tile adhesive.
- It helps hide any minor imperfections or discoloration in the drywall.
- Choosing a Primer: Use a high-quality, moisture-resistant drywall primer. Some primers are specifically designed for tile applications.
- Application: Apply one or two coats of primer according to the manufacturer’s instructions, ensuring full coverage. Allow it to dry completely.
Step 4: Plan Your Layout
- Dry Fit: Lay out some of your tiles on the countertop to visualize the pattern and spacing.
- Find the Center: Locate the center point of your backsplash area (often above the stove or sink). Mark this point with a pencil.
- Start from the Center: It’s generally recommended to start your tile layout from the center and work outwards. This ensures that any necessary cuts are less noticeable and are typically on the outer edges.
- Horizontal and Vertical Lines: Use your level to draw a horizontal guideline from the center point across the wall. You can also draw a vertical guideline. These lines will help you keep your tiles straight.
- Consider Edge Tiles: Think about how your tiles will meet the cabinets, countertops, and any corners. You want to avoid very small, awkward cuts at the edges if possible. Adjust your starting point slightly if needed.
Mastering the Art of Tile Backsplash Installation
With the wall prepped and your layout planned, it’s time to get down to the actual tiling. This stage requires patience and precision.
Step 1: Mixing and Applying Adhesive Tile
- Read Adhesive Instructions: Always follow the manufacturer’s instructions for mixing and applying your chosen tile adhesive.
- Mixing Thin-set Mortar: If using powdered thin-set, mix it with water in a bucket until it reaches a peanut butter-like consistency. Allow it to “slake” (rest) for a few minutes, then remix.
- Applying Adhesive: Using your notched trowel, spread a thin, even layer of adhesive onto a small section of the wall (about 2-3 square feet at a time). Hold the trowel at a 45-degree angle to create uniform ridges. These ridges help ensure good adhesion and allow air to escape from behind the tiles.
Step 2: Setting the Tiles
- Start Tiling: Begin setting your tiles along your planned layout lines, starting from the center or your chosen starting point.
- Press Firmly: Press each tile firmly into the adhesive with a slight twisting motion to ensure good contact.
- Use Spacers: Place tile spacers between each tile to maintain consistent grout lines. The size of the spacer will determine the width of your grout joints.
- Check for Level: Periodically check your tiles with a level to ensure they are straight both horizontally and vertically.
- Clean Excess Adhesive: Immediately wipe away any adhesive that oozes through the grout lines or gets on the tile faces with a damp sponge. Dried adhesive can be very difficult to remove.
Step 3: Cutting Tiles
- Measure Carefully: Measure the space where a cut tile is needed. Remember to account for the grout joint.
- Use Your Tile Cutter:
- Snap Cutter: For ceramic and some glass tiles, score the tile along your marked line with the cutting wheel. Then, place the tile on the scoring line of the snap cutter and apply firm pressure to break the tile cleanly.
- Wet Saw: For porcelain, natural stone, or intricate cuts, a wet saw is essential. Position the tile against the guide and slowly feed it through the blade. Always wear safety glasses when operating a wet saw.
- Test Cuts: It’s a good idea to make a few test cuts on scrap tiles to get a feel for your tile cutter.
Step 4: Working Around Obstacles
- Outlets and Switches: For outlets and switches, you’ll need to cut tiles to fit around them. You can often make straight cuts for the edges and use a tile nipper or a wet saw with a small blade for more intricate shapes.
- Corners: For inside corners, cut tiles to fit snugly. For outside corners, you can either mitre the tiles (cut at a 45-degree angle) or use a bullnose edge tile if available.
Step 5: Letting the Adhesive Cure
- Drying Time: Allow the tile adhesive to cure completely according to the manufacturer’s instructions. This usually takes 24-48 hours. Avoid disturbing the tiles during this time.
- Remove Spacers: Once the adhesive has cured, carefully remove all the tile spacers.
The Grouting Process: Filling the Gaps
Grouting is the final step that ties the entire backsplash together, filling the spaces between tiles and providing a finished look. Selecting the right grout for backsplash is key.
Step 1: Preparing for Grouting
- Clean the Tile Surface: Ensure the tile surface is clean and free of any remaining adhesive.
- Remove Excess Adhesive: Scrape out any adhesive that may have hardened in the grout lines.
Step 2: Mixing and Applying Grout
- Choose Your Grout: Select a grout suitable for kitchen backsplashes. Consider sanded or unsanded grout based on your grout joint width.
- Mix the Grout: Mix the grout according to the manufacturer’s instructions. Aim for a smooth, paste-like consistency similar to creamy peanut butter. Let it slake as per the instructions.
- Apply the Grout: Using a grout float, spread the grout over the tiles, working it into the joints at a 45-degree angle. Make sure all the gaps are filled completely.
Step 3: Cleaning Off Excess Grout
- Initial Wipe: After about 15-20 minutes (or as directed by the grout manufacturer), use a damp (not wet) sponge to wipe away the excess grout from the tile surface. Wipe diagonally across the tiles to avoid pulling grout out of the joints. Rinse your sponge frequently in a clean bucket of water.
- Second Wipe: Repeat this cleaning process several times, using a clean sponge and clean water each time, until the tile surface is mostly clean.
Step 4: Hazing and Final Cleaning
- Grout Haze: As the grout dries, a fine haze may appear on the tiles. This is normal.
- Remove Haze: Once the grout is dry to the touch (usually a few hours later), use a clean, dry cloth or a slightly damp sponge to buff away the haze.
- Final Rinse: You can give the tiles a final rinse with a damp cloth after the grout has fully cured to remove any lingering haze.
Step 5: Letting the Grout Cure
- Curing Time: Allow the grout to cure fully according to the manufacturer’s recommendations. This can take anywhere from 24 to 72 hours. Avoid getting the backsplash wet during this period.
Sealing the Deal: Protecting Your Grout
Sealing grout is a crucial step to protect it from stains and moisture, especially in a busy kitchen environment.
Why Seal Grout?
Grout is porous, meaning it can absorb liquids, leading to staining, discoloration, and even mold or mildew growth over time. Sealing creates a barrier that repels these substances.
When to Seal Grout
Wait until the grout has fully cured. This is typically at least 24-72 hours, but always check the grout manufacturer’s specific instructions.
How to Seal Grout
- Clean the Area: Ensure the tiles and grout are completely clean and dry.
- Apply Sealer: Use a small paintbrush or applicator to apply a thin, even coat of grout sealer to the grout lines. You can also use a grout sealer pen for precise application.
- Wipe Away Excess: Immediately wipe away any excess sealer that gets onto the tile surface with a clean cloth. Most sealers work best when they don’t dry on the tile face.
- Second Coat (Optional): Some manufacturers recommend a second coat after the first has dried.
- Drying Time: Allow the sealer to dry completely according to the product’s instructions before exposing the backsplash to water or heavy use.
Frequently Asked Questions About Installing Backsplash on Drywall
Q1: Can I tile directly over painted drywall?
Yes, you can tile directly over painted drywall, provided the paint is in good condition, well-adhered, and clean. For best results, ensure the wall is clean, dry, and free of grease or grime. A light sanding and a coat of primer can also improve adhesion.
Q2: What kind of adhesive should I use for kitchen backsplashes on drywall?
For most kitchen backsplash installations on drywall, thin-set mortar is the recommended adhesive. It provides a strong, durable bond. Pre-mixed tile adhesives are also available and can be convenient, but ensure they are rated for the type of tile you are using and for wall applications. Always check the manufacturer’s recommendations for compatibility with drywall.
Q3: How do I cut tiles for my backsplash?
You will likely need a tile cutter or a wet saw to cut tiles. A snap-off tile cutter is suitable for ceramic and some softer tiles. For harder materials like porcelain or natural stone, or for more intricate cuts (like around outlets), a wet saw is essential. Always measure carefully and wear safety glasses when cutting tiles.
Q4: How do I ensure my tiles are straight?
Use a level to draw a horizontal and vertical guideline on your wall before you start tiling. These lines will serve as a reference to keep your rows and columns of tiles straight. Check your work with a level frequently as you go.
Q5: How much extra tile should I buy?
It’s recommended to purchase 10-15% more tile than your calculated square footage. This accounts for cuts, potential breakage during installation, and future repairs.
Q6: Do I need to seal the grout?
Yes, it is highly recommended to seal the grout after it has fully cured. Sealing protects the grout from stains and moisture, which is especially important in a kitchen where spills are common.
Q7: What is the difference between sanded and unsanded grout?
Sanded grout contains fine sand particles and is used for grout lines that are 1/8 inch or wider. The sand provides strength and prevents shrinkage. Unsanded grout is smoother and is used for narrower grout lines (less than 1/8 inch) or for delicate tiles like glass, as the sand can scratch them.
Q8: Can I use a peel and stick backsplash on drywall?
Yes, peel and stick backsplashes are designed for easy application on various surfaces, including painted drywall. They are a quick DIY option that doesn’t require adhesive or grout. However, their longevity and water resistance may not match traditional tile installations.
This comprehensive guide should equip you with the knowledge to successfully tackle your DIY kitchen backsplash project on drywall. Enjoy your beautiful new kitchen!