
Can you declutter a kitchen fast? Yes, you absolutely can! With a clear plan and focused effort, transforming your kitchen from cluttered chaos to a serene space is achievable in a surprisingly short amount of time. This guide will walk you through effective decluttering strategies to help you declutter your kitchen fast.
A cluttered kitchen can feel overwhelming, making cooking a chore and even affecting your mood. But what if you could reclaim your kitchen space and make it a joy to be in? This isn’t about achieving a picture-perfect, minimalist kitchen overnight, but about creating a functional, organized, and peaceful environment that supports your daily life. We’ll cover everything from tackling those overflowing cabinets to mastering kitchen counter organization, ensuring you get the most out of your culinary space.
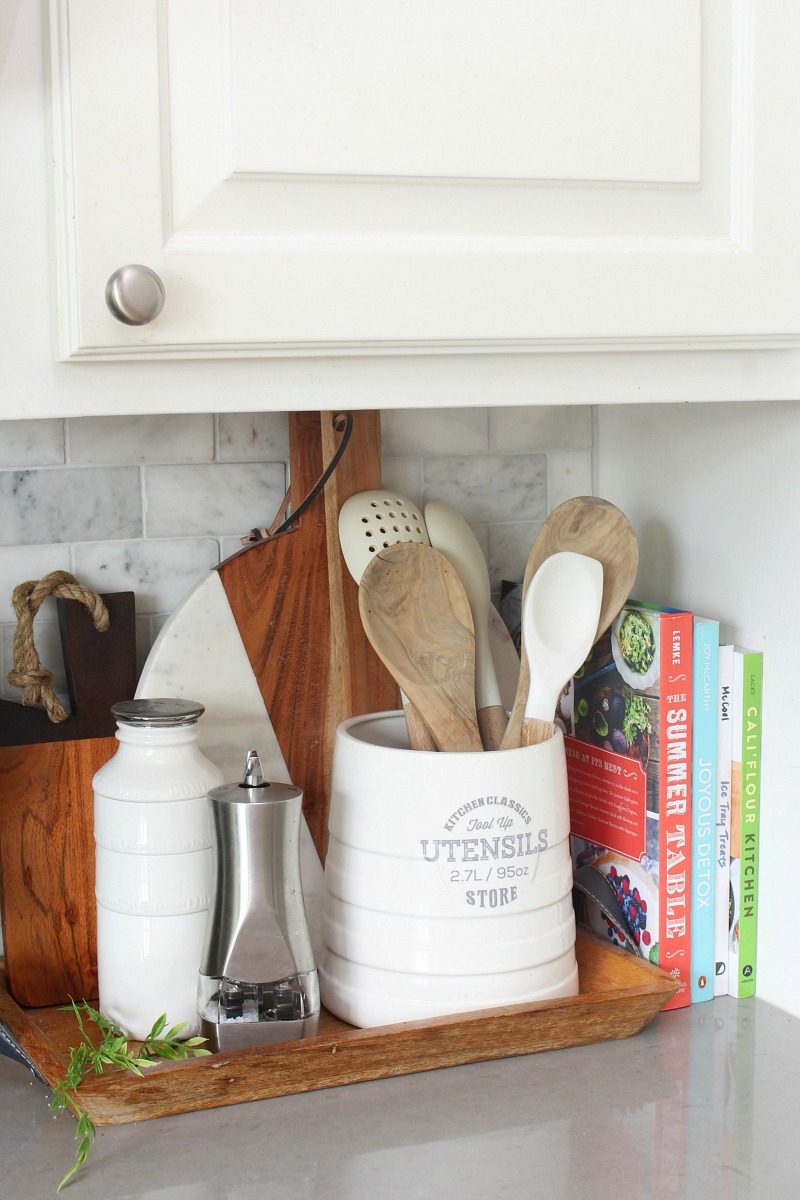
Image Source: www.cleanandscentsible.com
The Core Principles of Kitchen Decluttering
Before we dive into specific areas, let’s establish some fundamental principles. These are the pillars of any successful decluttering workflow, ensuring you’re not just moving clutter around but actually reducing it.
- One Area at a Time: Trying to do everything at once is a recipe for disaster. Focus on one drawer, one cabinet, or one shelf. This keeps you from feeling overwhelmed and allows for focused progress.
- The “Keep, Donate, Trash/Recycle” System: Have these three categories clearly defined. As you go through items, make a swift decision. If you hesitate, ask yourself if you’ve used it in the last year, if it serves a purpose, or if you truly love it.
- Clean as You Go: Once you’ve emptied a cabinet or drawer, give it a quick wipe down. This makes the “keep” items look even better in their new, clean home.
- Set a Timer: Even 15-30 minutes of focused decluttering can yield significant results. It’s a great way to get started and build momentum.
Your Kitchen Decluttering Workflow: Step-by-Step
Let’s break down the process into manageable steps. This decluttering workflow is designed for efficiency and effectiveness.
Step 1: The Grand Overview and Preparation
- Gather Your Supplies: Before you begin, grab some boxes or bags for donation, trash, and recycling. You’ll also need cleaning supplies (all-purpose cleaner, cloths, paper towels) and perhaps some labels.
- Mentally Prepare: Acknowledge that this might take some time, but remind yourself of the end goal: a functional, beautiful kitchen. Put on some upbeat music or a podcast to make it more enjoyable.
- Take a “Before” Photo: This is optional but highly motivating. Seeing the dramatic “after” photo will be a great reward.
Step 2: Tackling the Countertops – Kitchen Counter Organization Nirvana
Kitchen counter organization is crucial for a functional kitchen. Cluttered countertops create visual noise and make food preparation difficult.
Immediate Actions for Countertops:
- Clear Everything Off: Yes, everything. This might seem drastic, but it’s the most effective way to see what you’re dealing with.
- Sort Items: Group like items together. Appliances, utensil holders, spice racks, fruit bowls, etc.
- Wipe Down Surfaces: Now that your counters are clear, give them a thorough cleaning. It’s a fresh start!
- Evaluate Each Item:
- Appliances: Do you use them regularly? If a specialty appliance like a waffle maker or an ice cream maker sits unused for years, consider donating it.
- Utensils & Gadgets: Is your utensil crock overflowing? Are there duplicates or items you never reach for? Pare down to the essentials you use most often.
- Decorations: While pretty, too many decorative items can become clutter. Keep only a few cherished pieces.
- Mail/Paperwork: This should not live on your kitchen counters! Designate a specific spot for mail elsewhere.
- Strategic Placement: Return only the items you use daily or that are purely decorative. Think about workflow. Keep frequently used spices and oils near the stove. Have your most-used utensils easily accessible.
Step 3: The Cabinet Crusade – Mastering Cabinet Organization
Cabinets are often black holes of forgotten items. This is where pantry decluttering and cabinet organization truly shine.
Your Cabinet Decluttering Strategy:
- Empty One Cabinet at a Time: Don’t pull everything out at once. Start with a single upper or lower cabinet.
- Wipe It Down: Clean shelves before putting items back.
- Sort Contents:
- Pots and Pans: Are they stacked neatly? Are there lids missing? Are they scratched and beyond use? Discard damaged items. Consider vertical pan organizers for easier access.
- Dishes and Glasses: Get rid of chipped, cracked, or rarely used items. If you have too many duplicates of everyday dishes, consider keeping only what you regularly use and a few extra for guests.
- Food Items (The Pantry Decluttering Component):
- Check expiration dates. Toss anything past its prime.
- Group like items: baking supplies, canned goods, pasta, snacks, breakfast items.
- Decant dry goods like flour, sugar, and pasta into airtight containers. This saves space, keeps food fresh, and looks tidy. This is a key part of effective food storage solutions.
- Consider pull-out shelves or turntables (lazy Susans) to make items in the back more accessible.
- Linens (Dish towels, oven mitts, etc.): Discard stained or worn-out items. Fold them neatly.
- Small Appliances (Less frequently used): Store these in a dedicated cabinet.
- Put Back Strategically:
- Frequency of Use: Keep everyday items at eye level and within easy reach. Less-used items can go on higher shelves or in deeper cabinets.
- Weight: Store heavy items on lower shelves.
- Grouping: Keep all your baking supplies together, all your spices together, etc.
Step 4: Drawer Deep Dive – Drawer Organization Essentials
Drawers can become jumbled messes of miscellaneous items. Effective drawer organization makes a huge difference.
Conquering Your Drawers:
- Empty Each Drawer Completely: Again, one drawer at a time.
- Clean the Drawer: A quick wipe makes a difference.
- Sort and Purge:
- Utensil Drawer: Keep only what you use. Sharpening stones, graters, peelers, whisks, spatulas, ladles, etc. Discard duplicates or items you never use. Use drawer dividers to keep things from sliding around.
- Junk Drawer: This is the ultimate test! Everything from rubber bands to expired batteries. Go through each item. Do you need it? When did you last use it? Can it be stored properly elsewhere? Get rid of anything that doesn’t belong in the kitchen.
- “Gadget” Drawer: Similar to the utensil drawer, keep only functional, regularly used gadgets.
- Tea Towel/Napkin Drawer: Fold neatly. Discard stained or ripped items.
- Invest in Drawer Organizers: These are your best friends for drawer organization. From expandable dividers to small bins for specific items (like bag clips or rubber bands), they keep everything in its place.
Step 5: The Pantry Purge – Ultimate Pantry Decluttering
Pantry decluttering is often a significant undertaking, but it yields immense rewards in terms of functionality and reducing food waste.
Your Pantry Decluttering Plan:
- Empty Your Entire Pantry: Yes, all at once this time. Lay everything out on your kitchen table or floor.
- Clean the Pantry: Wipe down shelves thoroughly.
- Check Expiration Dates: Ruthlessly discard anything expired. Group items that are close to expiring and plan meals around them.
- Categorize and Group:
- Canned goods
- Baking supplies (flour, sugar, baking soda, etc.)
- Pasta and grains
- Cereals and breakfast items
- Snacks
- Oils, vinegars, and sauces
- Spices (check these too!)
- Assess Food Storage Solutions:
- Airtight Containers: Transfer dry goods like rice, pasta, flour, sugar, oats, and cereal into clear, airtight containers. This not only keeps them fresh but also creates a uniform look and makes it easy to see what you have.
- Baskets and Bins: Use these to group smaller items like snack packs, spice packets, or small jars. Label them!
- Turntables (Lazy Susans): Perfect for corners or deep shelves, especially for oils, vinegars, and jars.
- Tiered Shelving/Risers: Excellent for canned goods, allowing you to see items in the back.
- Put Back Intelligently:
- Zone your pantry: Create specific areas for different categories.
- “First In, First Out” (FIFO): Place newer items behind older ones to ensure you use older stock first.
- Visibility: Make sure you can see as much as possible. Use clear containers and risers.
Step 6: Refrigerator and Freezer Refresh – Kitchen Cleaning Tips in Action
These areas often harbor forgotten science experiments. Effective kitchen cleaning tips are essential here.
Refrigerator and Freezer Decluttering:
- Empty One Section at a Time: Start with a shelf or the crisper drawer.
- Discard Outdated Items: Check expiration dates on everything. Toss anything questionable.
- Clean Thoroughly: Wipe down shelves, drawers, and door bins with a mild cleaner.
- Group Like Items: Keep dairy together, produce together, condiments together.
- Use Clear Containers: Store leftovers in clear, airtight containers. This makes it easy to see what’s inside and prevents spills.
- Label Everything: Especially in the freezer, label items with the contents and date. This is crucial for food storage solutions.
- “Eat Me First” Box: Designate a small bin for items that need to be used soon.
Step 7: The Sink Area and Under-Sink – Small but Mighty Spaces
Don’t forget these often-overlooked spots.
Sink Area Decluttering:
- Under the Sink: This is prime territory for cleaning supplies.
- Discard empty or nearly empty bottles.
- Consolidate similar cleaners (e.g., all-purpose sprays).
- Use a caddy or small bins to keep bottles upright and organized.
- Consider adding a small shelf or stackable drawers if you have vertical space.
- Dish Rack/Drying Mat: Only keep what you regularly use. Storing these neatly when not in use is key.
- Sink Itself: Keep it clear of dirty dishes for a more pleasant experience.
Step 8: Appliance & Tool Audit – Do You Really Need It?
This is where we question the purpose of every kitchen item.
Appliance and Tool Assessment:
- Multi-functionality: Can one tool do the job of several? For instance, a quality chef’s knife can handle many tasks better than a drawer full of specialized knives.
- Duplicates: Unless you frequently cook for a crowd, do you need three whisks?
- Specialty Gadgets: Be honest. If you haven’t used that avocado slicer or fancy corer in over a year, it’s probably time to let it go. This is a core principle of a minimalist kitchen.
- Manuals and Warranties: Keep only current ones in a designated spot.
- Small Appliances: If an appliance is broken, either fix it or discard it. Don’t let broken items linger.
Maintaining Your Decluttered Kitchen
Decluttering isn’t a one-time event; it’s a lifestyle. Here are some tips for maintaining your newly organized kitchen:
- The “One In, One Out” Rule: When you buy a new kitchen item, get rid of an old one. This is especially effective for mugs, utensils, and gadgets.
- Regular “Tidy-Up” Sessions: Spend 5-10 minutes each day putting items back in their designated homes.
- Monthly Check-ins: Once a month, do a quick scan of your pantry, fridge, and cabinets for items nearing expiration or that have become clutter.
- Mindful Purchases: Before buying new kitchen items, ask yourself if you truly need it and where it will be stored.
Transitioning to a Minimalist Kitchen
If your goal is a truly minimalist kitchen, the decluttering process becomes even more intentional. A minimalist kitchen focuses on quality over quantity, functionality, and clear surfaces.
Key principles for a minimalist kitchen:
- Essential Tools Only: Keep only the highest quality, most versatile tools and appliances.
- Clear Countertops: Aim for as few items on your countertops as possible.
- Cohesive Storage: Utilize matching containers and organizers for a streamlined look.
- Purposeful Decor: Choose a few well-placed decorative items that add to the ambiance without creating clutter.
- Focus on Experience: A minimalist kitchen is designed to reduce stress and enhance the joy of cooking and gathering.
Decluttering Your Kitchen Fast: A Sample Timeline
Here’s how you might approach decluttering your kitchen fast over a weekend:
Friday Evening (2-3 hours):
- Countertops: Clear everything off, clean, and put back only essentials.
- Sink Area & Under Sink: Tackle these small but impactful spaces.
- Assign Categories: Set up your “Keep, Donate, Trash/Recycle” stations.
Saturday Morning (3-4 hours):
- Cabinets (Upper): Focus on dishes, glasses, and seldom-used items.
- Drawers (Utensils & Gadgets): Clear, sort, and organize with dividers.
Saturday Afternoon (3-4 hours):
- Pantry: The big one! Empty, sort, clean, and reorganize with new storage solutions.
- Food Storage Solutions: Implement containers and baskets.
Sunday Morning (2-3 hours):
- Cabinets (Lower): Pots, pans, and cleaning supplies.
- Refrigerator & Freezer: Quick purge and clean.
Sunday Afternoon (1-2 hours):
- Final Touches: Wipe down all surfaces, label containers, and take out donation items.
- Admire Your Work!
This timeline is flexible. You can spread it out over a week if that’s more manageable, dedicating an hour or two each evening. The key is focused effort.
Frequently Asked Questions (FAQ)
Q: How much time does it usually take to declutter a kitchen?
A: The time varies greatly depending on the current level of clutter. For a deep declutter, you might need anywhere from 4 to 12 hours. Breaking it down into smaller sessions, as outlined in our decluttering workflow, makes it feel much faster and less daunting.
Q: What are the best food storage solutions for a decluttered pantry?
A: Airtight containers for dry goods like flour, sugar, pasta, and cereal are excellent. Baskets and bins are great for grouping smaller items like spice packets or snack bars. Turntables (lazy Susans) are perfect for corners, and tiered risers help with canned goods. Clear containers are always a good choice so you can easily see what you have.
Q: My kitchen counters always get cluttered. What are some quick kitchen counter organization tips?
A: The best tip is to give everything a designated home. Only keep frequently used appliances and items on the counter. Use a utensil crock for your most-used tools, a fruit bowl, and perhaps a decorative item. For mail and papers, have a dedicated spot elsewhere in your home. Wipe down your counters daily to keep them looking tidy.
Q: I have so many duplicate kitchen gadgets. How do I decide what to keep?
A: Be honest with yourself. Do you use all of them regularly? If you have three spatulas, keep the one you like best and donate the others. For specialty gadgets, if you haven’t used it in over a year, it might be time to let it go. This is part of developing a minimalist kitchen approach.
Q: How can I make decluttering less overwhelming?
A: The most effective strategy is to focus on one small area at a time (one drawer, one shelf, one cabinet). Set a timer for 15-30 minutes and commit to working on that specific area. This makes the task feel manageable and provides a sense of accomplishment as you progress.
By following these detailed steps and decluttering strategies, you can transform your kitchen into a functional, organized, and stress-free space. Happy decluttering!