
Image Source: i.ytimg.com
Step-by-Step: How To Change Moen Kitchen Faucet
Can I change a Moen kitchen faucet myself? Yes, you can change your Moen kitchen faucet yourself with the right tools and a little patience. This guide will walk you through the entire process, from preparation to final touches, ensuring a successful Moen faucet replacement. We’ll cover everything you need to know to install new kitchen faucet Moen fixtures and tackle common issues like Moen faucet drip fix or a Moen single handle faucet repair.
When your trusty Moen kitchen faucet starts acting up, whether it’s a persistent drip, a stiff handle, or you’re simply ready for an upgrade, knowing how to perform a Moen kitchen tap repair or a complete Moen faucet replacement can save you time and money. This comprehensive Moen faucet installation guide is designed for homeowners who want to tackle the job themselves. We’ll cover identifying your faucet type, gathering necessary supplies, and a detailed breakdown of the removal and installation process. So, let’s get started on how to fix a leaky Moen kitchen faucet or upgrade your sink!
Preparing for Your Moen Faucet Replacement
Before you dive in, proper preparation is key to a smooth Moen faucet replacement. This involves gathering your tools and supplies, as well as understanding your current faucet.
Gathering Your Tools and Supplies
Having the right tools makes all the difference. Here’s a list of common items you’ll need:
- Adjustable Wrenches: Two are best – one to hold and one to turn.
- Basin Wrench: This specialized tool is crucial for reaching nuts in tight spaces under the sink.
- Screwdrivers: Both Phillips and flathead types are usually needed.
- Plumber’s Putty or Silicone Sealant: To create a watertight seal around the base of the new faucet.
- Bucket or Towels: To catch any residual water.
- Safety Glasses: To protect your eyes from debris or falling water.
- Gloves: To keep your hands clean and protected.
- Old Rags or Towels: For wiping up water and cleaning.
- Flashlight or Headlamp: The area under the sink is often dark.
- Penetrating Oil (Optional): For stubborn or corroded connections.
- New Faucet and Supplies: Ensure you have your new Moen faucet and any necessary supply lines.
Identifying Your Moen Faucet Model
Knowing your Moen faucet model is helpful for obtaining specific instructions or replacement parts, especially if you’re attempting a Moen faucet cartridge replacement or a specific Moen kitchen faucet troubleshooting. Most Moen faucets have a model number or name located:
- On the faucet itself: Often subtly marked on the underside or back of the faucet body.
- On the original packaging or manual: If you still have them.
- On your water bill or home improvement receipts: If it was recently installed.
If you can’t find a model number, don’t worry. This guide will provide general steps applicable to most Moen kitchen faucets. However, for specific Moen single handle faucet repair or intricate Moen faucet installation guide details, referring to the manufacturer’s documentation for your particular model is always a good idea.
Removing the Old Moen Faucet
This is where the hands-on work begins. Taking your time here will prevent frustration later.
Shutting Off the Water Supply
This is the most critical first step. Locate the shut-off valves under your sink. Most sinks have two valves, one for hot water and one for cold.
- Turn the valves clockwise until they are firmly closed.
- Turn on the old faucet to drain any remaining water in the lines and to confirm the water is off.
Disconnecting the Supply Lines
Once the water is off, you need to disconnect the flexible supply lines from the shut-off valves and the faucet.
- Place a bucket or towels under the valves and faucet connections to catch drips.
- Use an adjustable wrench to loosen the nuts connecting the supply lines to the shut-off valves. Turn counter-clockwise.
- Carefully disconnect the other end of the supply lines from the underside of the faucet. You might need a basin wrench for these connections, as they are often in a tight spot.
Removing the Mounting Hardware
Underneath the sink, there are nuts and washers that secure the faucet to the countertop or sink basin.
- Locate the mounting nuts. These can be plastic or metal and are typically around the shanks of the faucet.
- Use a basin wrench or an adjustable wrench to unscrew these nuts. This can be the trickiest part due to the limited space. If the nuts are old or corroded, a penetrating oil might help loosen them.
- Once the nuts are removed, lift the old faucet straight up from the sink. You might need to gently pry it loose if plumber’s putty or sealant has hardened.
Installing the New Moen Faucet
Now for the exciting part – installing your new Moen kitchen faucet! This process is generally straightforward, but attention to detail is important.
Preparing the Sink Surface
Clean the area where the old faucet was mounted. Remove any old plumber’s putty or sealant.
- Scrape away old putty or sealant with a plastic putty knife or an old rag.
- Clean the surface with a household cleaner and dry it thoroughly. A clean surface ensures a good seal for your new faucet.
Assembling the New Faucet (if necessary)
Some faucets come in multiple pieces. Check your new faucet’s instructions for any assembly steps before installation.
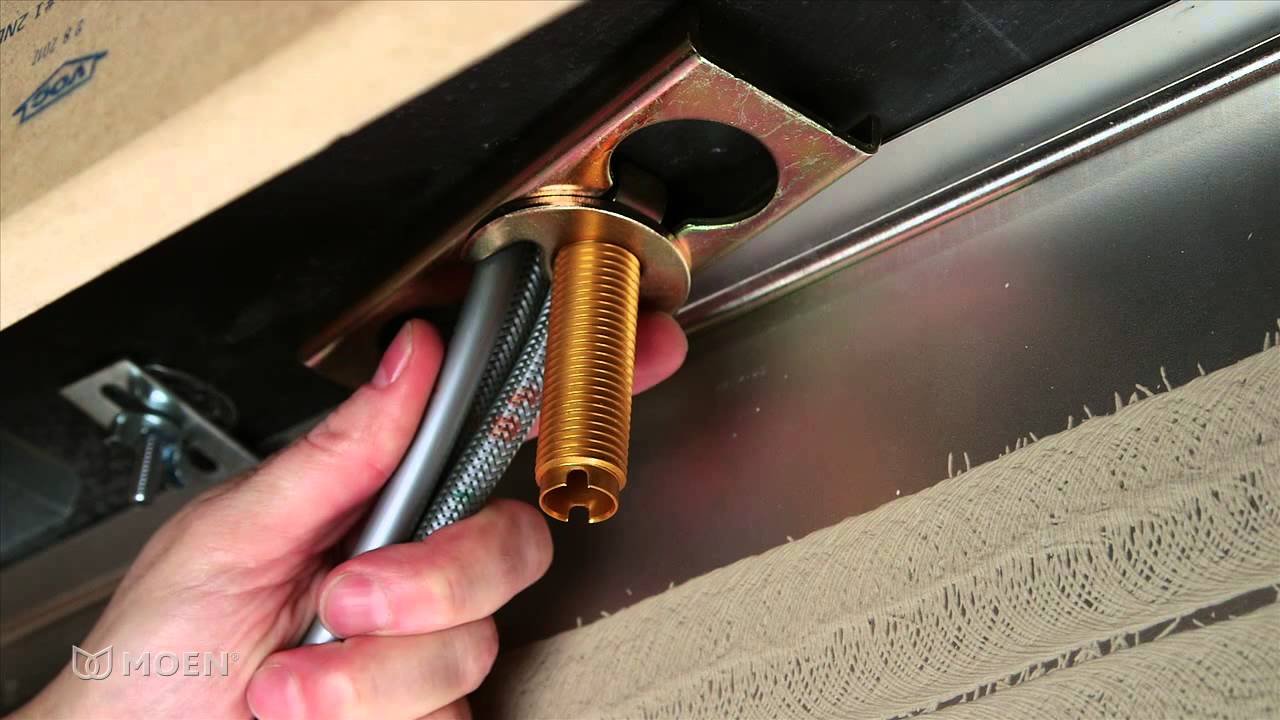
Mounting the New Faucet
This is where you’ll install new kitchen faucet Moen components.
- Apply plumber’s putty or silicone sealant around the base of the new faucet or the gasket provided. This creates a watertight barrier.
- Carefully position the new faucet into the holes on the sink or countertop. Ensure it’s aligned correctly.
- From underneath the sink, thread the mounting nuts onto the faucet shanks. Hand-tighten them first.
- Use your basin wrench or adjustable wrench to snug the nuts securely. Be careful not to overtighten, which could damage the sink or faucet.
- Wipe away any excess putty or sealant that squeezed out from under the faucet base.
Connecting the Supply Lines
Attach the new supply lines to the faucet shanks and the shut-off valves.
- Connect the supply lines to the faucet shanks according to the manufacturer’s instructions.
- Connect the other ends of the supply lines to the corresponding hot and cold shut-off valves.
- Tighten the connections with an adjustable wrench, but again, avoid overtightening.
Testing for Leaks
This is a crucial step to ensure your Moen faucet replacement was successful.
- Slowly turn the water supply valves back on by turning them counter-clockwise.
- Check all connections under the sink for any signs of leaks.
- Turn on the new faucet and let the water run for a minute or two. Check both hot and cold water.
- Inspect all connections again under the sink, including the faucet base, supply line connections to the faucet, and supply line connections to the valves.
- If you find any drips or leaks, try gently tightening the connection. If a leak persists, you may need to disconnect and re-seal the connection, or the supply line itself might be faulty.
Common Moen Faucet Issues and Their Fixes
Even with a new faucet, or if you’re looking into Moen kitchen faucet troubleshooting, understanding common issues can be very helpful.
How to Fix a Leaky Moen Kitchen Faucet
A leaky faucet is a common problem and can often be addressed with a Moen faucet cartridge replacement.
- Identify the Leak Source: Is it dripping from the spout? Leaking around the handle? Leaking from the base?
- Drip from Spout: This is almost always a sign of a worn-out cartridge.
- Procedure: Shut off the water. Remove the handle (often there’s a decorative cap hiding a screw). Unscrew the escutcheon cap. Use pliers or a cartridge puller tool to remove the old cartridge. Insert the new cartridge, ensuring it’s oriented correctly. Reassemble the faucet.
- Leak Around Handle: This can also be a cartridge issue or worn O-rings.
- Procedure: Similar to fixing a spout drip, you’ll likely need to access and replace the cartridge or O-rings.
- Leak from Base: This usually indicates a problem with the seals or gaskets where the faucet meets the sink, or a loose mounting nut.
- Procedure: Tighten the mounting nuts first. If that doesn’t work, the faucet may need to be removed, the old sealant cleaned off, and new plumber’s putty or silicone applied.
Replacing the Moen Faucet Cartridge
The cartridge is the heart of most Moen faucets. Knowing how to perform a Moen faucet cartridge replacement is a key skill for Moen faucet repair.
Table 1: Moen Cartridge Replacement Steps
| Step | Description |
|---|---|
| 1. Turn off water supply. | Locate and close both hot and cold shut-off valves under the sink. |
| 2. Relieve water pressure. | Open the faucet to drain residual water. |
| 3. Remove the handle. | Look for a decorative cap or a small set screw. Remove it and lift off the handle. |
| 4. Remove the retaining clip/nut. | Some Moen faucets have a small metal clip that needs to be pulled out with pliers, or a threaded nut. |
| 5. Remove the old cartridge. | Use a Moen cartridge puller tool (highly recommended) or needle-nose pliers to gently wiggle and pull the cartridge straight up. |
| 6. Insert the new cartridge. | Ensure the new cartridge is oriented correctly (refer to your faucet’s manual or the new cartridge’s packaging). |
| 7. Reinstall retaining clip/nut. | Secure the new cartridge with the clip or nut. |
| 8. Reassemble the faucet. | Put the escutcheon cap and handle back on. |
| 9. Turn water back on. | Slowly open the shut-off valves and check for leaks. |
Replacing a Moen Faucet Handle
Sometimes, the issue might be with the handle itself, or you might want to update the look. This is a simpler repair.
- Turn off the water supply and relieve pressure.
- Locate the handle screw. This is often hidden under a decorative cap or plug on the front or side of the handle. Pry off the cap carefully with a flathead screwdriver.
- Unscrew the handle screw with the appropriate screwdriver.
- Lift the handle straight up and off the faucet stem.
- Install the new handle by aligning it with the stem and securing it with the handle screw.
- Replace the decorative cap.
- Turn the water back on and test.
Other Moen Faucet Troubleshooting Tips
- Low Water Pressure: If you have low water pressure from your Moen faucet, check the aerator. It can become clogged with mineral deposits. Unscrew it, clean it with vinegar, and reattach. If the problem persists, check the supply lines for kinks or debris, and the shut-off valves to ensure they are fully open. A clogged cartridge can also restrict flow.
- Stiff Handle: A stiff handle can be caused by mineral buildup or a worn cartridge. A Moen faucet cartridge replacement often resolves this. Lubricating the internal parts with a silicone-based plumber’s grease can also help, but this is usually done during a cartridge replacement.
Upgrading Your Kitchen Faucet: When and Why
Beyond repairs, there are many reasons to replace Moen faucet handle or the entire faucet.
- Aesthetics: Newer models often have sleeker designs and finishes that can dramatically update your kitchen’s look.
- Functionality: Modern faucets offer features like pull-down sprayers, touchless operation, or filtered water.
- Efficiency: Older faucets can be less water-efficient. Replacing them can lead to savings on your water bill.
- Major Leaks or Damage: If your faucet has significant corrosion or damage, replacement is often more practical than repair.
When you decide to install new kitchen faucet Moen fixtures, consider the style that best complements your kitchen, the number of holes your sink has, and any specific features you desire.
Maintaining Your Moen Faucet
Regular maintenance can prevent many common issues and extend the life of your faucet.
- Clean Regularly: Wipe down your faucet with a soft cloth and mild soap to prevent mineral buildup.
- Check for Leaks: Periodically inspect under the sink for any signs of moisture.
- Clean the Aerator: At least twice a year, unscrew and clean the aerator to maintain good water flow.
- Address Small Drips Promptly: Don’t let minor drips turn into major problems. A small drip is often an early sign that a Moen faucet cartridge replacement is needed.
Frequently Asked Questions (FAQ)
-
How often should I replace my Moen faucet cartridge?
This varies greatly depending on water quality and usage. If you experience dripping or issues with handle operation, it’s time for a replacement. Some cartridges can last 10-15 years or more. -
What is the difference between a Moen faucet cartridge and a ceramic disc cartridge?
Moen traditionally uses a specific type of cartridge, often a compression or ball-type mechanism within their older models, and a more robust cartridge system in newer ones that may incorporate ceramic discs. The key is to match the replacement cartridge to your specific Moen faucet model. -
Can I use a universal cartridge for my Moen faucet?
It is highly recommended to use a genuine Moen replacement cartridge for your specific faucet model. Using a universal cartridge may not fit correctly or provide the same performance and longevity. You can usually find the correct cartridge number by looking up your faucet model on the Moen website or by taking the old cartridge to a plumbing supply store. -
My Moen single handle faucet is hard to move. What could be the problem?
A stiff handle is often due to mineral deposits or a worn-out cartridge. Performing a Moen faucet cartridge replacement is usually the solution. Sometimes, lubricating the stem, if accessible, can help temporarily. -
What tools do I need to replace a Moen faucet handle?
Typically, you’ll need a screwdriver (often a Phillips or flathead) and a small flat object (like a thin screwdriver or utility knife) to pry off the decorative cap covering the handle screw.
By following this detailed Moen faucet installation guide, you can confidently tackle a Moen faucet replacement, perform Moen kitchen tap repair, and keep your kitchen tap functioning smoothly for years to come. Whether you’re performing a Moen faucet cartridge replacement to fix a drip or installing a brand-new fixture, these steps will help you achieve a professional result.