
Image Source: i.ytimg.com
Step-by-Step: Install Sink Strainer on Cast Iron
Can I install a sink strainer on a cast iron sink? Yes, you absolutely can install a sink strainer on a cast iron sink. This guide will show you the best way to install a sink strainer on cast iron, and how to fix a sink strainer in cast iron. We’ll also cover replacing a kitchen sink strainer on cast iron and how to fit a sink strainer cast iron.
Installing a new sink strainer cast iron is a common DIY task, but working with cast iron requires a slightly different approach than other sink materials. This in-depth guide will walk you through the entire process of cast iron sink strainer installation, from gathering your tools to the final tightening. We’ll explore replacing kitchen sink strainer cast iron and ensure a watertight seal for your kitchen sink drain assembly cast iron.
Cast iron sinks are known for their durability and classic look. However, their weight and material can make some plumbing tasks seem daunting. Don’t let that deter you! With the right preparation and technique, installing a new sink strainer cast iron is entirely achievable. We’ll break down how to fit a sink strainer cast iron correctly, ensuring your new strainer is secure and leak-free. This process is crucial for maintaining your cast iron plumbing strainer fitting and preventing water damage.
Gathering Your Tools and Supplies
Before you begin securing sink strainer cast iron, it’s essential to have all the necessary tools and supplies ready. This will make the installation process smooth and efficient.
Essential Tools:
- Adjustable Wrench or Pipe Wrench: For tightening and loosening the strainer assembly. A pipe wrench offers a stronger grip, which can be helpful for cast iron.
- Plumber’s Putty: A malleable sealing compound used around the flange to create a watertight barrier.
- Silicone Caulk (Optional, but recommended for extra sealing): A good alternative or addition to plumber’s putty, especially in damp environments.
- Screwdriver (Phillips or Flathead, depending on the strainer type): For securing some strainer components.
- Bucket: To catch any residual water in the drainpipe.
- Old Rags or Towels: For wiping up spills and excess putty.
- Safety Glasses: To protect your eyes from debris.
- Gloves: To keep your hands clean and protected.
- Wire Brush: To clean the drain opening in the cast iron sink.
- Pliers (Channel Locks or Slip-Joint): Can be useful for holding parts or tightening.
Essential Supplies:
- New Sink Strainer Assembly: Ensure it’s designed for kitchen sinks and is compatible with standard drain sizes. These usually come with a flange, a basket, a lock nut, and rubber gaskets.
- Drain Pipe Washer/Gasket: Some strainers include this, but it’s good to have a spare, especially for older plumbing.
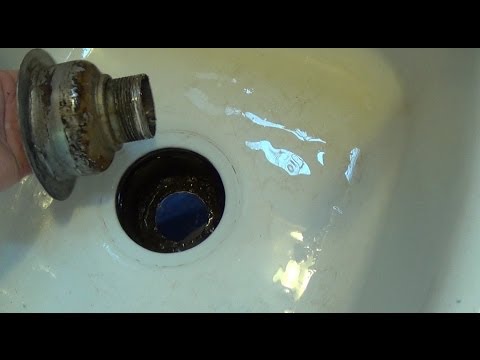
Step 1: Removing the Old Strainer
If you are replacing kitchen sink strainer cast iron, the first step is to carefully remove the old one.
- Clear the Area: Remove any dishes, cleaning supplies, or other items from under the sink to give yourself ample working space. Place your bucket underneath the drain pipe to catch any water that might spill out.
- Loosen the Lock Nut: Look for the large lock nut that secures the strainer assembly to the underside of the sink. Use your adjustable wrench or pipe wrench to turn this nut counter-clockwise. It might be tight, so apply steady pressure.
- Disconnect the Drainpipe: Once the lock nut is loose, you may need to disconnect the drainpipe (P-trap) from the tailpiece of the old strainer. This usually involves unscrewing a large plastic or metal nut connecting the two. Have rags ready for any residual water.
- Remove the Old Strainer Assembly: With the lock nut and drainpipe disconnected, you should be able to pull the old strainer assembly away from the bottom of the sink.
- Clean the Drain Opening: Use your wire brush to thoroughly clean the drain opening in the cast iron sink. Remove any old plumber’s putty, caulk, rust, or debris. A clean surface is crucial for a good seal with the new strainer.
Step 2: Preparing the New Strainer and Sink
Proper preparation is key to how to fit a sink strainer cast iron effectively.
- Inspect the New Strainer: Unpack your new sink strainer and lay out all the parts: the flange (the visible part inside the sink), the rubber gaskets, the friction washer (often made of fiber or rubber), the lock nut, and any screws or clips.
- Clean the Flange: Ensure the flange itself is clean and free from any manufacturing oils or debris.
- Apply Plumber’s Putty or Silicone: This is where you create the watertight seal.
- Plumber’s Putty Method: Take a generous amount of plumber’s putty and roll it into a rope, about 1/2 inch in diameter. Place this rope evenly around the underside of the strainer flange. This rope of putty will be compressed when the flange is seated into the sink drain opening, creating a seal.
- Silicone Caulk Method: Alternatively, you can use silicone caulk. Apply a continuous bead of silicone caulk around the underside of the flange. If you’re aiming for the best way to install sink strainer cast iron, a combination of both can be highly effective, with putty as the primary seal and a thin bead of silicone as a backup.
Step 3: Installing the New Strainer into the Cast Iron Sink
Now it’s time to put the new strainer in place. This is where you’ll be installing a new sink strainer cast iron.
- Insert the Flange: Carefully press the flange (with the putty or caulk applied) into the drain opening from the top of the sink. Make sure it’s centered.
- Add the Gaskets and Washer: From the underside of the sink, slide the rubber gasket (usually the larger one) over the threaded shank of the strainer, followed by the friction washer, and then the metal washer (if your kit includes one). The order is typically: sink drain hole -> flange -> rubber gasket -> friction washer -> metal washer -> lock nut.
- Thread the Lock Nut: Screw the large lock nut onto the threaded shank of the strainer. Hand-tighten it as much as you can.
Step 4: Securing the Sink Strainer
Securing sink strainer cast iron requires firm but careful tightening to avoid damaging the sink or the strainer.
- Tighten the Lock Nut: Use your adjustable wrench or pipe wrench to tighten the lock nut.
- For Cast Iron: Cast iron can be more brittle than stainless steel or porcelain, so avoid over-tightening. Tighten it until the lock nut is snug and the strainer flange in the sink doesn’t move when you try to twist it. You want it firm enough to compress the putty/caulk and create a seal, but not so tight that you risk cracking the cast iron.
- Check for Wobble: Once the lock nut is tight, gently try to wiggle the strainer flange from inside the sink. If it moves, tighten the lock nut a little more.
Step 5: Reattaching the Drainpipe and Testing
This step involves connecting your kitchen sink drain parts cast iron back together.
- Reattach the Drainpipe: Align the drainpipe (P-trap) with the tailpiece of the new strainer assembly. Screw the connecting nut back on hand-tight.
- Tighten Drainpipe Connections: Use your wrench to tighten the drainpipe connecting nuts. Again, don’t over-tighten, especially if you have plastic pipes. A snug fit is usually sufficient.
- Test for Leaks: This is the most crucial part of fixing sink strainer cast iron correctly.
- Fill the Sink: Place the stopper in the drain to fill the sink with a few inches of water.
- Observe: Watch closely for any drips or leaks around the strainer flange inside the sink and at all drainpipe connections.
- Check While Draining: Once you’ve confirmed no leaks with a full sink, pull the stopper and let the water drain. Continue to observe all connections as the water flows out.
- Address Leaks:
- Strainer Flange Leak: If you see a leak from under the sink around the strainer flange, it usually means the plumber’s putty or caulk didn’t create a perfect seal. You’ll need to loosen the lock nut, remove the strainer, reapply fresh putty or caulk, and retighten.
- Drainpipe Connection Leak: If the leak is at a drainpipe connection, try tightening the nut slightly. If it persists, you may need to loosen the connection, check the washer, and re-tighten. Sometimes, a new washer is needed.
Frequently Asked Questions About Cast Iron Sink Strainer Installation
-
Q1: Do I need special tools for cast iron sinks?
While standard plumbing tools work, a pipe wrench can offer a better grip for tightening components on a cast iron sink. Be mindful of the material’s weight and potential brittleness to avoid over-tightening. -
Q2: What’s the best sealant for a cast iron sink strainer?
Plumber’s putty is the traditional and most common sealant. For extra security, especially in areas prone to moisture, a bead of silicone caulk can be applied around the flange as a secondary sealant. -
Q3: How tight should I make the lock nut on a cast iron sink?
Tighten it until it’s snug and the strainer doesn’t move. You want enough pressure to compress the putty or caulk for a good seal, but avoid excessive force that could crack the cast iron. -
Q4: My new strainer is leaking from the top. What did I do wrong?
This usually means the sealant (plumber’s putty or caulk) didn’t create a proper seal. You’ll need to loosen the lock nut from underneath, remove the strainer, clean off the old sealant, reapply fresh putty or caulk around the flange, and reinstall. -
Q5: Can I use PTFE tape (Teflon tape) on sink strainer threads?
PTFE tape is generally not recommended for sink strainer threads that use compression gaskets for sealing. The gaskets are designed to create a watertight seal on their own. PTFE tape is more for threaded pipe connections where metal-to-metal contact is expected.
By following these detailed steps, you can confidently tackle the task of installing a new sink strainer cast iron and ensure your kitchen sink drain is functioning perfectly. Remember to work methodically and not rush the process, especially when securing sink strainer cast iron. With a little patience, you’ll have a properly fitted and leak-free drain. This is the best way to install sink strainer cast iron for lasting results.