
Can you strip paint off kitchen cabinets yourself? Yes, you absolutely can! With the right approach and safety precautions, DIY cabinet stripping is a rewarding project that can completely transform your kitchen. This guide will walk you through the entire process of removing old paint from your kitchen cabinets, from choosing the best methods to cleaning up afterward. We’ll cover everything you need to know for successful cabinet refinishing.
Stripping paint off kitchen cabinets might seem like a daunting task, but it’s entirely achievable for the home renovator. Whether you’re aiming for a natural wood finish or a fresh coat of paint, removing the old layers is the crucial first step. This process is key to achieving a smooth, durable, and professional-looking result for your cabinet refinishing project.
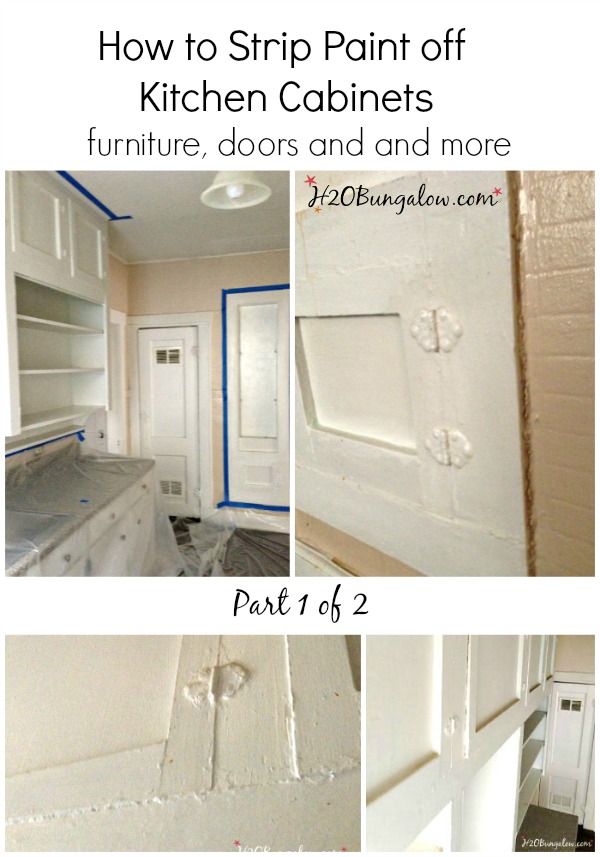
Image Source: h2obungalow.com
Deciphering the Best Method for Paint Removal
Choosing the right method for removing paint from your kitchen cabinets depends on several factors: the type of paint used, the age and condition of the cabinets, the material they are made from (wood, laminate, metal), and your personal preference for tools and chemicals. Understanding these elements will help you select the safest and most effective approach.
Chemical Paint Stripper: A Powerful Ally
Chemical paint remover is often the go-to solution for tough, multiple layers of paint or stubborn finishes. These products work by breaking down the chemical bonds in paint, allowing it to be scraped away.
Types of Chemical Paint Strippers:
- Methylene Chloride-Based Strippers: These are historically the most powerful and fastest-acting strippers. However, they are also the most toxic and require significant safety precautions. Due to health concerns, many manufacturers have reformulated or discontinued methylene chloride products.
- NMP (N-Methylpyrrolidone) Based Strippers: NMP is a more modern alternative to methylene chloride. While still requiring careful handling, it is generally considered less toxic. NMP strippers are effective but may work a bit slower than methylene chloride.
- Citrus-Based or Soy-Based Strippers: These are the most environmentally friendly and least toxic options. They are typically made from natural ingredients and have a much milder odor. However, they are also the slowest-acting and may not be effective on thick or multiple layers of old paint, often requiring multiple applications. They are best suited for latex or water-based paints.
Safety First When Using Chemical Strippers:
Working with chemical paint removers necessitates strict adherence to safety protocols. Always wear:
- Chemical-resistant gloves: Nitrile or neoprene gloves are recommended.
- Eye protection: Goggles or a face shield to prevent splashes.
- Respirator: A respirator with organic vapor cartridges is essential to avoid inhaling fumes, especially with stronger chemical strippers.
- Protective clothing: Long sleeves, long pants, and closed-toe shoes.
Ensure good ventilation by opening windows and doors, or use fans to circulate air. Always read and follow the manufacturer’s instructions precisely. Have a designated area for working, and protect surrounding surfaces with drop cloths or plastic sheeting.
Application and Removal with Chemical Strippers:
- Preparation: Clean the cabinet surfaces to remove grease and grime.
- Apply Stripper: Using a disposable brush, apply a thick, even coat of the chemical paint remover to a small section of the cabinet at a time. Avoid brushing back and forth too much, as this can re-activate the stripper.
- Wait for Action: Allow the stripper to sit for the time recommended by the manufacturer. You’ll see the paint start to bubble and lift.
- Scrape Away Paint: Use a putty knife or scraper (plastic scrapers are less likely to damage wood) to gently lift the softened paint. Work in the direction of the wood grain.
- Rinse and Neutralize: After scraping, you’ll need to clean the surface to remove any residual stripper and neutralize the chemicals. Follow the stripper manufacturer’s instructions for this step, which often involves using a denatured alcohol, mineral spirits, or a specific wash solution.
Heat Gun Paint Removal: Harnessing the Power of Heat
A heat gun is another effective method for stripping paint, particularly on wood. It works by heating the paint until it softens and blisters, making it easier to scrape off.
How to Use a Heat Gun Safely:
- Ventilation: As with chemical strippers, good ventilation is crucial.
- Protective Gear: Wear heat-resistant gloves, safety glasses, and long sleeves.
- Fire Safety: Keep a fire extinguisher nearby. Never use a heat gun near flammable materials or liquids. Be aware that old paint may contain lead, which can vaporize and become hazardous when heated. If you suspect lead paint (common in homes built before 1978), professional abatement or lead-safe practices are essential.
- Nozzle Selection: Use the appropriate nozzle for your heat gun, often a wide-spreading or scraper nozzle.
The Heat Gun Process:
- Heat the Paint: Hold the heat gun a few inches from the cabinet surface, moving it back and forth to heat a small area evenly.
- Scrape Blistered Paint: As the paint blisters, use a scraper or putty knife to gently lift it away. Work in manageable sections.
- Continue Section by Section: Move the heat gun to the next section and repeat the process.
- Clean Residue: After all the paint is removed, you may have some residue or softened paint. This can often be cleaned with mineral spirits or denatured alcohol.
Sanding Cabinets: The Abrasive Approach
Sanding cabinets can be used as a primary paint removal method or as a follow-up to chemical or heat gun stripping to smooth the surface and remove any remaining traces of paint.
Types of Sanding and When to Use Them:
- Orbital Sander: Good for flat, large surfaces. It’s efficient but can leave swirl marks if not used carefully.
- Detail Sander: Useful for corners and smaller areas.
- Sanding Blocks or Sandpaper: Essential for intricate details, curved areas, and tight corners that power sanders can’t reach.
The Sanding Process for Paint Removal:
- Start with Coarse Grit: Begin with a coarser grit sandpaper (e.g., 60-80 grit) to quickly remove the bulk of the paint.
- Progress to Finer Grits: Gradually move to finer grits (e.g., 120, then 180 or 220) to smooth the surface.
- Direction of Sanding: Always sand in the direction of the wood grain to avoid visible scratches.
- Dust Control: Sanding creates a lot of dust. Use a shop vacuum with a dust collection system attached to your sander or a dust collection bag. Wear a dust mask or respirator and eye protection.
- Manual Sanding for Details: For detailed areas, use sanding sponges or folded sandpaper.
When Sanding is NOT Enough:
Sanding alone is often not practical or effective for removing multiple layers of thick paint or for intricate details. It can also be very time-consuming. It’s often best used in conjunction with other methods.
Step-by-Step Guide: Stripping Wood Cabinets
Removing old paint from wood cabinets requires a methodical approach. This guide focuses on a common scenario: cabinets with several layers of paint.
Step 1: Preparation is Key
Before you start any stripping, proper preparation is crucial for both safety and a good outcome.
- Remove Cabinet Doors and Drawers: Take all doors and drawer fronts off their hinges and remove drawer boxes. This makes the job much easier and allows you to access all surfaces.
- Label Everything: Use masking tape and a marker to label each door, drawer, and corresponding cabinet frame location. This ensures you can reassemble everything correctly.
- Protect Your Workspace: Lay down drop cloths or plastic sheeting over your countertops, floors, and any surrounding furniture. If working indoors, ensure excellent ventilation.
- Gather Your Supplies: Have all your chosen stripping materials, tools, and safety gear ready.
Step 2: Choose Your Stripping Method(s)
As discussed, you have a few options:
- Chemical Paint Remover: Good for thick paint, but requires caution.
- Heat Gun Paint Removal: Effective for wood, but be mindful of lead paint and heat damage.
- Sanding: Best for light paint layers or as a finishing step.
Often, a combination of methods works best. For example, using a chemical stripper or heat gun to remove the bulk of the paint, followed by sanding to smooth the surface.
Step 3: Executing the Stripping Process
Let’s assume you’re using a chemical stripper for this example, as it’s a common and effective method for cabinet refinishing.
Applying Chemical Paint Remover:
- Apply Generously: Using a disposable paintbrush, apply a thick, even layer of your chosen chemical paint remover to one door or section at a time. Don’t brush it out too thinly; you want it to soften the paint effectively.
- Wait Patiently: Allow the stripper to work for the time specified by the manufacturer. You will see the paint begin to wrinkle, bubble, or lift from the wood. This can take anywhere from 15 minutes to an hour or more, depending on the stripper and the paint.
- Scrape with Care: Use a plastic scraper or a dull putty knife to gently push the softened paint off the surface. Work with the grain of the wood. For detailed areas, use smaller scrapers or stiff-bristled brushes. If the paint isn’t lifting easily, apply more stripper to that area and wait longer.
- Dealing with Stubborn Paint: Some older paints, especially oil-based ones or multiple layers, might be very resistant. You may need to apply a second coat of stripper or use a fine-grit sandpaper (used dry, without power) in combination with the scraper.
Post-Stripping Cleanup:
- Remove Residue: Once you’ve scraped off as much paint as possible, you need to clean the surface to remove any stripper residue and remaining paint bits. This is crucial for the success of any new finish.
- Follow Manufacturer Instructions: Each chemical paint remover will have specific instructions for cleaning. This often involves wiping the surface with mineral spirits, denatured alcohol, or a special neutralizing wash. Use clean rags and change them frequently.
- Inspect and Repeat if Necessary: Examine the cabinet surface. If there are still traces of paint, especially in the grain or corners, you may need to repeat the stripping process on those areas or use a fine-grit sandpaper.
Step 4: Sanding for a Smooth Finish
After the bulk of the paint is removed and the surface is clean, it’s time for sanding. This step is vital for preparing the wood for staining or painting.
- Medium Grit Sanding: Start with a medium-grit sandpaper (around 120-150 grit) using a sanding block or an orbital sander. Sand in the direction of the wood grain, applying even pressure. This will remove any minor imperfections and smooth out the surface.
- Fine Grit Sanding: Follow up with a finer grit sandpaper (180-220 grit). This will create a very smooth surface, ready for your chosen finish. For very fine finishes, you might even go up to 320 grit.
- Clean Dust Thoroughly: After sanding, it’s essential to remove all dust. Use a vacuum cleaner with a brush attachment, followed by a tack cloth. A tack cloth is slightly sticky and picks up even the finest dust particles.
Step 5: Preparing for the New Finish
Once your cabinets are stripped and sanded smooth, they are ready for their new look.
- Inspect for Damage: Check the wood for any gouges, cracks, or repairs needed. Fill any imperfections with wood filler and allow it to dry completely before sanding smooth.
- Final Cleaning: Wipe down the cabinets one last time with a tack cloth to ensure no dust remains.
- Stain or Paint: You can now apply your chosen stain or paint. Follow the product manufacturer’s instructions for application, drying times, and number of coats. For stained cabinets, apply a clear protective topcoat like polyurethane for durability. For painted cabinets, a good primer is often recommended before painting.
Alternatives to Full Stripping
Sometimes, a full paint strip isn’t necessary, or you might be looking for a less intensive approach.
Feathering Edges and Light Sanding
If your existing paint is in decent condition with only minor chips or a desire to change the color, you might not need to strip it completely.
- Clean Thoroughly: Start by cleaning the cabinets to remove all grease and grime.
- Light Sanding: Lightly sand the entire surface with a fine-grit sandpaper (e.g., 180-220 grit). This scuffs the surface, creating a better grip for a new coat of paint or primer.
- Feather Edges: For areas with chipped paint, use sandpaper to gently feather the edges so they blend smoothly with the surrounding paint.
- Dust Removal: Clean off all dust with a vacuum and tack cloth.
- Prime and Paint: Apply a good quality primer, followed by your chosen paint.
This method is much faster but won’t give you a natural wood finish.
Using a Furniture Stripper on More Delicate Surfaces
For cabinets with delicate details, veneers, or antique finishes, a gentler approach might be needed. Some furniture stripper products are formulated for more sensitive materials. Always test in an inconspicuous area first.
Specialized Scenarios for Removing Old Paint
Stripping Laminate Cabinets
Laminate cabinets present a unique challenge. Most chemical paint removers and heat guns can damage or melt the laminate material.
- Best Approach: Light sanding might be an option if the laminate is intact and you’re preparing for a new paint job. For very specific situations, there are specialty strippers designed for laminate, but these are less common and can be difficult to find.
- Consider Painting Over: Often, the most practical solution for laminate cabinets is to clean them thoroughly, lightly sand them to create a scuff surface, use a bonding primer, and then paint.
Removing Paint from Metal Cabinets
Metal cabinets typically have baked-on enamel or powder coating.
- Chemical Strippers: Some chemical strippers can work, but always test first, as they can sometimes etch or discolor the metal.
- Sanding: Sanding is often effective but can be labor-intensive on a large scale. Start with coarse grit and move to finer grits. A wire brush can also be helpful for textured or heavily coated metal.
- Media Blasting: For severe cases or a desire for a perfectly clean surface, professional media blasting (like sandblasting or soda blasting) is the most effective method but is expensive and not a DIY option for most.
Tools and Materials Checklist
Here’s a comprehensive list of what you might need for DIY cabinet stripping:
Safety Gear:
- Chemical-resistant gloves (nitrile or neoprene)
- Safety goggles or face shield
- Respirator with organic vapor cartridges
- Dust mask (for sanding)
- Protective clothing (long sleeves, pants, closed-toe shoes)
- Fire extinguisher (if using a heat gun)
Stripping Tools & Materials:
- Chosen paint stripper (chemical, NMP, citrus-based)
- Heat gun
- Putty knives and scrapers (plastic is best to avoid scratching wood)
- Small detail scrapers or old toothbrushes/stiff brushes
- Sandpaper in various grits (60, 80, 120, 180, 220)
- Sanding blocks or an orbital sander
- Orbital sander with dust collection
- Mineral spirits or denatured alcohol for cleaning
- Tack cloths
Preparation & Cleanup:
- Drop cloths or plastic sheeting
- Masking tape
- Painter’s tape
- Rags (lots of old rags!)
- Buckets
- Vacuum cleaner
- Wood filler (if needed)
- Primer and paint/stain for finishing
Frequently Asked Questions (FAQ)
Q1: What is the fastest way to strip paint off kitchen cabinets?
A1: The fastest way is usually a strong chemical paint stripper, like those containing methylene chloride or NMP, combined with scraping. However, this method requires the most stringent safety precautions.
Q2: Can I strip paint off cabinets with just sandpaper?
A2: You can strip paint with sandpaper, but it’s very time-consuming and only practical for very thin, single layers of paint or for touching up small areas. For multiple layers, it’s usually best combined with chemical or heat methods.
Q3: How do I know if my old paint contains lead?
A3: Paint applied in homes built before 1978 is presumed to contain lead. If you suspect lead paint, it’s best to use lead-safe practices: wet sanding, chemical strippers that don’t create dust, or hire a certified lead abatement professional. Never dry sand or use a heat gun on suspected lead paint without proper containment and respiratory protection.
Q4: What is the best way to clean cabinets after using chemical stripper?
A4: Always follow the manufacturer’s instructions for the specific chemical paint remover you used. Typically, this involves wiping down the surface with mineral spirits or denatured alcohol using clean rags to remove all residue.
Q5: Will a heat gun damage wood cabinets?
A5: A heat gun can damage wood if held too close or in one spot for too long. It can scorch or burn the wood. Use a constant sweeping motion and keep it a few inches away from the surface.
Q6: How do I strip paint from detailed cabinet areas?
A6: For intricate details, use smaller scraping tools, old toothbrushes, stiff nylon brushes, or even dental picks after applying a chemical stripper. Sanding these areas by hand with fine-grit sandpaper or sanding sponges is also effective.
Q7: Is it worth stripping old cabinets?
A7: It is absolutely worth stripping cabinets if you desire a natural wood finish or if the existing paint is peeling badly and cannot be properly prepped for a new coat. It significantly improves the final look and longevity of your cabinet refinishing project.
Q8: Can I strip laminate cabinets?
A8: Stripping laminate cabinets is difficult and often not recommended, as most strippers can damage the laminate material. Light sanding, priming with a bonding primer, and repainting is usually the best approach for laminate.
Q9: How do I get rid of paint stripper smell?
A9: Ensure excellent ventilation during and after stripping. Washing the cabinets thoroughly with the recommended cleaning solution (mineral spirits or denatured alcohol) and airing out the room helps dissipate the smell.
Q10: What are the main risks of stripping paint?
A10: The main risks include exposure to toxic chemicals from paint strippers, inhalation of hazardous fumes or lead dust (if lead paint is present), burns from a heat gun, and physical injury from scraping tools. Always prioritize safety.
By carefully following these steps and prioritizing safety, you can successfully strip paint off your kitchen cabinets and pave the way for a beautiful cabinet refinishing project. Remember, patience and attention to detail are key to achieving professional-looking results.