
Can you spray paint kitchen cabinets? Yes, you absolutely can spray paint kitchen cabinets, and it’s often the best way to achieve a smooth, professional-looking finish. This guide will walk you through everything you need to know to successfully spray paint your kitchen cabinets, from choosing the right equipment to achieving a flawless final coat.
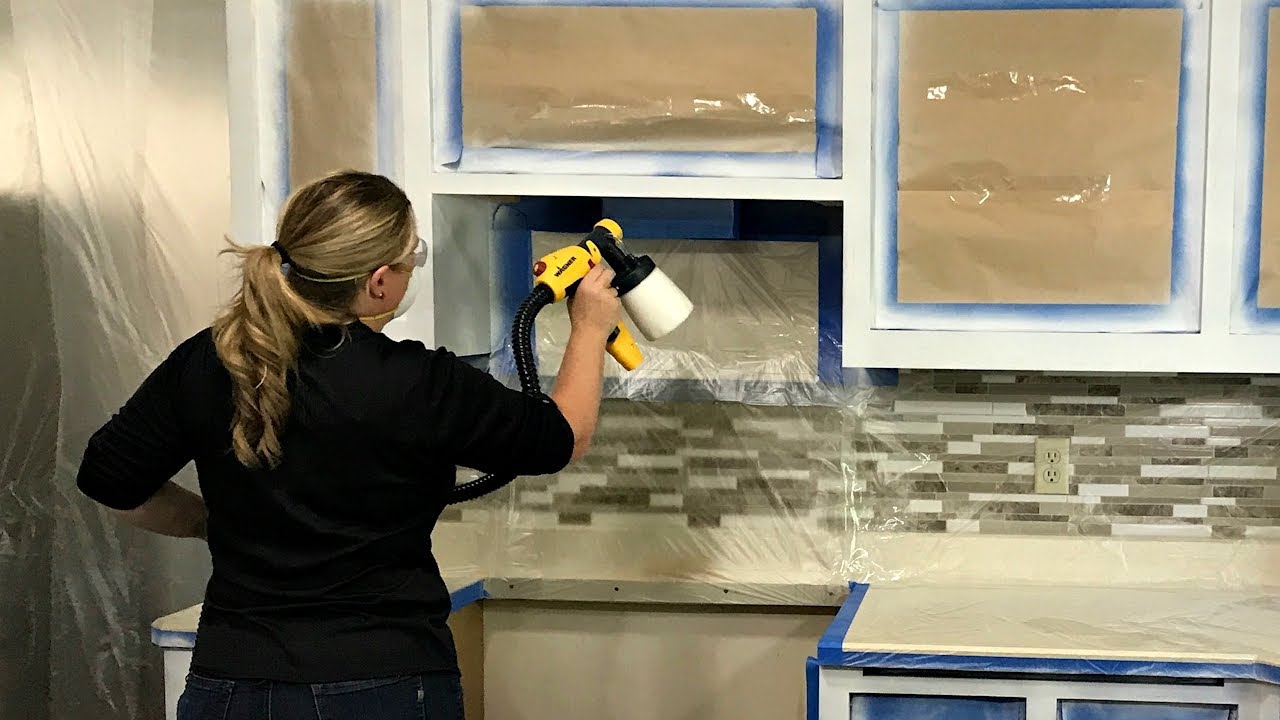
Image Source: i.ytimg.com
Deciphering the Benefits of Spray Painting Cabinets
When you’re aiming for a factory-like finish on your kitchen cabinets, spraying is the way to go. Unlike brushing or rolling, spraying allows for a thin, even coat of paint that dries uniformly, eliminating brush strokes and roller marks. This results in a sleek, durable finish that can transform the look of your entire kitchen.
Here’s why spraying is superior for cabinet painting:
- Smooth, Flawless Finish: Spraying lays down a thin, consistent layer of paint that dries to a glass-like smoothness, free from imperfections.
- Even Coverage: It’s much easier to achieve uniform coverage on intricate cabinet door details and edges with a sprayer.
- Efficiency: While setup takes time, the actual painting process is much faster than traditional methods.
- Durability: A properly applied spray finish is incredibly durable and resistant to chipping and wear.
- Professional Look: The final result mimics the high-quality finish you’d find on new cabinetry.
Choosing Your Kitchen Cabinet Painting Sprayer
Selecting the right spray gun for cabinets is crucial for a successful project. Not all sprayers are created equal, and the type you choose will significantly impact your results.
The Best Sprayer for Kitchen Cabinets: HVLP vs. Airless
When it comes to kitchen cabinet painting sprayer options, you’ll primarily encounter two types: HVLP (High Volume Low Pressure) and Airless. For cabinet doors and frames, HVLP sprayers are generally preferred due to their precision and reduced overspray.
HVLP Sprayer Cabinet Painting
HVLP sprayers work by delivering a high volume of air at a low pressure. This combination atomizes the paint finely, allowing it to be applied smoothly and with minimal overspray. This is essential for cabinet painting, where you want to control the paint application precisely.
Advantages of HVLP Sprayers:
- Low Overspray: Less paint wasted and less masking required.
- Fine Atomization: Produces a very smooth, even finish.
- Excellent Control: Ideal for detailed work and achieving sharp lines.
- Suitable for Various Paints: Can handle lacquers, enamels, and stains.
Disadvantages of HVLP Sprayers:
- Slower Application: Can take longer to cover large areas compared to airless sprayers.
- Requires Thinner Paint: Often requires thinning of the paint to the correct viscosity.
- More Expensive: Generally a higher upfront cost than basic airless models.
Airless Sprayers
Airless sprayers use high pressure to force paint through a small tip, atomizing it without the need for compressed air. They are faster for large projects but can produce more overspray and a less refined finish on intricate surfaces like cabinet doors.
Advantages of Airless Sprayers:
- Fast Application: Excellent for large surfaces like walls.
- No Compressor Needed: Self-contained unit.
Disadvantages of Airless Sprayers:
- High Overspray: Requires extensive masking and can be messy.
- Less Control: Can be challenging to get a smooth, even finish on detailed work.
- Can Create Orange Peel: The high pressure can sometimes create a textured finish.
Recommendation: For spray paint kitchen cabinets, an HVLP sprayer is the superior choice. Look for models specifically designed for furniture or cabinetry.
Key Features to Look For in a Cabinet Sprayer
When purchasing a spray gun for cabinets, consider these features:
- Adjustable Fan Pattern: Allows you to control the width of the spray.
- Adjustable Flow Rate: Lets you regulate how much paint is dispensed.
- Multiple Nozzle/Tip Sizes: Different sizes are better suited for different paint viscosities.
- Cup Size: A larger cup means less refilling, but a heavier sprayer.
- Ease of Cleaning: Crucial for maintaining the sprayer’s performance.
Popular HVLP Sprayer Brands for Cabinets:
- Wagner
- Graco
- DeVilbiss
Comprehending How to Prep Kitchen Cabinets for Spraying
Proper preparation is the most critical step in how to prep kitchen cabinets for spraying. Skipping or rushing this phase will lead to a subpar finish, regardless of how skilled your spraying technique is.
The Essential Prep Steps
- Remove Doors and Drawers: Take all cabinet doors and drawer fronts off their hinges and remove drawers. This allows you to spray each piece individually for the best coverage.
- Label Everything: As you remove doors and drawers, label them with masking tape and a marker. Indicate which cabinet carcass they belong to and their position (e.g., “Upper Left Door – Front,” “Drawer Front – Center”). This will save you immense frustration during reassembly.
- Clean Thoroughly: This is non-negotiable. Kitchen cabinets accumulate grease, grime, and food residue. Use a good degreaser (like TSP substitute or a dedicated kitchen degreaser) and a sponge or cloth. Rinse thoroughly with clean water and let them dry completely. Any remaining grease will prevent paint adhesion.
- Repair Imperfections: Fill any holes, dents, or gouges with wood filler. Once dry, sand them smooth.
- Sand for Adhesion: Even if your cabinets are in good condition, you need to create a surface that the primer and paint can adhere to.
- Sanding Technique: Use 120-150 grit sandpaper. You don’t need to remove the old finish, just scuff it up. A sanding block or an orbital sander can be used on flat surfaces. For details and edges, fine-grit sanding sponges are ideal.
- Dust Removal: After sanding, meticulously remove all dust. Use a vacuum with a brush attachment, followed by tack cloths. Ensure every surface is dust-free.
- Apply Cabinet Spraying Primer: Primer is essential for adhesion, coverage, and a uniform base color.
- Primer Type: For cabinets, use a high-quality bonding primer or a stain-blocking primer. Shellac-based primers are excellent for blocking stains and providing a hard surface. Water-based acrylic enamels are also popular.
- Application: Apply a thin, even coat of primer. Allow it to dry completely according to the manufacturer’s instructions.
- Sanding the Primer: Once the primer is dry, lightly sand it with 220-320 grit sandpaper. This will smooth out any imperfections and create an even surface for your topcoat. Wipe away all dust with tack cloths.
- Masking: This is where you protect everything you don’t want painted.
- Cabinets: For the cabinet boxes (carcasses), use painter’s tape to mask off any areas you don’t want sprayed, such as hinges, interiors, or countertops. Use plastic sheeting or large paper rolls to cover adjacent walls, floors, and appliances.
- Doors/Drawers: If you are not removing hardware, mask it off meticulously. It’s often easier to remove hardware entirely if possible.
Mastering the Cabinet Spraying Technique
Achieving a professional cabinet spraying technique requires practice and attention to detail. Here’s how to do it right.
Setting Up Your Spraying Environment
- Ventilation: Ensure good airflow. Open windows and doors or use fans to circulate air. If working indoors, a well-ventilated area is crucial.
- Dust-Free: The ideal spraying environment is dust-free. Consider setting up in a garage or a separate room where dust is minimized. A temporary spray booth can be constructed using plastic sheeting.
- Lighting: Good lighting is essential to see what you’re doing and ensure even coverage.
Preparing Your Paint for Spraying
- Paint Type: Use high-quality paint specifically designed for cabinets. Acrylic latex enamels or oil-based enamels are common choices. Many manufacturers offer paints formulated for spraying.
- Paint Thinning: Follow your sprayer manufacturer’s recommendations for thinning. Most paints will need to be thinned for HVLP sprayers to achieve the correct viscosity for atomization. Use the recommended thinner for your paint type (water for latex, lacquer thinner for lacquer, etc.).
- Straining: Always strain your paint through a paint strainer before pouring it into your sprayer cup. This removes any dried paint chips or debris that could clog the nozzle and ruin your finish.
The Spraying Process: Step-by-Step
- Test Spray: Before painting your actual cabinets, do a test spray on a piece of cardboard or scrap wood. Adjust the paint flow, air pressure, and fan pattern until you achieve a smooth, even spray with no sputtering or runs.
- Holding the Sprayer:
- Distance: Hold the spray gun about 8-12 inches away from the surface.
- Trigger Control: Start the spray before the edge of your work surface and release the trigger after you pass the opposite edge. This prevents paint buildup at the start and end of each pass.
- Movement: Move your arm in a smooth, consistent motion. Keep the sprayer perpendicular to the surface to avoid an uneven pattern.
- Painting Doors and Drawer Fronts:
- Start with Edges: Begin by spraying the edges of the doors and drawer fronts first.
- Spray Faces: Then, spray the faces of the doors and drawer fronts.
- Apply Thin Coats: Apply multiple thin coats rather than one thick coat. This allows for better coverage, prevents runs, and builds a durable finish.
- Overlap: Overlap each spray pass by about 50% to ensure complete coverage and a uniform appearance.
- Drying Between Coats: Allow adequate drying time between coats as recommended by the paint manufacturer. Lightly sand with 320-400 grit sandpaper between coats if necessary for a smoother finish, and always wipe away dust with a tack cloth.
- Painting Cabinet Boxes (Carcasses):
- Work in Sections: Spray one section of the cabinet carcass at a time.
- Consistent Motion: Maintain a consistent distance and speed.
- Inside vs. Outside: If spraying the inside of cabinets, be mindful of overspray onto adjacent surfaces.
Achieving the Cabinet Spraying Finish
The cabinet spraying finish is the culmination of your efforts. Aim for a smooth, uniform sheen with no visible imperfections.
Tips for a Better Finish:
- Patience: Rushing the process will lead to mistakes.
- Humidity: Avoid spraying in high humidity, as it can affect drying time and finish quality.
- Cleanliness: Keep your sprayer clean and free of clogs.
- Practice: The more you spray, the better you’ll become.
Selecting the Right Paint and Primer
The quality of your paint and primer directly impacts the final cabinet spraying finish.
Paint Choices for Cabinets
- Acrylic Latex Enamels: These are popular for their durability, ease of cleanup, and low VOCs. Look for “cabinet coat” or “cabinet paint” formulations.
- Oil-Based Enamels: Offer a harder, more durable finish but are more difficult to clean up and have stronger fumes.
- Lacquers: Provide a very hard, smooth finish but are more challenging to work with and require specialized thinners and ventilation.
Primer Selection
As mentioned in the prep section, a good cabinet spraying primer is crucial.
- Bonding Primers: Excellent for adhering to slick surfaces like laminate or previously painted/varnished wood.
- Stain-Blocking Primers: Ideal for wood with tannins (like oak or cherry) that can bleed through paint. Shellac-based primers are the best stain blockers.
Spray Painting Cabinet Doors: A Closer Look
Spray painting cabinet doors requires a slightly different approach than the boxes due to their thin profile and often intricate details.
Techniques for Spray Painting Cabinet Doors
- Setup: Lay your cabinet doors flat on a clean, raised surface. Using painter’s pyramids or blocks of wood allows you to spray the entire door, including the edges, without the door sticking to your work surface. Ensure they are level.
- Start with Edges: Spray the edges first, holding the sprayer at a consistent distance and moving smoothly around the perimeter.
- Spray the Face: Move to the face of the door. Start at one edge, trigger the sprayer, move across the door in a consistent motion, and release the trigger past the opposite edge.
- Overlap and Repeat: Overlap each pass by about 50% for complete coverage. Apply thin, even coats.
- Allow Drying: Let each coat dry completely before applying the next.
- Consider the Back: If you’re painting both sides, ensure the first side is fully dry before flipping and repeating the process.
Spray Painting Cabinet Doors vs. Spraying the Boxes
While you can spray both doors and boxes with the same technique, there are considerations:
- Doors: Generally easier to get a perfect finish due to their flat, accessible nature.
- Boxes: Require more careful masking to protect interiors and adjacent surfaces. You’ll also need to work around hinges and other fixtures.
Maintaining Your Sprayer
Proper maintenance ensures your kitchen cabinet painting sprayer functions optimally for years to come.
Cleaning Your Sprayer
This is the most important maintenance task. Clean your sprayer immediately after each use.
- Empty Excess Paint: Pour any remaining paint back into the original container.
- Flush with Thinner: Fill the cup partially with the appropriate thinner. Attach the lid, then run the sprayer on a low setting, aiming into a waste container, until only thinner sprays out. You may need to repeat this several times.
- Disassemble and Clean: Follow your sprayer’s manual for detailed disassembly instructions. Clean the nozzle, needle, air cap, and cup thoroughly with thinner and a brush.
- Lubricate: Lightly lubricate moving parts as recommended by the manufacturer.
- Reassemble: Reassemble the sprayer and store it in a clean, dry place.
Troubleshooting Common Spraying Issues
Even with the best preparation, you might encounter minor issues.
Common Problems and Solutions
| Problem | Cause | Solution |
|---|---|---|
| Runs or Sags | Too much paint applied; too close to surface | Reduce paint flow; increase distance; apply thinner coats. |
| Orange Peel | Paint too thick; not enough atomization | Thin paint more; adjust air pressure; use a finer tip. |
| Sputtering | Clogged nozzle; insufficient thinning | Clean nozzle; ensure paint is properly thinned and strained. |
| Uneven Coverage | Inconsistent spray pattern; poor overlap | Adjust fan width; ensure 50% overlap; maintain consistent distance and speed. |
| Dust Nibs | Dust in the air or paint | Clean spray area; use tack cloths religiously; strain paint. |
Frequently Asked Questions About Spraying Kitchen Cabinets
Q1: How many coats of paint do I need for kitchen cabinets?
A1: Typically, two to three thin coats of paint are recommended for a durable and even finish. Always follow the paint manufacturer’s guidelines.
Q2: What kind of paint is best for spraying cabinets?
A2: High-quality acrylic latex enamels or oil-based enamels formulated for cabinets are best. Ensure the paint is suitable for spraying.
Q3: Do I need to remove the hardware?
A3: Yes, it is highly recommended to remove all hardware (hinges, knobs, pulls) before painting for the smoothest and most professional finish. If you cannot remove them, meticulous masking is essential.
Q4: Can I spray paint directly over old paint?
A4: Only if the old paint is in excellent condition, well-adhered, and has been properly cleaned and lightly sanded. If there are any doubts, it’s best to prime over the existing finish.
Q5: How long does it take to spray paint kitchen cabinets?
A5: The actual spraying time might only be a few hours, but the entire process, including prep, drying between coats, and cleanup, can take several days to a week or more, depending on the number of doors and the drying times of your chosen paint.
By following this comprehensive guide, you’ll be well-equipped to tackle your kitchen cabinet painting project with confidence, achieving a beautiful, durable, and professional-looking result using your kitchen cabinet painting sprayer.