
Image Source: i.ytimg.com
Kitchen Sink Sprayer Fix: Simple Guide
Yes, you can usually fix a kitchen sink sprayer yourself! Many common issues, like low water pressure or leaks, can be resolved with basic tools and a few simple steps. This guide will walk you through diagnosing and repairing your kitchen faucet sprayer.
When your kitchen sink sprayer stops working as it should, it can be a significant inconvenience. A faulty sprayer can lead to water messes, reduced cleaning efficiency, and overall frustration. Fortunately, most kitchen sprayer problems are not insurmountable and can often be fixed with a little know-how and a few common household tools. Whether your issue is a weak spray, a leak, or a sprayer that won’t activate at all, this comprehensive guide will help you get your kitchen sprayer back in working order. We’ll cover common problems, their causes, and step-by-step solutions, including how to clean a sink sprayer and what to do if your kitchen faucet sprayer has a leaky sprayer hose.
Why Your Kitchen Sink Sprayer Might Be Acting Up
Several factors can contribute to a malfunctioning kitchen faucet sprayer. Identifying the root cause is the first step toward an effective repair. Common culprits include mineral buildup, worn-out parts, or a faulty diverter valve.
Mineral Buildup
Over time, minerals from your water supply can accumulate in the sprayer head and internal components. This buildup restricts water flow, leading to a weak spray or clogged sprayer head. It’s a very common issue, especially in areas with hard water.
Worn-Out Parts
Like any other part of your faucet, the sprayer components can wear down with regular use. Rubber seals, O-rings, and the sprayer hose itself can degrade, causing leaks and a loss of water pressure. A leaky sprayer hose is a prime example of this.
Sprayer Diverter Valve Issues
The sprayer diverter valve is a small component, usually located within the faucet body, that directs water flow between the main spout and the sprayer. If this valve malfunctions, it can prevent the sprayer from working or cause water to leak from both the spout and the sprayer simultaneously.
Kinked or Damaged Hose
The flexible hose connecting the sprayer to the faucet body can become kinked or damaged over time. This can restrict water flow, impacting sprayer performance.
Common Kitchen Sprayer Problems and Their Solutions
Let’s delve into specific issues and how to tackle them.
1. Weak Water Pressure or Sprayer Not Working
This is perhaps the most frequent complaint. A weak spray or a kitchen sink sprayer not working at all is usually due to a blockage.
Possible Causes:
- Clogged Sprayer Head: Mineral deposits are the usual suspects.
- Partially Closed Shut-off Valve: Less common, but worth checking if you have separate shut-off valves for your faucet.
- Debris in the Hose: Small particles can sometimes make their way into the system.
Solutions:
- Cleaning the Sprayer Head: This is your first line of defense.
- How to clean sink sprayer:
- Detach the Sprayer Head: Carefully unscrew the sprayer head from the hose. You might need pliers with a cloth to protect the finish.
- Soak in Vinegar: Place the sprayer head in a small bowl or plastic bag filled with white vinegar. Ensure the head is fully submerged. Vinegar is excellent at dissolving mineral deposits.
- Soaking Time: Leave it to soak for at least a few hours, or preferably overnight for stubborn clogs.
- Scrub and Rinse: After soaking, use an old toothbrush or a small brush to scrub away any loosened debris. Rinse thoroughly with warm water.
- Reassemble: Screw the cleaned sprayer head back onto the hose.
- Test: Turn on the water to test the spray.
- How to clean sink sprayer:
- Checking for Debris in the Hose: If cleaning the head doesn’t help, the blockage might be further down the line.
- Turn off Water Supply: Locate the shut-off valves under your sink (usually behind the wall where the faucet pipes connect) and turn them clockwise to shut off the water.
- Disconnect Hose: Unscrew the sprayer hose from the faucet body under the sink. Have a towel or bucket ready to catch any residual water.
- Flush the Hose: Hold the disconnected end of the hose over a bucket or sink and briefly turn on the water supply valves. This can help flush out any loose debris.
- Inspect the Hose: Check the hose for any kinks or damage.
- Reassemble and Test: Reconnect the hose securely and turn on the water supply.
-
Inspect the Sprayer Diverter Valve: If cleaning the head and flushing the hose don’t resolve the issue, the problem might be with the sprayer diverter valve. This is often a more complex repair.
What is a sprayer diverter valve? The diverter valve is a mechanism inside the faucet that allows you to switch water flow between the main spout and the side sprayer. When you pull the sprayer handle or press a button on the sprayer, it activates the diverter to send water to the sprayer. If it’s stuck, clogged, or broken, it will prevent water from reaching the sprayer.
Fixing the Sprayer Diverter Valve:
1. Turn off Water Supply: Crucial first step.
2. Remove Faucet Handle/Body: This varies greatly by faucet model. You might need to remove decorative caps, unscrew set screws, or lift off the handle. Consult your faucet’s manual if you have it.
3. Access the Diverter: Once the handle or outer components are removed, you should be able to see or access the diverter mechanism. It might be a separate cartridge or part of the main valve assembly.
4. Clean or Replace:
* Cleaning: If the diverter appears clogged with debris or mineral buildup, try cleaning it with vinegar and a small brush, similar to how you cleaned the sprayer head.
* Replacement: If cleaning doesn’t work, or if the diverter appears damaged, you’ll likely need to replace it. You’ll need to identify your faucet’s brand and model to get the correct replacement part.
5. Reassemble: Carefully put the faucet back together, ensuring all parts are correctly seated and tightened.
6. Test: Turn the water supply back on and test the sprayer.
2. Leaky Sprayer Hose or Sprayer Head
A leaky sprayer hose or a dripping sprayer head is usually caused by worn seals or loose connections.
Possible Causes:
- Loose Connection: The hose might not be screwed on tightly enough to the faucet body or the sprayer head.
- Worn O-rings or Seals: These small rubber rings create a watertight seal. Over time, they can crack, harden, or get dislodged.
- Damaged Hose: Abrasions or cracks in the hose itself can cause leaks.
Solutions:
- Tighten Connections:
- Turn off Water Supply.
- Check Sprayer Head Connection: Gently try to tighten the sprayer head onto the hose.
- Check Hose Connection to Faucet: Under the sink, locate where the sprayer hose connects to the faucet body and ensure that fitting is snug. Don’t overtighten, as this can strip threads.
- Replace O-rings/Seals: If tightening doesn’t work, the seals are likely the problem.
- Turn off Water Supply.
- Disconnect the Hose: Unscrew the sprayer hose from the faucet body under the sink.
- Inspect the Connection Point: Look at the fitting on the faucet body where the hose connects. There should be an O-ring or washer here.
- Remove Old O-ring: Carefully pry out the old O-ring using a small flathead screwdriver or a pick.
- Install New O-ring: Lubricate the new O-ring (silicone grease is good) and carefully place it into the groove. Ensure it’s seated evenly.
- Reconnect Hose: Screw the hose back onto the faucet body.
- Inspect Sprayer Head Seals: If the leak is at the sprayer head, you might need to unscrew the head and look for a similar O-ring or seal at its base where it connects to the hose. Replace it if it looks worn.
- Test: Turn on the water supply and check for leaks.
-
Sprayer Hose Replacement: If the hose itself is damaged (cracked, split, or severely kinked), a sprayer hose repair might not be feasible, and replacement is the best option.
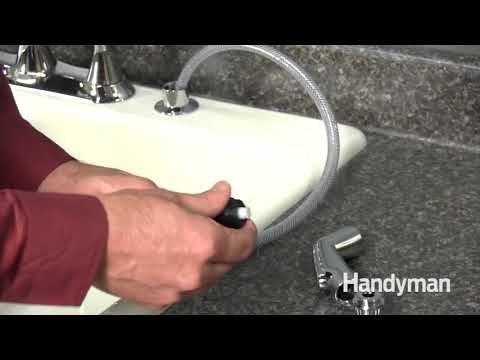
How to replace a sprayer hose:
1. Turn off Water Supply.
2. Remove Old Hose:
* Under Sink: Unscrew the sprayer hose from the faucet body. You may need a basin wrench for tight spaces.
* Sprayer Head End: Unscrew the sprayer head from the hose.
3. Purchase a New Hose: Take the old hose with you to a hardware store or plumbing supply shop to ensure you get a compatible replacement. Most hoses have standard threading, but it’s best to be sure.
4. Install New Hose:
* Connect to Sprayer Head: Screw the new hose onto the sprayer head.
* Connect to Faucet Body: Screw the other end of the new hose onto the faucet body under the sink. Make sure it’s hand-tight, then snug it up a quarter-turn with pliers if needed.
5. Test: Turn on the water supply and thoroughly check for leaks at both connection points.
3. Sprayer Won’t Retract or Stays Out
This often happens with pull-down sprayer models.
Possible Causes:
- Kinked Hose: The pull-down hose might be getting caught or kinked inside the cabinet or around pipes.
- Weight Issues: The counterweight that helps retract the hose might be missing, dislodged, or the wrong weight for the hose.
- Hose Snagged: The hose might be snagging on something under the sink.
Solutions:
- Check for Hose Kinks and Snags:
- Open Cabinet: Get under your sink and clear out any clutter that might be obstructing the hose.
- Trace the Hose: Follow the sprayer hose from where it connects to the faucet down to the sprayer head. Look for any obvious kinks, bends, or items that the hose might be catching on.
- Straighten and Clear: Gently straighten any kinks and remove any obstructions.
- Inspect and Adjust the Counterweight:
- Locate the Weight: The counterweight is usually a clamp or bracket that attaches to the pull-down hose underneath the sink.
- Check Placement: Ensure the weight is positioned correctly on the hose. The ideal placement helps the sprayer retract smoothly. Manufacturers often provide a recommended spot. If it’s too high, the hose might not extend fully; if it’s too low, it might not retract properly.
- Secure the Weight: Make sure the weight is firmly clamped to the hose.
- Test Retraction: Gently pull and release the sprayer to see if it retracts correctly. You may need to experiment with the weight’s position to find the sweet spot.
- Hose Diameter Issues: Sometimes, if a replacement hose was installed, it might be slightly thicker than the original, causing it to snag or not retract properly. In this case, you might need to find a hose specifically designed for your faucet model.
4. Water Leaks from the Base of the Faucet (When Sprayer is Used)
This usually points to a problem with the sprayer diverter valve assembly or the hose connection to the faucet body.
Possible Causes:
- Faulty Diverter: As mentioned before, the diverter valve controls water flow. If it leaks internally, water can escape through other pathways.
- Loose Hose Connection: The connection of the sprayer hose to the faucet body might be loose.
- Cracked Faucet Body: Less common, but a crack near the sprayer hose connection could cause leaks.
Solutions:
- Tighten Sprayer Hose Connection: Revisit step 2 for tightening the hose connection under the sink.
- Repair or Replace Sprayer Diverter Valve: This is a common cause for this specific leak. Follow the steps outlined in the “Weak Water Pressure” section for accessing and dealing with the diverter valve.
Tools You Might Need
Having the right tools makes any DIY repair smoother.
- Adjustable Wrench or Pliers: For tightening and loosening fittings. Channel-lock pliers are also very useful.
- Basin Wrench: Essential for reaching and working with nuts and fittings in tight spaces under the sink.
- Screwdrivers: Both Phillips head and flathead screwdrivers are often needed.
- Old Toothbrush or Small Scrub Brush: For cleaning mineral deposits.
- White Vinegar: The go-to for descaling.
- Rag or Towel: For wiping up spills and protecting finishes.
- Bucket: To catch residual water.
- Silicone Grease (Plumber’s Grease): For lubricating O-rings and making reassembly easier.
- Replacement O-rings or Seals: Have these on hand if you suspect a seal issue.
- Replacement Sprayer Hose: If your hose is damaged beyond repair.
- Replacement Sprayer Head: If the original is too clogged or damaged.
- Replacement Sprayer Diverter Valve: If the diverter is the culprit.
Table: Common Sprayer Problems & Solutions at a Glance
| Problem | Likely Cause(s) | Primary Solution(s) |
|---|---|---|
| Weak Water Pressure / No Spray | Clogged Sprayer Head, Debris in Hose, Faulty Diverter | Clean Sprayer Head, Flush Hose, Inspect/Clean/Replace Diverter |
| Leaky Sprayer Hose or Sprayer Head | Loose Connections, Worn O-rings/Seals | Tighten Fittings, Replace O-rings/Seals |
| Sprayer Won’t Retract (Pull-Down) | Kinked Hose, Misplaced Counterweight, Snagged Hose | Straighten/Clear Hose, Adjust/Secure Counterweight |
| Water Leaks from Faucet Base (When Sprayer Used) | Faulty Diverter, Loose Hose Connection | Inspect/Clean/Replace Diverter, Tighten Hose Connection |
| Sprayer Sprays Randomly or Leaks when Off | Faulty Diverter, Internal Faucet Seal Issue | Inspect/Clean/Replace Diverter, Inspect/Replace Cartridge (if applicable) |
| Low Water Flow from Main Spout too | Blockage in supply lines, partially closed valve | Check Shut-off Valves, Inspect supply lines (more involved plumbing) |
Specific Faucet Types and Sprayer Fixes
The method for fixing a kitchen faucet sprayer can vary slightly depending on the type of faucet you have.
Standard Side Sprayer
These have a separate sprayer unit connected by a hose that typically hangs to the side of the sink.
- Fixing a leaky sprayer hose repair: This usually involves tightening the connection at the faucet body or replacing an O-ring at that connection. If the hose itself is damaged, a sprayer hose replacement is needed.
- Fixing a clogged sprayer head: Follow the cleaning steps described earlier. If the sprayer nozzle replacement is needed, unscrew the old one and attach a new one.
Pull-Down Sprayer
This is a very popular type where the sprayer head pulls directly out from the spout.
- How to fix pull-down sprayer: The most common issues are retraction problems (addressed above) or leaks from the connection point where the hose enters the faucet body. Ensure the weight is properly attached and that the hose isn’t snagging. For leaks, check the connection under the sink and the seals.
- Sprayer nozzle replacement: These are typically designed to be unscrewed from the hose end.
Pull-Out Sprayer
Similar to pull-down, but the sprayer head pulls straight out from the spout rather than down.
- Fixing a pull-out sprayer: The principles are the same as for pull-down sprayers. Check for kinks, ensure the weight is properly placed, and inspect hose connections and seals.
Important Considerations Before You Start
- Water Shut-Off: Always, always turn off the water supply to your faucet before beginning any repair. Failure to do so can result in significant water damage.
- Protect Finishes: Use a soft cloth or rag when using pliers or wrenches to avoid scratching the chrome or other finishes on your faucet and sprayer.
- Faucet Manuals: If you still have the manual for your specific faucet model, it’s an invaluable resource. It will show you how to disassemble your faucet correctly and identify specific parts.
- Parts Identification: If you need to replace a part, like a sprayer diverter valve or hose, knowing your faucet’s brand and model number is crucial for finding the correct replacement. You can often find this information on the faucet itself or on original packaging.
- When to Call a Professional: While many kitchen sprayer fixes are DIY-friendly, if you’re uncomfortable with the process, if the problem persists after your attempts, or if you suspect a more complex issue with the faucet body or internal plumbing, it’s best to call a qualified plumber.
Frequently Asked Questions (FAQ)
Q1: How often should I clean my kitchen sink sprayer?
A1: It’s a good idea to clean your kitchen sink sprayer head every 6-12 months, or more frequently if you have hard water. This preventive maintenance can help avoid clogs and ensure consistent water pressure.
Q2: Can I use a different brand’s sprayer hose if mine is broken?
A2: It’s best to stick with the same brand or a universally compatible hose. While many hoses have standard threading, slight variations can lead to leaks or a poor fit. If possible, match the brand or take your old hose to the store for comparison.
Q3: My kitchen faucet sprayer leaks even when it’s off. What could be wrong?
A3: This often indicates a faulty diverter valve or a worn-out internal cartridge within the faucet body. The diverter is meant to shut off water flow to the sprayer when not in use. If it’s failing, water can still pass through.
Q4: What’s the difference between a kitchen faucet sprayer and a kitchen sprayer attachment?
A4: A “kitchen faucet sprayer” typically refers to the integrated side sprayer or pull-down/pull-out sprayer that comes as part of the faucet assembly. A “kitchen sprayer attachment” might refer to a third-party add-on that connects to your existing faucet or a separate portable sprayer. This guide primarily focuses on integrated faucet sprayers.
Q5: My pull-down sprayer hose feels stiff. How can I fix this?
A5: A stiff hose is often due to the hose rubbing against something inside the cabinet or a lack of lubrication on the hose itself. Ensure the counterweight is correctly positioned and that the hose has a clear path for movement. You can also try lubricating the hose externally with a silicone-based spray (ensure it’s safe for rubber/plastic). If the hose is old and brittle, it may need to be replaced.
By following these steps and tips, you should be well-equipped to tackle most common issues with your kitchen sink sprayer. Happy fixing!