
Can you put together IKEA kitchen cabinets yourself? Yes, with patience and the right tools, most homeowners can successfully assemble IKEA kitchen cabinets. This comprehensive guide will walk you through every step of IKEA cabinet assembly, from unboxing to final IKEA kitchen installation. We’ll cover everything you need to know about putting together IKEA cabinets, including deciphering IKEA cabinet instructions, handling IKEA cabinet hardware, and perfecting your IKEA SEKTION assembly.
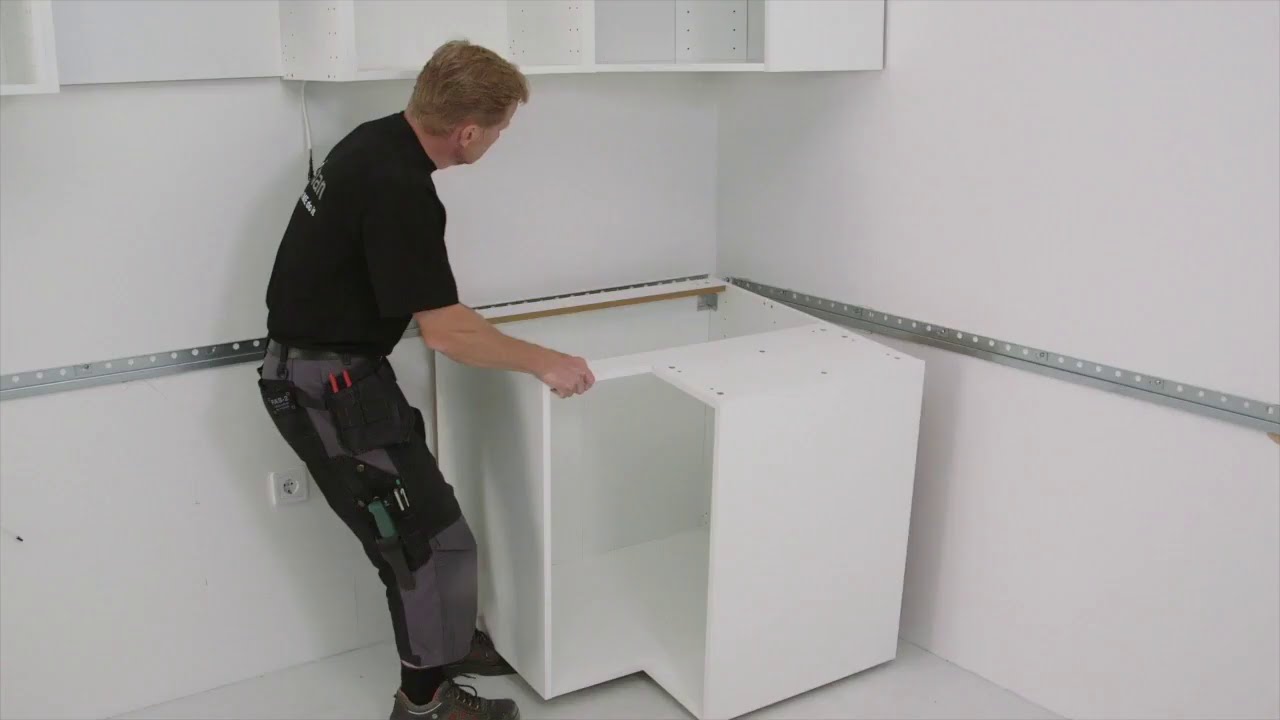
Image Source: i.ytimg.com
Getting Started: Preparation is Key
Before you even think about screws and panels, proper preparation will save you time, frustration, and potential mistakes. This phase is critical for a smooth IKEA kitchen installation.
1. Planning Your IKEA Kitchen Layout
This is the first and most important step. IKEA’s SEKTION system is modular, meaning you can customize it to fit your space perfectly.
- Measure Your Space: Accurately measure the length, width, and height of your kitchen walls. Note the placement of windows, doors, and any existing plumbing or electrical outlets.
- Sketch Your Design: Use graph paper or IKEA’s online kitchen planner tool. This tool is invaluable for visualizing your layout and ensuring all your desired IKEA kitchen components fit. It helps you avoid common pitfalls.
- Choose Your Cabinets: Select base cabinets, wall cabinets, and pantry units that suit your needs and layout. Consider drawer units, cabinets with shelves, and specialized units like corner cabinets.
- Select Doors and Drawer Fronts: IKEA offers a vast array of styles and colors for IKEA cabinet doors. Choose ones that match your aesthetic.
- Plan for Appliances: Factor in the dimensions of your refrigerator, dishwasher, oven, and cooktop.
2. Gathering Your Tools and Supplies
Having the right tools makes IKEA cabinet assembly much easier.
- Essential Tools:
- Drill/Driver: With Phillips head bits and possibly hex bits. Variable speed is helpful.
- Hammer: For tapping in dowels and back panels.
- Level: To ensure cabinets are plumb and straight.
- Measuring Tape: For precise measurements.
- Screwdriver Set: Various sizes and types, especially Phillips.
- Pencil: For marking.
- Stud Finder: Crucial for secure wall mounting.
- Utility Knife: For opening boxes and trimming materials.
- Safety Glasses: Protect your eyes.
- Gloves: To protect your hands.
- Clamp: To hold pieces together while you work.
- Helpful Supplies:
- Wood Glue: For extra strength on dowel joints.
- Painter’s Tape: To mark positions or protect surfaces.
- Drop Cloth: To protect your floor.
- Another Person: IKEA cabinet assembly is a two-person job for most parts, especially lifting and mounting.
3. Unboxing and Inventory
Once you have your plan and tools, it’s time to open those boxes.
- Organize Components: Lay out all the panels, hardware, and IKEA cabinet hardware in a clear, organized manner. Keep the IKEA cabinet instructions handy.
- Check for Missing Parts: Compare the contents of each box against the parts list in the instructions. IKEA is usually good about including everything, but it’s best to check early.
- Familiarize Yourself with Parts: Identify the different panels (sides, top, bottom, back), drawer components, hinges, and other IKEA kitchen components.
Assembling the Cabinet Box: The Core Structure
The foundation of your IKEA kitchen is the cabinet box. This is where the majority of the IKEA SEKTION assembly takes place.
Understanding IKEA Cabinet Instructions
IKEA instructions are almost entirely visual. This means:
- Follow the Steps Exactly: Don’t skip steps or assume you know what’s next.
- Pay Attention to Detail: Small illustrations show which way panels face, where screws go, and the orientation of parts.
- Identify Parts: Each part is usually numbered or lettered in the diagrams. Match these to the physical pieces.
Step-by-Step Cabinet Assembly
Let’s break down the process of putting together IKEA cabinets:
Step 1: Attaching Connectors and Dowels
- Cam Locks and Dowels: IKEA cabinets use a system of cam locks and dowels for assembly. Insert the wooden dowels into the pre-drilled holes on the edges of the cabinet panels.
- Cam Bolts: Screw the cam bolts into the corresponding holes. These are the metal pieces that the cam locks will grip. Ensure they are screwed in firmly but not overtightened.
Step 2: Joining the Side Panels to the Base and Top
- Align Panels: Take one side panel and align the holes for the cam bolts and dowels with the corresponding holes on the base and top panels.
- Insert Cam Locks: Place the cam locks into the larger holes on the edges of the base and top panels.
- Tighten Cam Locks: Using a Phillips head screwdriver, turn the cam locks clockwise. You’ll feel them grab the cam bolt and pull the panels together tightly. This is a crucial step for the structural integrity of your IKEA cabinet assembly.
Step 3: Adding the Back Panel
- Slide or Nail: Some IKEA cabinets have a thin back panel that slides into grooves. Others require you to nail or screw the back panel into place.
- Square the Cabinet: Ensure the cabinet box is perfectly square before attaching the back panel. You can check this by measuring the diagonals; they should be equal. A square cabinet will hang and function better.
- Secure the Back Panel: If nailing, use the provided nails and hammer them in evenly around the perimeter.
Step 4: Assembling Drawers
Assembling IKEA drawers is a common part of the process.
- Drawer Sides, Front, and Back: Similar to the cabinet box, these pieces connect using dowels and cam locks.
- Drawer Bottom: The drawer bottom usually slides into grooves on the drawer sides and then into a groove on the drawer front.
- Drawer Slides: Attach the drawer slides to the sides of the drawer box and the inside of the cabinet frame. IKEA uses a specific type of IKEA cabinet hardware for these, so follow the instructions carefully for correct placement. The orientation of the slides is critical for smooth operation.
Step 5: Attaching Cabinet Doors
- Hinge Plates: Screw the hinge plates to the inside of the cabinet box.
- Hinges to Doors: Attach the hinges to the IKEA cabinet doors.
- Mounting Doors: Clip or screw the hinges onto the hinge plates. Most IKEA hinges have adjustment screws that allow you to fine-tune the alignment of the doors. This is key for a professional look.
Mounting Your IKEA Kitchen Cabinets: Securing Them to the Wall
This is a critical step for safety and longevity. Proper IKEA cabinet mounting ensures your cabinets are secure and can bear weight.
Locating Wall Studs
This is non-negotiable for secure mounting.
- Use a Stud Finder: Scan the wall where you plan to mount the cabinets. Mark the center of each stud with a pencil.
- Wall Types: If you have plaster walls, you might need to locate the wooden studs behind them. For drywall, you’ll be screwing into the studs.
Hanging Rails and Cabinet Mounting
IKEA often uses a hanging rail system for wall cabinets, which simplifies the process.
Step 1: Installing the Hanging Rail
- Determine Height: Use your level and measuring tape to mark the desired height for the hanging rail. Consider the height of your wall cabinets and your desired finished height.
- Locate Studs: Ensure your rail is screwed directly into wall studs for maximum support. Mark the stud locations along your rail line.
- Screw the Rail: Use appropriate screws (often provided or recommended by IKEA) to securely attach the hanging rail to the studs. Use a level to ensure the rail is perfectly horizontal.
Step 2: Hanging the Cabinet Boxes
- Lift and Hook: Most IKEA wall cabinets have a metal bracket that hooks onto the hanging rail.
- Level and Adjust: Once hung, use your level to ensure the cabinet is plumb and level. Most cabinets have adjustment screws on the mounting brackets that allow you to fine-tune their position.
Step 3: Securing Base Cabinets
- Positioning: Place the base cabinets in their designated spots.
- Leveling: Use shims under the cabinets if your floor is uneven to ensure they are level and plumb.
- Joining Cabinets: If you have multiple base cabinets next to each other, you’ll typically join them using screws through the side panels, ensuring they are flush and aligned.
- Attaching to the Wall (Optional but Recommended): For extra security, especially for heavy base cabinets or in earthquake-prone areas, you can screw through the back of the cabinet into wall studs.
Step 4: Attaching Face Frames and Trim (If Applicable)
- Face Frames: Some IKEA cabinet lines have separate face frames that attach to the front of the assembled cabinet boxes.
- Trim Pieces: Install any decorative trim or fillers as per the IKEA cabinet instructions.
Installing Doors, Drawers, and Shelving
The final touches that make your IKEA kitchen functional and beautiful.
Attaching Drawer Fronts
- Align and Screw: Once the drawer boxes are assembled and the slides are installed, attach the drawer fronts. IKEA often uses a template or pre-drilled holes to ensure perfect alignment.
Adjusting Cabinet Doors
- Fine-Tuning Alignment: The beauty of IKEA hinges is their adjustability.
- In/Out: Adjust how far the door sits from the cabinet box.
- Up/Down: Adjust the vertical position of the door.
- Left/Right: Adjust how the door sits within the cabinet opening.
- Even Gaps: Aim for consistent gaps between doors and around drawer fronts.
Installing Shelves and Accessories
- Shelf Pins: Insert shelf pins into the pre-drilled holes inside the cabinet boxes.
- Place Shelves: Rest the shelves on the pins.
- Drawer Interiors: Install drawer organizers, dividers, and other interior IKEA kitchen components as desired.
Frequently Asked Questions About IKEA Kitchen Cabinet Assembly
Q1: Do IKEA kitchen cabinets require special tools?
A1: While you can get by with basic hand tools, a cordless drill/driver with appropriate bits significantly speeds up IKEA cabinet assembly. A good level and a stud finder are also essential for proper IKEA cabinet mounting.
Q2: How long does it take to assemble IKEA kitchen cabinets?
A2: The time can vary greatly depending on the number of cabinets, your experience level, and whether you have help. For a standard kitchen, expect to spend at least one to three full days on assembly and installation.
Q3: What if I’m missing parts or have damaged IKEA cabinet hardware?
A3: Contact IKEA customer service immediately. They are usually very helpful and can send replacement parts quickly.
Q4: Can I cut IKEA cabinet panels if I need custom sizes?
A4: While possible, it’s generally not recommended. Cutting IKEA panels can compromise their structural integrity and the fit of the IKEA cabinet hardware. If you need custom sizes, it’s better to explore IKEA’s range of filler strips or consult with a professional custom cabinet maker.
Q5: Is IKEA SEKTION assembly difficult?
A5: The IKEA SEKTION assembly system is designed to be user-friendly. The visual instructions and pre-drilled holes make it manageable for most DIYers. The most challenging parts are often the precise measuring and the physical labor of mounting.
Q6: How do I ensure my IKEA cabinets are level and plumb?
A6: Use a good quality spirit level throughout the assembly and mounting process. For base cabinets, use shims to compensate for uneven floors. For wall cabinets, the hanging rail system and adjustable brackets are key. Always check both horizontally and vertically.
Q7: Can I install IKEA kitchen cabinets on any wall type?
A7: IKEA cabinets need to be securely fastened to structural elements. For drywall, this means screwing into wall studs. If you have concrete or brick walls, you’ll need appropriate anchors and drilling methods. Always ensure your wall can support the weight of the cabinets and their contents.
Q8: What are the most common mistakes when putting together IKEA cabinets?
A8: Common mistakes include: not reading instructions thoroughly, not checking for level or plumb during installation, overtightening cam locks (which can strip the holes), and not securing cabinets to wall studs. Rushing the process is also a frequent cause of errors.
By following this detailed guide, you can confidently tackle your IKEA kitchen installation and enjoy your beautifully assembled cabinets for years to come. Remember, patience and attention to detail are your best allies in IKEA cabinet assembly.