
Can you hang IKEA kitchen cabinets yourself? Yes, you absolutely can! With a bit of planning, the right tools, and this detailed guide, you can successfully hang IKEA kitchen cabinets like a seasoned pro, saving money and gaining immense satisfaction from your DIY kitchen renovation. This guide will walk you through the entire process of IKEA cabinet installation, from preparation to the final adjustments.
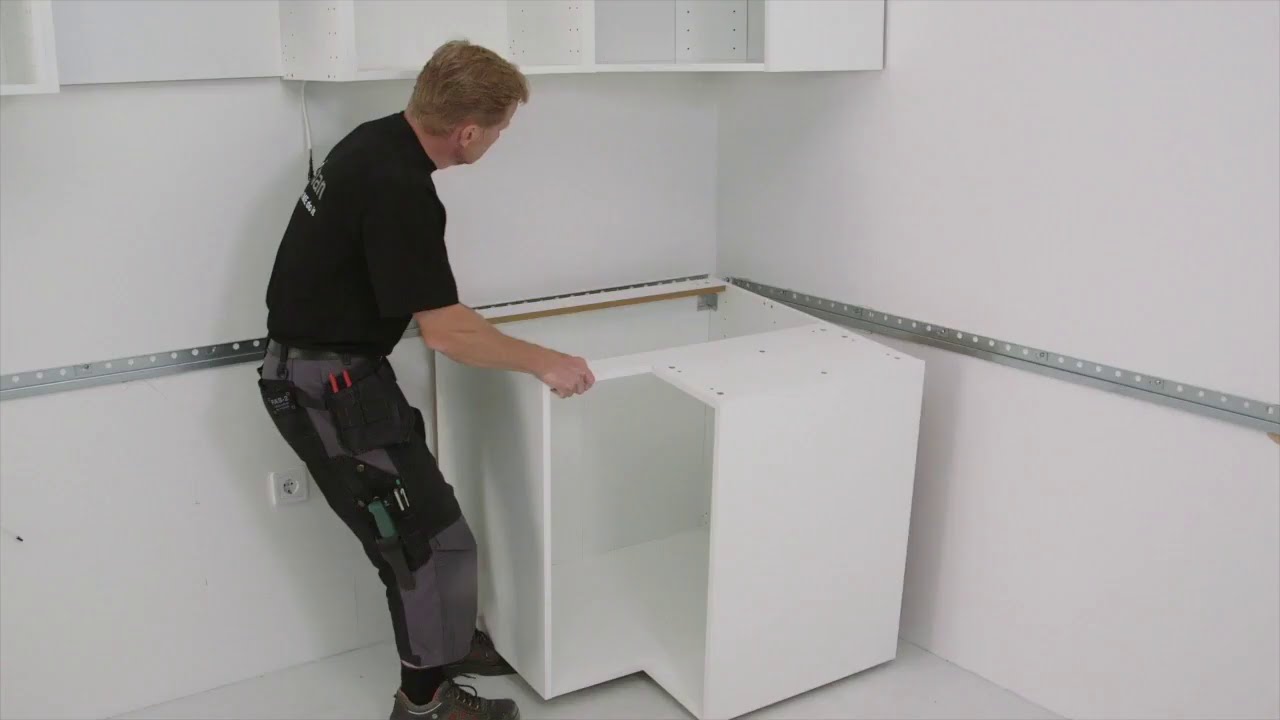
Image Source: i.ytimg.com
Getting Ready for Your IKEA Cabinet Installation
Before you even think about touching a cabinet, proper preparation is key to a smooth and successful IKEA cabinet installation. Rushing this stage can lead to frustration and mistakes.
Planning Your Kitchen Layout
The foundation of any successful kitchen remodel is meticulous planning. You’ll want to finalize your layout, ensuring it maximizes functionality and flow.
Sketching Your Design
- Measure Twice, Cut Once (or Drill Once!): Measure your kitchen space accurately. Note the location of windows, doors, plumbing, electrical outlets, and any other fixed features.
- Use IKEA’s Planning Tools: IKEA offers excellent online planning tools that let you visualize your kitchen and experiment with different cabinet configurations.
- Consider Appliance Placement: Think about where your refrigerator, oven, dishwasher, and microwave will go. Ensure there’s enough clearance and access.
- Think About Workflow: Design your kitchen around key zones: prep, cooking, cleaning, and storage.
Ordering Your Cabinets
- Create a Bill of Materials: Once your layout is set, use IKEA’s planner to generate a detailed list of all the cabinets, doors, drawer fronts, shelves, and hardware you’ll need.
- Don’t Forget the Extras: Order necessary items like suspension rails, filler panels, toe kicks, and decorative trim.
- Check for Damage: When your cabinets arrive, inspect all boxes for any damage before signing for delivery.
Gathering Your Tools and Materials
Having the right tools makes all the difference. You’ll need more than just a screwdriver for mounting IKEA cabinets.
Essential Tools for Hanging Kitchen Units
- Measuring Tape: A good quality tape measure is non-negotiable.
- Level: A long level (4-6 feet) is crucial for ensuring your cabinets are perfectly straight. A smaller torpedo level is handy for smaller adjustments.
- Stud Finder: Essential for locating wall studs for secure wall mounting kitchen cabinets.
- Pencil: For marking measurements and drilling points.
- Drill/Driver: With various drill bits and driver bits.
- Screwdriver Set: Phillips head and flathead screwdrivers.
- Hammer: For tapping in dowels or adjusting cabinet placement.
- Chisels: For minor adjustments or cleaning out holes.
- Safety Glasses: Always protect your eyes.
- Work Gloves: To protect your hands.
- Utility Knife: For opening boxes and cutting materials.
- Caulk Gun: For applying sealant around countertops.
- Wood Glue: For securing dowels and other wood joints.
- Clamps: Useful for holding pieces together while glue dries.
- Putty Knife: For applying wood filler or adhesive.
- Sander or Sandpaper: For smoothing any rough edges.
Necessary Materials
- IKEA Cabinets: The stars of the show!
- Suspension Rails: These are critical for mounting IKEA cabinets. They are typically long metal bars that attach to the wall and cabinets slide onto.
- Cabinet Mounting Brackets: While suspension rails are the primary method, some situations might call for additional L-brackets or corner braces for extra support, especially for heavy cabinets.
- Screws: Various sizes of wood screws for cabinet assembly and mounting. Make sure they are long enough to penetrate into studs.
- Wall Anchors: If you can’t hit a stud in certain locations, use heavy-duty wall anchors rated for the weight of the cabinets and their contents.
- Shims: Essential for leveling kitchen cabinets and filling small gaps between cabinets and the wall.
- Wood Filler: For filling any unwanted holes or imperfections.
- Painter’s Tape: For marking and protecting surfaces.
- Drop Cloths: To protect your floors from dust and debris.
Preparing Your Kitchen Walls
A solid foundation is vital for secure cabinet installation guide.
Locating Wall Studs
- Use Your Stud Finder: Glide the stud finder horizontally across the wall where you plan to hang cabinets. Mark the edges of each stud.
- Confirm with a Small Nail: Once you think you’ve found a stud, drill a small pilot hole. If you hit solid wood, you’ve found a stud. If you hit an empty space, try a little to the side.
- Mark Stud Centers: It’s best to screw into the center of the studs for maximum holding power.
Preparing the Wall Surface
- Clean the Walls: Wipe down the walls to remove any dust or grease.
- Address Imperfections: Fill any holes or cracks in the drywall. Sand smooth once dry.
- Install Blocking (If Necessary): In some cases, especially if you are hanging particularly heavy items or in areas where stud placement is unfavorable, you might need to add blocking between studs. This involves screwing horizontal pieces of wood into the studs at the desired cabinet height.
Assembling Your IKEA Cabinets
The IKEA kitchen assembly process is generally straightforward, but attention to detail is important.
Assembling the Cabinet Boxes
IKEA cabinets typically use a cam lock and dowel system.
Step-by-Step Assembly
- Unpack and Identify Parts: Lay out all the pieces and hardware for each cabinet. Refer to the IKEA instruction manual for your specific cabinet model.
- Insert Dowels: Gently tap wooden dowels into the pre-drilled holes on the cabinet sides, top, and bottom. A light application of wood glue can add extra strength.
- Attach Cam Locks: Screw the metal cam lock posts into their designated holes.
- Connect Cabinet Sides: Align the sides of the cabinet with the base and top panels. The dowels and cam lock posts should slide into their corresponding holes.
- Secure with Cam Locks: Insert the round cam locks into the larger holes. Use a screwdriver to turn the cam locks clockwise until they tighten, pulling the pieces together securely.
- Attach Back Panel: Slide the thin back panel into the grooves on the cabinet sides and base. Secure it with small nails or screws provided, ensuring the cabinet box remains square.
Installing Drawer Slides and Hinges
These components are crucial for the functionality of your DIY kitchen cabinets.
Drawer Slides
- Cabinet Member: Attach the cabinet member of the drawer slide to the inside of the cabinet box using the provided screws. Ensure it’s level and positioned correctly according to the IKEA instructions.
- Drawer Member: Attach the drawer member to the side of the drawer box.
Hinges
- Attach Hinges to Doors: Screw the hinge cups into the large circular recesses on the back of the cabinet doors.
- Attach Hinges to Cabinet: Screw the hinge mounting plates to the inside of the cabinet box. Then, clip the door hinges onto the mounting plates.
Mounting IKEA Cabinets to the Wall
This is where the magic happens. Proper wall mounting kitchen cabinets ensures they are secure and perfectly aligned.
Installing the Suspension Rail
The suspension rail is the backbone of IKEA cabinet hanging.
Securing the Rail
- Determine Cabinet Height: Decide on the finished height of your cabinets. A standard countertop height is 36 inches from the floor.
- Mark the Rail Position: Using your level, draw a perfectly straight, horizontal line on the wall at the desired height for the top of your cabinets.
- Locate Studs: Use your stud finder to locate and mark all the studs along this line.
- Attach the Suspension Rail: Position the suspension rail on the wall, aligning it with your marked line and ensuring it overlaps with studs wherever possible. Use screws that are long enough to securely fasten the rail into the studs. If you cannot hit a stud at a particular point, use heavy-duty wall anchors rated for significant weight.
- Check for Level: Constantly check that the suspension rail is perfectly level. Use shims behind the rail if necessary to achieve a level installation, especially if your walls are not perfectly straight.
Hanging the Cabinet Boxes
This is the moment of truth for your hanging kitchen units.
The Hanging Process
- Lift and Hook: With assistance (especially for larger cabinets), lift the assembled cabinet box and hook the metal cleat on the back of the cabinet onto the suspension rail.
- Adjust Position: Slide the cabinet horizontally along the rail to its desired position.
- Secure the Cabinet: Most IKEA cabinets have pre-drilled holes or adjustment screws that allow you to secure the cabinet to the wall via the suspension rail. Tighten these screws to lock the cabinet in place.
- Level the Cabinet: Use your level to check if the cabinet is plumb (vertically straight) and level (horizontally straight). Adjust the cabinet’s position on the rail or use shims behind the cabinet against the wall to achieve perfect alignment.
Spacing and Aligning Cabinets
Consistency is key for a professional look.
Achieving a Seamless Look
- Use a Spacer: Place a piece of scrap wood or a dedicated cabinet spacing tool between cabinets as you hang them to ensure consistent gaps.
- Check Alignment: After hanging a few cabinets, step back and visually check that they are aligned horizontally and vertically.
- Adjust as Needed: Minor adjustments can be made by loosening the cabinet securing screws, repositioning, and re-tightening. Shims can be used behind the cabinet if the wall isn’t perfectly flat.
Connecting and Securing Cabinets Together
Once the cabinets are on the wall, they need to be joined for stability.
Joining Adjacent Cabinets
This step ensures your cabinet bank acts as a single, sturdy unit.
Securing Cabinets to Each Other
- Drill Pilot Holes: With cabinets in their final, leveled positions, drill pilot holes through the face frames or sides of adjacent cabinets. Aim to go through both cabinets where they meet.
- Use Cabinet Connecting Screws: Drive appropriate cabinet connecting screws (often called “face frame screws” or “cabinet joining screws”) through the pilot holes to pull the cabinets tightly together. Use at least two screws per vertical joint for good stability.
- Check for Squareness: After connecting, re-check that the cabinets are still square and aligned.
Installing Cabinet Mounting Brackets (If Needed)
While the suspension rail is the primary support, cabinet mounting brackets can offer extra security.
When to Use Brackets
- Heavy Cabinets: For very heavy cabinets, especially uppers, adding an L-bracket at the top or bottom, screwed into a stud, can provide extra peace of mind.
- Uneven Walls: If there are significant gaps between the back of the cabinet and the wall due to uneven walls, brackets can help pull the cabinet flush and provide support.
- High-Traffic Areas: In kitchens with a lot of activity, extra support can be beneficial.
Attaching Brackets
- Position the Bracket: Place the bracket in the desired location, usually at the top rear of the cabinet, extending to the wall.
- Screw into Studs: Mark and drill pilot holes into the wall studs.
- Secure the Bracket: Screw the bracket firmly into the wall studs. Ensure the cabinet is pulled snug against the wall before fully tightening.
Final Touches and Adjustments
The last steps bring your DIY kitchen cabinets to life.
Leveling Kitchen Cabinets
Even after hanging, minor adjustments might be needed to achieve perfect leveling kitchen cabinets.
Fine-Tuning
- Check All Cabinets: Use your level on the top, bottom, and sides of every cabinet.
- Adjustments: If a cabinet is slightly off, you can sometimes loosen the securing screws that attach it to the suspension rail or to adjacent cabinets, and then use shims behind the cabinet or adjust the suspension rail connection to correct the level.
Installing Doors, Drawers, and Countertops
This is when your kitchen starts to look complete.
Door and Drawer Adjustments
- Hinge Adjustments: IKEA hinges have adjustment screws that allow you to fine-tune the position of the doors (up/down, left/right, in/out) until they are perfectly aligned and close smoothly.
- Drawer Adjustments: Similarly, drawer slides often have minor adjustment capabilities.
Countertop Installation
- Measure Carefully: Ensure your countertops are cut to size.
- Secure the Countertop: Apply a bead of adhesive or caulk along the top edges of the cabinets. Carefully place the countertop, ensuring it’s properly aligned. Secure it from underneath through the cabinet frames using appropriate screws or brackets, as per the countertop manufacturer’s instructions.
Installing the Kitchen Cabinet Hardware
The finishing touches that make your kitchen functional and stylish.
Handles and Knobs
- Marking: Decide on the placement of your handles or knobs. Use a template or measure precisely to ensure they are centered and at the same height on all doors and drawers.
- Drilling: Drill pilot holes from the inside of the door or drawer front to avoid splintering the outer surface.
- Attaching Hardware: Screw the hardware into place.
Frequently Asked Questions (FAQ)
Here are some common questions people have about mounting IKEA cabinets.
Q1: Do I need to assemble the IKEA cabinets before hanging them?
Yes, it is highly recommended to fully assemble the cabinet boxes before attempting to hang them. This makes them more rigid and easier to handle. The suspension rail system is designed to hook onto the assembled cabinet.
Q2: What is the best way to find wall studs for hanging IKEA cabinets?
The most reliable method is using a good quality electronic stud finder. However, you can also confirm stud locations by drilling a small pilot hole where you suspect a stud is. If you hit solid wood, it’s a stud.
Q3: Can I hang IKEA cabinets on plaster walls or just drywall?
Yes, you can hang cabinets on plaster walls, but it often requires different fastening methods. Plaster can be brittle, so it’s crucial to locate studs. If you can’t hit studs, you’ll need to use heavy-duty anchors specifically designed for plaster, or consider adding blocking.
Q4: How far apart should IKEA cabinets be?
For standard IKEA cabinet installation, adjacent cabinets are typically butted up against each other without any gap, or with a very small, consistent gap maintained by spacers during installation. The key is consistency.
Q5: What kind of screws should I use for mounting IKEA cabinets?
For attaching the suspension rail to studs, use long wood screws (e.g., #8 or #10 screws, 2.5 to 3 inches long). For joining cabinets to each other, use dedicated cabinet connecting screws. Always ensure your screws are long enough to penetrate at least 1.5 inches into the stud.
Q6: How do I ensure my IKEA cabinets are level?
Use a long spirit level on the top, bottom, and sides of each cabinet as you hang it. The IKEA suspension rail system allows for some adjustment. You can also use shims behind the cabinet box where it meets the wall to make fine adjustments and keep the cabinet plumb and level.
Q7: Is it possible to install IKEA kitchen cabinets without a suspension rail?
While the suspension rail is IKEA’s primary and recommended method for mounting IKEA cabinets, it is technically possible to use alternative methods like direct mounting with heavy-duty L-brackets screwed into studs. However, this requires careful calculation of weight distribution and secure fastening, and the suspension rail system is generally simpler and provides excellent support.
Q8: How do I handle corner cabinets?
Corner cabinets often require specific joining techniques and may need additional support. You’ll likely connect them to adjacent cabinets first, ensuring they are square, and then use the suspension rail or additional brackets for wall mounting. Consult your IKEA manual for the specific corner cabinet installation.
By following these detailed steps, you can confidently tackle your IKEA kitchen project and achieve a professional-looking result for your DIY kitchen cabinets. Happy renovating!