
Does your kitchen faucet sprayer refuse to spray? Or maybe it drips constantly? You’re not alone! Many homeowners face issues with their kitchen faucet sprayers. The good news is, most common problems are fixable with a few simple tools and a little patience. You can often repair a kitchen faucet sprayer yourself without calling a plumber. Let’s dive into how to get your sprayer working like new again.
When your kitchen faucet sprayer not working correctly, it can range from a weak stream to a complete failure to spray. This article will guide you through the common causes and solutions, from a clogged kitchen faucet sprayer to a faulty valve. We’ll cover how to repair kitchen faucet sprayer issues and even when it’s time for a replacement kitchen faucet sprayer. If you have a leaky kitchen faucet sprayer, we’ll address that too.
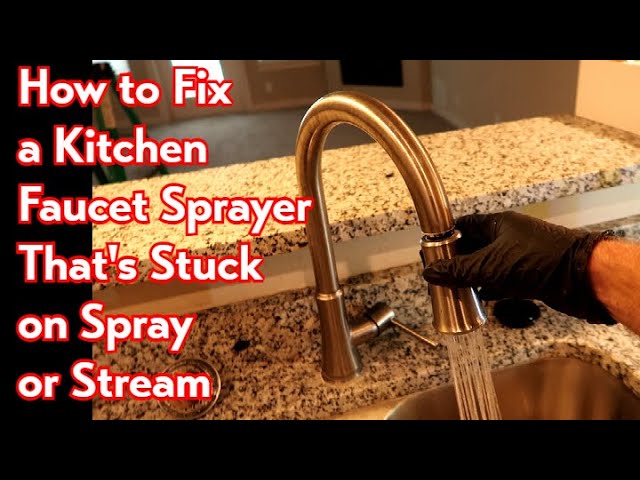
Image Source: i.ytimg.com
Why Your Kitchen Faucet Sprayer Isn’t Working
Several things can stop your kitchen faucet sprayer from working correctly. Let’s look at the most common culprits:
1. Clogged Sprayer Head
This is the most frequent reason for a weak spray or no spray at all. Over time, mineral deposits from hard water can build up inside the small holes of the sprayer head. This buildup restricts water flow.
2. Worn-Out Washer or O-Ring
Inside the sprayer mechanism or the diverter valve (which switches water between the main faucet and the sprayer), there are rubber washers and O-rings. These small parts can wear out, crack, or become stiff with age, leading to leaks or a loss of spraying power.
3. Kinked or Damaged Sprayer Hose
The flexible hose connecting your faucet to the sprayer head can get kinked, twisted, or even develop a hole. A kinked hose restricts water flow, while a damaged hose will leak.
4. Faulty Diverter Valve
The diverter valve is a small component, usually located inside the faucet body, that directs water flow. If it’s stuck, corroded, or damaged, it might not send enough water to the sprayer, or it might leak water back into the main spout.
5. Low Water Pressure
While less common as a sole cause for sprayer issues, generally low water pressure in your home can affect the performance of the sprayer. However, if only the sprayer is affected, this is less likely the main problem.
Tools You’ll Likely Need
Before you start, gather these common household tools. Having them ready will make the repair process smoother.
- Adjustable Wrench: For loosening and tightening nuts and fittings.
- Pliers: Needle-nose pliers are especially helpful for gripping small parts.
- Screwdrivers: Both Phillips head and flathead screwdrivers will be needed.
- Plumber’s Tape (PTFE Tape): To ensure watertight seals on threaded connections.
- Old Towels or Rags: To catch any dripping water.
- Bucket: To place under the faucet to catch water.
- Vinegar: For cleaning mineral deposits.
- Small Brush (like an old toothbrush): For scrubbing.
- Replacement Parts: Such as washers, O-rings, or a new sprayer head if needed.
Step-by-Step Guide to Fix Your Kitchen Faucet Sprayer
Let’s break down the process of how to repair kitchen faucet sprayer issues.
Step 1: Turn Off the Water Supply
This is crucial! Before you do any work on your faucet, you must shut off the water.
- Locate Shut-Off Valves: Look under your sink for two valves (one for hot water, one for cold). Turn them clockwise until they are snug.
- Test: Turn on the faucet to release any remaining water in the lines and confirm the water is off.
Step 2: Detach the Sprayer Head
The method for detaching the sprayer head varies depending on your faucet type.
- For Pull-Down Sprayers:
- Gently pull the sprayer head straight out from the spout.
- You might need to twist it slightly.
- There will be a hose connection underneath. It’s usually a threaded fitting that screws onto a hose or a quick-connect fitting.
- Most commonly, you’ll find a threaded connection. Use your adjustable wrench or pliers to carefully loosen this fitting. Hold the spout or the hose itself steady to avoid damaging the faucet body.
- If it’s a quick-connect fitting, there’s usually a release tab you need to press.
- For Side-Sprayer Models:
- The sprayer head is typically attached to a separate hose that runs from the faucet body.
- You’ll likely need to access the connection point under the sink.
Step 3: Clean the Sprayer Head (Address Clogs)
This is how you tackle a clogged kitchen faucet sprayer.
- Soaking Method:
- Place the detached sprayer head in a bowl or plastic bag.
- Fill the container with white vinegar. Ensure the sprayer head is fully submerged.
- Let it soak for several hours, or even overnight, to dissolve mineral deposits.
- After soaking, use a small brush (like an old toothbrush) to gently scrub away any remaining residue from the spray holes.
- Rinse the sprayer head thoroughly with water.
- Direct Cleaning:
- If soaking isn’t practical or doesn’t fully solve the problem, you can sometimes clean the holes directly with a toothpick or a thin needle. Be gentle to avoid enlarging the holes or damaging the head.
Step 4: Inspect and Repair the Sprayer Hose
A faulty kitchen faucet sprayer hose can cause a variety of problems.
- Check for Kinks: Ensure the hose isn’t twisted or bent sharply. Gently try to straighten any kinks.
- Look for Leaks: Inspect the entire length of the hose for cracks, holes, or worn spots. If you find any damage, the hose will need to be replaced.
- Check Hose Connections: Make sure the connections at both the sprayer head and under the faucet are tight.
Step 5: Examine the Diverter Valve and Internal Parts
This is where you troubleshoot kitchen faucet sprayer issues related to internal components.
- Locate the Diverter: For pull-down sprayers, the diverter is usually within the spout assembly itself. For side sprayers, it’s typically a small valve body connected to the faucet’s main water supply lines.
- Inspect for Wear:
- If you can easily access the diverter (sometimes requiring partial faucet disassembly), look for worn-out rubber seals or O-rings.
- Mineral buildup can also affect the diverter’s operation, making it stick. Gently clean any visible residue.
- Washer and O-Ring Replacement:
- If you find damaged or worn washers and O-rings, this is often the cause of a leaky kitchen faucet sprayer or a kitchen faucet sprayer not working properly.
- You’ll need to identify the exact size and type of washer or O-ring. It’s best to take the old one to a hardware store to find an exact match.
- Carefully remove the old parts and install the new ones, ensuring they are seated correctly. Apply a small amount of plumber’s grease to O-rings to help them seal and last longer.
Step 6: Reassemble and Test
Once you’ve cleaned or replaced parts, it’s time to put everything back together.
- Reconnect the Sprayer: Screw the sprayer head back onto the hose. Hand-tighten first, then use your wrench for a final snug turn. Apply plumber’s tape to the threads if necessary to prevent leaks.
- Turn Water Back On: Slowly turn the shut-off valves back on (counter-clockwise).
- Test the Sprayer: Turn on the faucet and switch the water flow to the sprayer. Check for leaks and ensure a strong spray.
Specific Scenarios and How to Address Them
Let’s delve deeper into common problems and how to fix them.
Scenario 1: Kitchen Faucet Sprayer Not Working at All
If you get no water from the sprayer, even after cleaning the head, the issue is likely internal.
- Possible Causes:
- Completely blocked diverter valve.
- A broken or disconnected hose internally.
- A faulty cartridge or valve stem that isn’t opening correctly.
- Troubleshooting Steps:
- Check Diverter: If accessible, try manually moving the diverter mechanism to see if it’s stuck.
- Inspect Hose Connection: Under the sink, ensure the hose is securely attached to the faucet body and the diverter.
- Cartridge Check: If your faucet has a removable cartridge, it might be the culprit. This usually involves removing the faucet handle to access it. Consult your faucet’s manual for this specific procedure.
Scenario 2: Leaky Kitchen Faucet Sprayer (Drips from the Head)
A persistent drip from the sprayer head, even when not in use, usually indicates a sealing issue.
- Possible Causes:
- Worn-out washer or O-ring inside the sprayer head mechanism.
- A problem with the valve that controls the sprayer.
- Troubleshooting Steps:
- Replace Sprayer Head Seals: This is often the easiest fix. Unscrew the sprayer head and look for any rubber gaskets or O-rings near where the water enters. Replace them.
- Check the Diverter: A diverter that doesn’t fully close off the sprayer port can cause a constant trickle.
Scenario 3: Low Water Pressure from Sprayer
This points to a partial blockage or a flow restriction.
- Possible Causes:
- Partially clogged kitchen faucet sprayer head.
- A kink in the kitchen faucet sprayer hose.
- A partially closed shut-off valve under the sink.
- Mineral buildup inside the diverter or faucet body.
- Troubleshooting Steps:
- Thoroughly Clean Sprayer Head: Ensure all spray holes are clear.
- Inspect Hose: Straighten any kinks and check for damage.
- Verify Shut-Off Valves: Make sure they are fully open.
- Clean Diverter: Remove and clean the diverter for any scale buildup.
Scenario 4: Leaky Connection Between Hose and Sprayer Head
If water leaks from where the hose connects to the sprayer head, it’s usually a sealing issue.
- Possible Causes:
- Loose connection.
- Damaged or missing O-ring at the connection point.
- Worn threads.
- Troubleshooting Steps:
- Tighten Connection: Gently try to tighten the sprayer head onto the hose.
- Replace O-ring: Unscrew the sprayer head and check for an O-ring. If it’s missing, damaged, or flattened, replace it with a new one of the correct size.
When to Consider Replacement
Sometimes, the cost and effort of repairing an old sprayer might not be worth it, or the damage might be too severe. Here’s when you might need a replacement kitchen faucet sprayer:
- Cracked or Damaged Hose: If the hose has multiple holes or is brittle, replacement is usually the only option.
- Corroded Sprayer Head: If the sprayer head is heavily corroded and cleaning doesn’t improve its function or appearance, a new one might be necessary.
- Difficulty Finding Parts: For older or obscure faucet models, finding the correct replacement parts (like specific washers or O-rings) can be challenging.
- Multiple Internal Issues: If you’ve tried several fixes and the sprayer still doesn’t work correctly, the internal components of the faucet might be too worn or damaged.
- Outdated Functionality: You might simply want to upgrade to a newer sprayer with better features.
How to Replace a Kitchen Faucet Sprayer
If you decide to replace the sprayer head and hose assembly, the process is similar to the initial steps of disassembly:
- Turn off the water supply.
- Detach the old sprayer head and hose from the faucet body (usually under the sink).
- Note the connection type (threaded or quick-connect).
- Purchase a compatible replacement from a hardware store or plumbing supply store. Bring the old parts with you if possible to ensure a match. Many brands offer universal replacement sprayer kits.
- Install the new hose and sprayer head, ensuring all connections are secure and sealed with plumber’s tape if applicable.
- Turn the water back on and test.
Table: Common Sprayer Problems and Solutions
| Problem | Likely Cause | Solution |
|---|---|---|
| No water from sprayer | Clogged sprayer head, faulty diverter | Clean sprayer head, check/clean/replace diverter valve, check hose for kinks/blockages. |
| Weak water pressure | Mineral buildup in sprayer head | Soak sprayer head in vinegar, scrub spray holes, check for hose kinks. |
| Leaking from sprayer head | Worn washer/O-ring in sprayer head | Replace washer/O-ring in the sprayer head assembly. |
| Leaking from hose connection | Loose connection, damaged O-ring | Tighten connection, replace O-ring at the connection point. |
| Water drips from sprayer | Diverter valve not sealing completely | Clean or replace diverter valve. |
| Sprayer handle feels stiff | Mineral buildup, worn internal parts | Clean internal parts of diverter/faucet body, lubricate O-rings. |
| Sprayer hose has a hole/crack | Hose damage | Replace the entire kitchen faucet sprayer hose assembly. |
Frequently Asked Questions (FAQ)
Q1: How do I fix a kitchen faucet sprayer that won’t spray?
A1: First, ensure your water supply is on and fully open. The most common reason is a clogged sprayer head due to mineral deposits. Try soaking the sprayer head in vinegar overnight to dissolve the buildup. If that doesn’t work, check the diverter valve inside the faucet body or the sprayer hose for kinks or blockages.
Q2: My kitchen faucet sprayer is leaking. What should I do?
A2: A leak usually means a worn-out washer or O-ring. If it’s dripping from the sprayer head itself, the seals within the head might be bad. If it’s leaking from the connection point between the hose and the sprayer, an O-ring there might be faulty or missing. You can often buy replacement O-rings at hardware stores.
Q3: Can I replace just the kitchen faucet sprayer head, or do I need the whole hose?
A3: In many cases, you can replace just the sprayer head if the hose is still in good condition. However, they are often sold as an assembly. If you’re having issues with the hose (kinks, leaks), it’s best to replace the entire kitchen faucet sprayer hose assembly.
Q4: How do I clean a clogged kitchen faucet sprayer?
A4: The most effective way is to detach the sprayer head and soak it in white vinegar for several hours or overnight. After soaking, use a small brush to scrub away loosened mineral deposits from the spray holes. Rinse thoroughly.
Q5: What is a diverter valve in a kitchen faucet sprayer?
A5: The diverter valve is a small component within the faucet body that redirects water flow. When you engage the sprayer, the diverter shifts to send water from the main spout to the sprayer hose and head. If it gets stuck or worn, it can prevent the sprayer from working or cause leaks.
Q6: My pull-down sprayer is stiff. How do I fix it?
A6: A stiff pull-down sprayer is often caused by mineral buildup or wear on the internal hose and the retraction mechanism. You can try cleaning the hose and the connection points. Sometimes, applying plumber’s grease to the O-rings and seals can help. If the hose is severely worn or damaged, you might need to replace the entire assembly.
By following these steps, you should be able to diagnose and fix most common problems with your kitchen faucet sprayer. Remember to always turn off the water supply before starting any work, and don’t hesitate to consult your faucet’s manufacturer manual if you have a specific model with unique components. Happy fixing!