
Image Source: i.ytimg.com
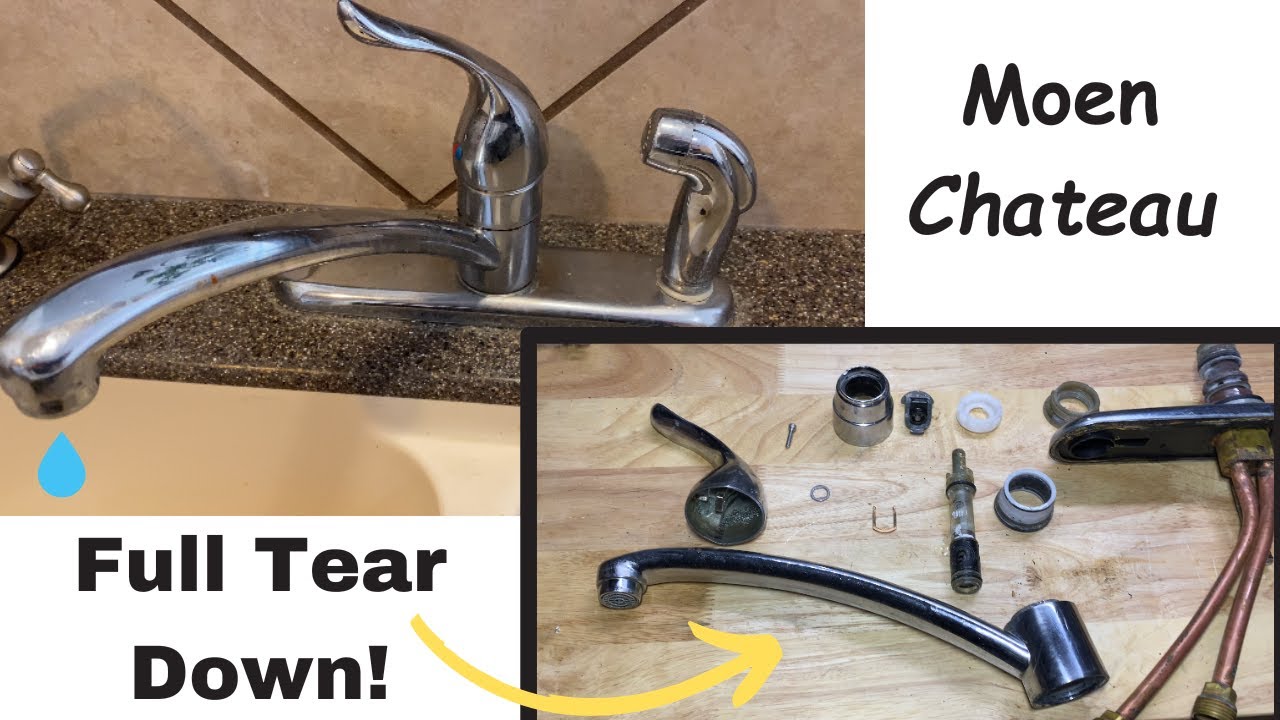
How To Dismantle A Moen Kitchen Faucet: Step-by-Step
Yes, you can often dismantle a Moen kitchen faucet yourself for repairs or cleaning. The primary reason you might need to dismantle a Moen faucet is to address issues like leaks, low water pressure, or a stiff handle. Can you replace a Moen faucet cartridge? Absolutely, this is a common repair that’s achievable for most homeowners. This comprehensive guide will walk you through the process of Moen faucet disassembly, covering everything from basic handle removal to more involved cartridge replacement and general troubleshooting.
Preparing for Moen Faucet Disassembly
Before you begin taking apart your Moen kitchen faucet, proper preparation is key. This ensures a smooth process, protects your plumbing, and makes reassembly much easier.
Essential Tools and Materials
Gathering the right tools upfront will prevent frustrating trips to the hardware store mid-task. Here’s what you’ll likely need:
- Adjustable Wrench: For loosening and tightening various nuts and fittings.
- Phillips Head Screwdriver: For screws found on handles and trim pieces.
- Flathead Screwdriver: Useful for prying off decorative caps or working with certain screws.
- Allen Wrench Set (Hex Keys): Many Moen faucet handles are secured with a small set screw that requires an Allen wrench.
- Pliers (Channel Lock or Slip-Joint): Can be helpful for gripping stubborn parts.
- Utility Knife or Small Pry Tool: For carefully removing decorative caps.
- Towel or Rag: To protect the sink finish and to catch drips.
- Bucket or Bowl: To catch any residual water.
- Plumber’s Grease or Silicone Grease: For lubricating O-rings and cartridges during reassembly.
- Replacement Moen Faucet Parts (if needed): Have these ready if you know what you’re replacing, such as a Moen faucet cartridge.
- Flashlight or Headlamp: For better visibility under the sink and inside the faucet body.
- Safety Glasses: To protect your eyes from debris or water splashes.
Turning Off the Water Supply
This is the absolute most critical first step. Failure to do so will result in an uncontrolled flood.
- Locate Shut-Off Valves: Look under your kitchen sink. You should see two shut-off valves connected to the hot and cold water supply lines that lead to the faucet.
- Turn Off Valves: Turn both valves clockwise until they are snug. Do not overtighten.
- Test Water Flow: Turn the faucet handle(s) to the “on” position. Any remaining water in the lines will drain out. Let it run until no more water comes out. This also releases any pressure in the lines.
Protecting Your Workspace
- Place a towel or old rag in the sink basin to prevent scratches from dropped tools and to catch small parts.
- Keep a bucket or bowl directly under the pipes and faucet connections you might be working on to catch any lingering water.
Moen Faucet Handle Removal: The First Step in Disassembly
Most Moen kitchen faucets have a handle that needs to be removed to access the internal components. The method for Moen faucet handle removal varies slightly depending on the model, but the general principle is the same: find and remove a small screw that holds the handle in place.
Identifying the Set Screw Location
Moen handles are typically secured by a small set screw, often hidden beneath a decorative cap or plug.
- Decorative Cap: Many handles have a small plastic or metal cap on the front or side, often marked with a blue (cold) or red (hot) indicator. Gently pry this cap off with a small flathead screwdriver or utility knife.
- Set Screw: Once the cap is removed, you’ll see a small hole. Insert the appropriate size Allen wrench (hex key) into this hole.
Removing the Handle
- Insert Allen Wrench: Fit the correct size Allen wrench into the set screw.
- Loosen the Screw: Turn the Allen wrench counter-clockwise to loosen the set screw. You don’t need to remove the screw completely; just loosen it enough so the handle can slide off.
- Lift the Handle: Once the set screw is loose, grip the handle firmly and pull it straight up and off the faucet stem. If it’s stuck, a gentle wiggle might be needed. Avoid excessive force. Sometimes, a bit of lubricant can help if it’s very stubborn.
Accessing the Moen Faucet Cartridge
The Moen faucet cartridge is the heart of the faucet, controlling water flow and temperature. Replacing or cleaning this part is often the solution for many Moen faucet problems.
Removing the Trim and Handle Adapter
After the handle is off, you’ll usually see a decorative bonnet or trim piece that screws onto the faucet body.
- Unscrew the Bonnet Nut: This is often a metal piece that sits just below where the handle was. It might unscrew by hand, or you may need an adjustable wrench. If using a wrench, wrap the nut with a cloth to prevent marring its finish. Turn it counter-clockwise.
- Remove the Retaining Clip (if applicable): Some Moen faucets use a small metal clip to hold the cartridge in place. This clip is usually U-shaped and sits in a slot on the faucet body. Use needle-nose pliers or a small screwdriver to carefully pull this clip straight up and out. Important: Note its orientation; it needs to go back the same way.
Extracting the Moen Faucet Cartridge
Once the bonnet nut and retaining clip (if present) are removed, the cartridge should be accessible.
- Grasp the Cartridge: You might see the top of the cartridge sticking out slightly. Use pliers to grip the top stem of the cartridge.
-
Pull Straight Up: Pull the cartridge straight up and out of the faucet body. It might require a firm tug, as O-rings can create a seal. Some Moen models come with a special cartridge removal tool that attaches to the cartridge stem, making it easier to extract without damaging the cartridge or the faucet body. If you have one, use it. If not, pliers are usually sufficient.
Tip: If the cartridge is very difficult to remove, try gently rocking it back and forth while pulling up. Be careful not to damage the faucet body itself.
3. Inspect the Cartridge: Once removed, examine the old cartridge. Look for cracks, worn-out O-rings, or mineral deposits. This is a good time for Moen faucet maintenance.
Moen Faucet Cartridge Replacement: A Common Moen Faucet Repair
If your Moen faucet is leaking, dripping, or has a stiff handle, replacing the cartridge is often the most effective Moen faucet repair.
Identifying the Correct Moen Faucet Cartridge
Moen uses several different types of cartridges. It’s crucial to get the exact match for your faucet model.
- Check Your Faucet Model: Look for a model number on the faucet itself (often on the underside of the spout or on the back of the faucet body) or on the original packaging if you still have it.
- Take the Old Cartridge to the Store: The most foolproof method is to take the old cartridge to a plumbing supply store or a well-stocked hardware store. They can help you find an exact replacement.
- Moen Faucet Parts: You can also order Moen faucet parts online, but ensure you have the correct part number. Moen’s website often has parts lookup tools.
Installing the New Moen Faucet Cartridge
- Lubricate O-Rings: Apply a thin layer of plumber’s grease or silicone grease to the O-rings on the new cartridge. This helps it slide in easily and creates a better seal.
- Align and Insert: Carefully align the new cartridge with the opening in the faucet body. There are usually notches or flats on the cartridge that need to match corresponding slots in the faucet body.
- Push Down: Push the new cartridge firmly into place. It should seat flush with the faucet body.
- Reinstall Retaining Clip (if applicable): If your faucet had a retaining clip, slide it back into its original position over the cartridge.
- Screw on Bonnet Nut: Thread the bonnet nut back onto the faucet body by hand, then tighten it gently with an adjustable wrench (using a cloth for protection).
Reassembling Your Moen Faucet
Once the cartridge is replaced or you’ve finished your cleaning, reassembly is the reverse of disassembly.
- Reattach Handle: Slide the handle back onto the faucet stem, aligning it correctly.
- Tighten Set Screw: Insert the Allen wrench and tighten the set screw firmly. Again, don’t overtighten.
- Replace Decorative Cap: Snap the decorative cap back into place on the handle.
- Turn Water Back On: Slowly turn the shut-off valves under the sink back on (counter-clockwise).
- Test for Leaks: Turn the faucet handle to check water flow and temperature. Inspect all connections for any signs of leaks.
Moen Faucet Troubleshooting and Maintenance
Dismantling a faucet can also be for cleaning or to address common Moen faucet troubleshooting issues.
Moen Faucet Aerator Cleaning
A clogged aerator is a frequent cause of reduced water flow from your Moen kitchen faucet.
- Locate the Aerator: This is the small screen piece at the very tip of the spout.
- Unscrew the Aerator: Most aerators can be unscrewed by hand, turning counter-clockwise. If it’s tight, use pliers with a cloth to protect the finish.
- Disassemble and Clean: Unscrew the outer casing of the aerator. You’ll find a screen, a washer, and sometimes a small flow restrictor. Rinse all these parts under running water. Use an old toothbrush or a small brush to gently scrub away any mineral deposits or debris. A soak in white vinegar for a few hours can help dissolve stubborn buildup.
- Reassemble and Reinstall: Put the aerator back together and screw it back onto the spout.
Addressing Leaks (Moen Faucet Leak Fix)
Beyond the cartridge, other parts can cause leaks.
- Spout O-rings: If the leak is from the base of the spout, the O-rings within the spout assembly might be worn. This usually requires removing the spout (often after removing the handle and bonnet nut) and replacing the O-rings.
- Base of Faucet: Leaks at the base of the faucet, where it meets the sink, usually indicate a problem with the mounting hardware or the seals between the faucet and the sink. This might involve tightening the mounting nuts under the sink or replacing the sealing gasket.
General Moen Faucet Maintenance
Regular Moen faucet maintenance can prevent many issues and extend the life of your faucet.
- Clean Aerator Regularly: As described above, this is simple and effective.
- Wipe Down Faucet: Clean the faucet body regularly with a soft, damp cloth. Avoid abrasive cleaners that can damage the finish.
- Check for Loose Parts: Periodically check if handles or connections are becoming loose.
Common Moen Kitchen Faucet Issues and Solutions
| Problem | Potential Cause(s) | Solution |
|---|---|---|
| Dripping Faucet | Worn or damaged cartridge, worn O-rings | Replace Moen faucet cartridge, replace O-rings. |
| Low Water Pressure | Clogged aerator, clogged cartridge, kinked supply line | Clean aerator, clean or replace cartridge, check and straighten supply lines. |
| Stiff or Hard-to-Turn Handle | Mineral buildup in cartridge, worn cartridge, lack of lubrication | Clean or replace cartridge, lubricate stem and cartridge with plumber’s grease. |
| Leaking from Spout Base | Worn spout O-rings | Replace spout O-rings. This may involve removing the spout by lifting it off after removing the handle and bonnet. |
| Leaking from Handle | Worn O-rings under the handle/bonnet, cracked cartridge | Replace O-rings, replace cartridge. |
| Water Temperature Issues | Incorrectly seated cartridge, faulty cartridge | Ensure cartridge is seated correctly, replace cartridge. |
| Sprayer Not Working | Clogged sprayer head, faulty diverter, broken hose | Clean sprayer head, check diverter valve (may need replacement), inspect spray hose for damage. |
Advanced Moen Faucet Disassembly and Reassembly
For more complex Moen faucet troubleshooting or when undertaking a full Moen faucet installation, you might encounter slightly different designs.
Spout Removal for Deeper Cleaning or O-ring Replacement
Some spout designs require specific steps for removal.
- Remove Handle and Bonnet: As described previously.
- Look for a Collar or Clip: Some spouts have a metal collar that screws onto the faucet body or a hidden clip that needs to be released.
- Lift the Spout: Once any securing mechanisms are removed, the spout should lift straight up. Be prepared for remaining water to drain out.
- Inspect and Replace O-rings: Locate the O-rings at the base of the spout body that seals into the faucet base. Replace these if they appear worn or damaged. Lubricate the new O-rings before reinserting the spout.
Diverter Valve Issues
If your faucet has a side sprayer or a pull-out sprayer, a diverter valve within the faucet body directs water to the sprayer.
- Symptoms of a Bad Diverter: Water flowing from both the spout and the sprayer, or water only going to the sprayer.
- Accessing the Diverter: The diverter is usually located deeper within the faucet body, often beneath the cartridge or integrated into the valve assembly. Specific procedures vary greatly by Moen model. Consult your faucet’s manual or Moen’s website for detailed instructions on accessing and replacing the diverter.
Safety First: Important Considerations
- Always Turn Off Water: This cannot be stressed enough.
- Work in a Well-Lit Area: Good lighting is essential for seeing small parts and ensuring correct reassembly.
- Don’t Force Parts: If a part is stuck, examine why. Forcing it can break it or damage the faucet body. Use penetrating oil or gentle heat if necessary, but be cautious with plastic parts.
- Keep Track of Parts: Use a tray or lay out parts in the order you remove them to make reassembly easier. Taking photos as you go can be incredibly helpful.
- Consult Your Manual: If you have the manual for your specific Moen kitchen faucet, it will provide the most accurate diagrams and instructions for your model.
Frequently Asked Questions (FAQ)
Q1: How do I know which Moen faucet cartridge I need?
A1: The best way is to identify your faucet’s model number and look up the corresponding cartridge on Moen’s website or take the old cartridge to a plumbing supply store for matching.
Q2: Can I fix a dripping Moen faucet without replacing the cartridge?
A2: While cleaning the aerator can help with low pressure, most drips are caused by a worn cartridge. Sometimes, lubricating the cartridge or replacing its O-rings can temporarily resolve a drip, but a full cartridge replacement is usually the most effective Moen faucet leak fix.
Q3: My Moen faucet handle is stuck. What should I do?
A3: Ensure the set screw is fully loosened. If it’s still stuck, try gently rocking the handle while pulling up. A penetrating lubricant applied around the stem might help. Avoid using excessive force, which could break the handle or stem.
Q4: Is Moen faucet installation difficult?
A4: Moen faucet installation is generally manageable for a DIYer with basic plumbing knowledge and the right tools. The main steps involve shutting off water, connecting supply lines, and mounting the faucet securely.
Q5: What if I can’t find the correct Moen faucet parts?
A5: Contact Moen customer support directly. They are excellent at helping identify parts and can often guide you on where to purchase them.
By following these detailed steps for Moen faucet disassembly, you can confidently tackle repairs, perform essential maintenance, and keep your Moen kitchen faucet operating smoothly for years to come. Remember, patience and the right tools are your best allies in any plumbing task.