
Can I change my kitchen sink sprayer myself? Yes, you absolutely can change your kitchen sink sprayer yourself! It’s a straightforward DIY project that most homeowners can tackle with basic tools and a little patience.
A malfunctioning kitchen sink sprayer can be a real nuisance. Whether it’s a weak spray, a constant drip, or a complete inability to spray at all, knowing how to change your kitchen sink sprayer can save you time and money on plumbing calls. This guide will walk you through the entire process, from identifying the problem to enjoying your new, fully functional sprayer. We’ll cover everything you need to know, including how to select the right replacement, how to disconnect the old unit, and how to install the new one. You’ll also learn how to address common issues like a leaky kitchen sink sprayer fix.
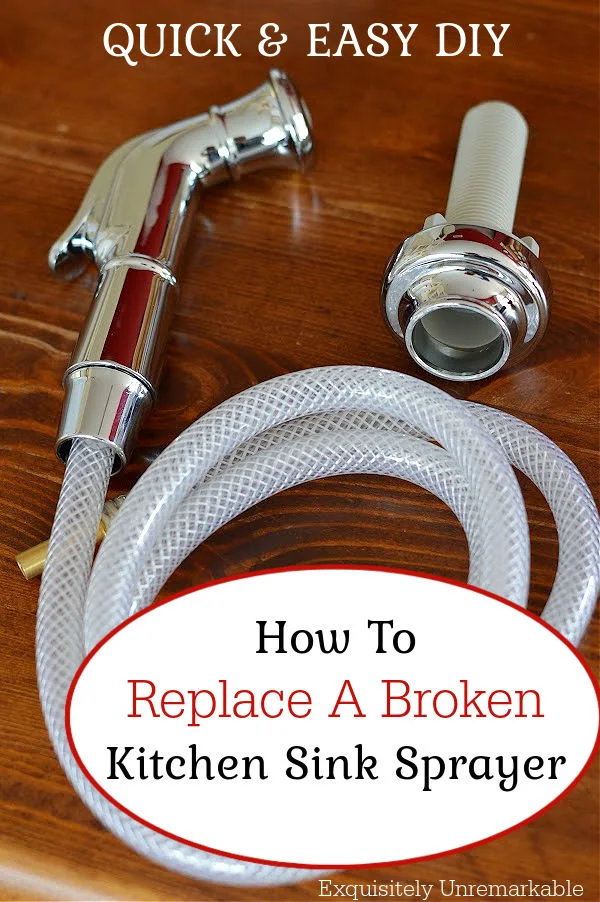
Image Source: blogger.googleusercontent.com
Why Your Kitchen Sink Sprayer Might Need Replacing
Before diving into the “how-to,” it’s helpful to understand why your current kitchen sink sprayer might be failing. Common culprits include:
- Worn-out O-rings and Seals: Over time, the rubber seals inside the sprayer head and along the hose can degrade, leading to leaks or a weak spray.
- Clogged Sprayer Nozzle: Mineral deposits from hard water can build up in the small holes of the sprayer nozzle, obstructing water flow and reducing pressure. This is a frequent reason for replacing just the kitchen sprayer nozzle.
- Damaged or Kinked Hose: The flexible hose connecting the sprayer to the faucet can develop cracks, kinks, or punctures, causing leaks or preventing water from reaching the sprayer head. A damaged kitchen sink sprayer hose is a common issue.
- Faulty Diverter Valve: This small component, often located within the faucet body, is responsible for directing water flow between the spout and the sprayer. A worn-out kitchen sprayer diverter valve can result in water leaking from the spout when the sprayer is in use, or no water at all coming out of the sprayer.
- Corrosion: Metal parts can corrode over time, especially in areas with mineral-rich water, affecting the sprayer’s function.
Gathering Your Tools and Materials
Successfully changing your kitchen sink sprayer requires a few essential tools. Having these on hand will make the job much smoother.
Essential Tools:
- Adjustable Wrench or Pliers: You’ll need this to loosen and tighten threaded connections. Channel-lock pliers are particularly useful.
- Bucket or Towels: To catch any residual water when disconnecting the old sprayer hose.
- Safety Glasses: To protect your eyes from potential drips or debris.
- Rag or Old Towel: For wiping up spills and keeping the work area clean.
- Flashlight or Headlamp: To illuminate the often-dark space under your sink.
- Penetrating Oil (Optional): If fittings are stubborn, a little penetrating oil can help loosen them.
- Plumber’s Tape (Thread Seal Tape) (Optional but Recommended): For ensuring watertight seals on threaded connections.
Replacement Parts:
- New Kitchen Faucet Sprayer Assembly: This typically includes the sprayer head, hose, and sometimes the diverter valve. Ensure you purchase a replacement that is compatible with your existing faucet. If you’re only replacing the nozzle, make sure it’s the correct thread size.
- Kitchen Faucet Hose Adapter (If Needed): Some older faucets or universal replacement parts might require a specific adapter to connect the new hose. It’s a good idea to check your existing connections before purchasing.
Step-by-Step Guide: How to Install a New Kitchen Sink Sprayer
This section will guide you through the process of removing your old sprayer and installing a new one.
Step 1: Turn Off the Water Supply
This is the most crucial first step to prevent water from spraying everywhere when you disconnect the old sprayer.
- Locate the Shut-Off Valves: Look under your sink for two valves connected to the hot and cold water lines that supply your faucet. They usually have small handles.
- Turn the Handles: Turn the handles clockwise until they are completely closed.
- Test the Faucet: Turn on the faucet to ensure the water is indeed shut off. Let any remaining water drain out, then turn the faucet off again.
Step 2: Disconnect the Old Kitchen Sink Sprayer Hose
Now it’s time to detach the old sprayer from the faucet’s water supply.
- Access the Connection Point: You’ll need to get under your sink. Position your bucket or towels directly below the faucet’s water lines.
- Identify the Sprayer Hose Connection: The sprayer hose usually connects to a vertical pipe or a fitting that branches off the main faucet supply line. You might also find a separate piece called the kitchen sprayer diverter valve here.
- Loosen the Fitting: Using your adjustable wrench or pliers, carefully turn the nut that connects the sprayer hose counter-clockwise. Hold the pipe or fitting above it steady with another wrench if possible to avoid straining the faucet connections.
- Disconnect: Once loosened, gently pull the sprayer hose free. Be prepared for a small amount of residual water to drip out into your bucket.
Step 3: Remove the Old Sprayer Head and Hose
In many cases, the sprayer head and hose are one integrated unit.
- Pull the Hose Through: If the hose is routed through a hole in your sink or countertop, gently pull the entire assembly out from under the sink.
- Separate the Sprayer Head (If Applicable): Some older models might have the hose screwed directly into the sprayer head. If this is the case, unscrew the old sprayer head from the hose. You might be replacing just the nozzle, in which case you would unscrew the old nozzle from the hose.
Step 4: Prepare the New Kitchen Faucet Sprayer Assembly
Before installing, it’s good practice to familiarize yourself with the new parts.
- Inspect the New Parts: Check the new sprayer head, hose, and any included fittings for damage.
- Attach the Sprayer Head (If Separate): If your new assembly comes with a detachable sprayer head, screw it onto the new hose. Use plumber’s tape on the threads for a better seal, tightening it gently with your hand until snug. Over-tightening can damage the plastic threads.
- Check for Adapters: If your new hose doesn’t seem to fit the existing connection under the sink, you may need a kitchen faucet hose adapter. Most modern replacements are designed to fit standard connections, but it’s wise to have one on hand if unsure.
Step 5: Connect the New Kitchen Sink Sprayer Hose
This is the reverse of Step 2.
- Route the New Hose: Feed the new hose up through the designated hole in your sink or countertop and connect it to the faucet’s water supply line or diverter valve.
- Tighten the Connection: Screw the fitting onto the pipe clockwise. Use your wrench or pliers to tighten it securely, but avoid over-tightening, which can strip threads or crack fittings. Again, holding the pipe steady is a good idea. If plumber’s tape was used on the old fitting, apply it to the new threads as well.
Step 6: Reassemble and Test
Now it’s time to see if your work paid off.
- Turn On the Water Supply: Slowly turn the water shut-off valves back on (counter-clockwise).
- Check for Leaks: Carefully inspect all connections you worked on for any signs of dripping or leaks.
- Test the Sprayer: Turn on the faucet. Activate the sprayer. Check the water flow and ensure it sprays correctly. Test the trigger mechanism and make sure the spray pattern is strong and even.
- Inspect Again: While the water is running through the new sprayer, re-check all connections for leaks.
Troubleshooting Common Issues and Leaky Kitchen Sink Sprayer Fixes
Even with careful installation, you might encounter a few hiccups. Here’s how to address them.
Water Not Coming Out of the Sprayer
- Check Diverter Valve: The kitchen sprayer diverter valve might be faulty or not fully engaged. Ensure it’s properly connected. If it’s an internal valve, it may need replacement of the entire faucet or just the valve itself.
- Kinked Hose: Make sure the new kitchen sink sprayer hose isn’t kinked or pinched anywhere along its length, especially where it goes through the sink or countertop.
- Air Lock: Sometimes, air can get trapped in the lines. Try running the water on the faucet spout for a minute, then try the sprayer again.
Weak Spray or Leaking Sprayer Head
- Clogged Nozzle: If you replaced the entire assembly, the new nozzle shouldn’t be clogged. However, if you only replaced the nozzle, ensure it’s not defective. For existing clogs, try soaking the sprayer head in vinegar to dissolve mineral deposits. This is a common leaky kitchen sink sprayer fix for the nozzle itself.
- Loose Connection: Double-check that the sprayer head is securely attached to the hose.
- Faulty Sprayer Assembly: If the entire new kitchen faucet sprayer assembly seems weak or leaky, it might be a manufacturing defect.
Leaks at the Connection Point Under the Sink
- Tighten Fitting: Gently tighten the connection nut with your wrench.
- Plumber’s Tape: If tightening doesn’t work, turn off the water again, unscrew the connection, re-apply plumber’s tape to the threads, and re-tighten.
- Damaged Threads: If the threads on either the pipe or the hose fitting are damaged, you might need to replace the pipe fitting or the entire hose.
Water Leaking from the Faucet Spout When Sprayer is On
This often points to an issue with the kitchen sprayer diverter valve.
- Faulty Diverter: The diverter valve may be worn out or not sealing properly. In some faucets, this valve is a separate component that can be replaced. In others, it’s integrated into the faucet body, meaning you might need to replace the entire faucet.
Replacing Just the Kitchen Sprayer Nozzle
Sometimes, the hose and diverter are fine, but the sprayer head itself is the problem. Replacing just the kitchen sprayer nozzle is even simpler than a full replacement.
- Turn off Water Supply: As always, start by shutting off the water under the sink.
- Disconnect Old Nozzle: Unscrew the old sprayer head from the existing hose. You may need pliers to get a good grip.
- Prepare New Nozzle: Ensure your new nozzle is compatible. Many are universal, but always check thread size. Some new nozzles may come with a new washer or O-ring; ensure it’s properly seated.
- Attach New Nozzle: Screw the new nozzle onto the hose hand-tight.
- Tighten: Use pliers or a wrench to snug it up. Again, avoid over-tightening.
- Test: Turn the water back on and check for leaks and proper function.
Understanding Your Kitchen Faucet Sprayer Assembly
Your kitchen faucet sprayer assembly is more than just a spray head. It’s a system designed for convenience. When it works correctly, it allows you to rinse dishes, clean the sink, and fill pots with ease. The main components are:
- Sprayer Head: The part you hold, with various spray settings and a trigger. This is where you would replace the kitchen sprayer nozzle if it gets clogged or damaged.
- Hose: The flexible tubing that carries water from the faucet body to the sprayer head. This is your kitchen sink sprayer hose.
- Diverter Valve: This crucial part, often housed within the faucet body, directs water flow. When you pull the sprayer trigger, it redirects water from the main spout to the hose. A faulty kitchen sprayer diverter valve is a common issue.
- Mounting Bracket: The holder for your sprayer head, typically mounted on the sink or countertop.
When you need to change the entire unit, you are essentially replacing the kitchen faucet sprayer assembly.
Frequently Asked Questions (FAQ)
Q: How often should I replace my kitchen sink sprayer?
A: There’s no set schedule. You should replace it when you notice significant leaks, a weak spray, or if the hose is damaged. Many can last for many years with proper care.
Q: Can I use a universal sprayer with my faucet?
A: Most universal kitchen faucet sprayer replacements are designed to fit standard faucet connections. However, it’s always best to check the thread size of your existing hose and the new sprayer assembly before purchasing. If the connections don’t match, you might need a kitchen faucet hose adapter.
Q: What if the new sprayer doesn’t fit?
A: Double-check that you bought the correct type of sprayer for your faucet. Some older or designer faucets have non-standard fittings. If the hose connection is the issue, a kitchen faucet hose adapter might solve it. If the sprayer head thread is wrong, you may need to exchange it for a compatible model.
Q: My faucet has a pull-down sprayer. Can I still replace the hose?
A: Yes, pull-down sprayers have hoses that retract. The process is similar, but you’ll need to disconnect the hose from inside the faucet body and potentially from the weight that helps retract it. There are often specific replacement hose kits for pull-down sprayers.
Q: How do I fix a leaky kitchen sink sprayer?
A: For a leaky kitchen sink sprayer fix, first identify where the leak is coming from. If it’s from the nozzle, it might be a worn-out seal or a clog. If it’s from the hose connection, tighten the fitting or reapply plumber’s tape. A leak from the faucet spout when the sprayer is on usually indicates a problem with the kitchen sprayer diverter valve.
By following these steps, you can confidently tackle the job of changing your kitchen sink sprayer, ensuring your faucet functions smoothly and efficiently once again.