
Can you caulk a kitchen sink yourself? Absolutely! Caulking around your kitchen sink is a DIY-friendly task that anyone can tackle to prevent water damage and keep your kitchen looking its best. This guide will walk you through every step of applying caulk kitchen surfaces, ensuring a watertight seal for your waterproof kitchen sink. We’ll cover everything from selecting the right kitchen sink sealant to the final cleanup, making sure you achieve a professional finish.
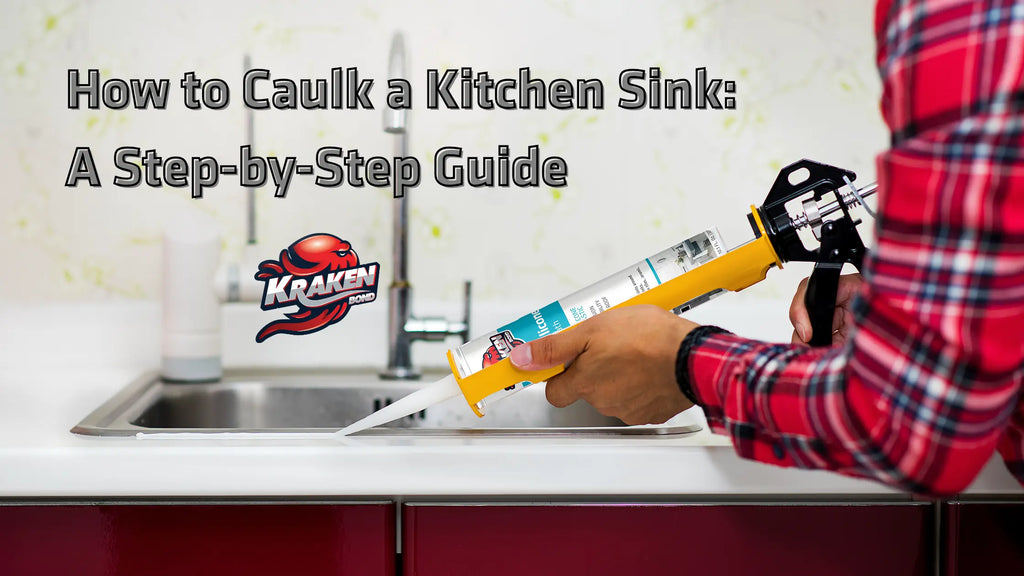
Image Source: cdn.shopify.com
Why Caulking Your Kitchen Sink Matters
Your kitchen sink is a hub of activity. From washing dishes to rinsing vegetables, it’s constantly exposed to water. A proper caulk seal acts as a barrier, preventing water from seeping into the countertop or cabinet below. Without this seal, you risk:
- Water Damage: This can lead to mold, mildew, and rot, weakening your cabinets and countertops.
- Stains and Discoloration: Water trapped in porous materials can cause unsightly marks.
- Pest Infestations: Damp areas can attract unwanted pests.
- Deterioration of Adhesives: The adhesive holding your sink in place can break down over time with constant moisture exposure.
A well-caulked sink not only protects your kitchen but also enhances its appearance, creating a clean, finished look. This process is crucial for both new kitchen sink installation and maintaining an existing one.
Gathering Your Supplies
Before you begin, ensure you have all the necessary tools and materials. Having everything ready makes the process smoother and more efficient.
Essential Tools:
- Caulk Gun: This tool dispenses caulk evenly. Look for a dripless model for easier application.
- Utility Knife or Caulk Removal Tool: For scraping away old caulk.
- Putty Knife or Scraper: To help remove stubborn old caulk.
- Cleaning Rags or Paper Towels: For wiping up excess caulk and cleaning the area.
- Rubbing Alcohol or Denatured Alcohol: To ensure the surface is perfectly clean and dry.
- Painter’s Tape (Optional but Recommended): For creating clean caulk lines.
- Caulk Finishing Tool or Your Finger: To smooth the caulk bead.
Choosing the Right Caulk:
The type of caulk you choose is critical for a lasting seal. For kitchen sinks, you need a caulk that is:
- Waterproof: Essential for resisting moisture.
- Mildew-Resistant: Kitchens can be humid, so this feature is important.
- Flexible: It needs to accommodate movement between the sink and countertop.
- Adhesive: It should bond well to both the sink material and the countertop.
Common options include:
- 100% Silicone Caulk: Highly waterproof and durable, but can be tricky to work with and difficult to paint over. It’s excellent for sink edge sealing.
- Siliconized Acrylic Latex Caulk: Easier to apply and clean up, and can be painted. It offers good flexibility and water resistance. Many manufacturers offer specific kitchen sink sealant formulations.
- Kitchen and Bath Caulk: Specifically designed for these areas, often containing mildew inhibitors.
Table 1: Caulk Type Comparison for Kitchen Sinks
| Caulk Type | Waterproof | Mildew Resistant | Flexibility | Ease of Application | Paintable | Best For |
|---|---|---|---|---|---|---|
| 100% Silicone | Excellent | Good | High | Moderate | No | High moisture areas, durable seals |
| Siliconized Acrylic Latex | Good | Very Good | Moderate | Easy | Yes | General purpose, painted finishes |
| Kitchen & Bath (Acrylic) | Good | Excellent | Moderate | Easy | Yes | General sealing, preventing mold |
For most DIY kitchen sink projects, a siliconized acrylic latex caulk designed for kitchens and baths is a great choice. It offers a good balance of performance and ease of use.
Step-by-Step Guide to Caulking Your Kitchen Sink
Now that you have your supplies, let’s get started! The process involves preparing the area, applying the caulk, and cleaning up.
Step 1: Removing Old Caulk
Before you can apply new kitchen sink sealant, you must thoroughly remove all the old caulk. This is a crucial step for ensuring the new caulk adheres properly.
Techniques for Removing Old Caulk:
- Using a Utility Knife or Caulk Removal Tool:
- Carefully insert the blade of your utility knife or caulk removal tool at an angle under the edge of the old caulk.
- Gently pull the tool along the seam, scraping away the caulk. Be careful not to scratch your sink or countertop.
- Work in sections, applying steady pressure.
- Using a Putty Knife or Scraper: For thicker or more stubborn caulk, a putty knife or scraper can provide more leverage. Slide it under the caulk and lift.
- Using Specialized Caulk Removers: Some chemical removers can soften old caulk, making it easier to scrape away. Follow the product instructions carefully and ensure good ventilation.
Cleaning After Removal:
- Once the bulk of the old caulk is removed, use a damp cloth to wipe away any residue.
- For any remaining stubborn bits, you might need to repeat the scraping process.
- Make sure the entire area where the new caulk will be applied is completely free of old caulk and debris.
This step is also relevant if you’re dealing with an old bathroom sink caulk job that needs refreshing. Proper removing old caulk is key to a successful reseal.
Step 2: Cleaning the Area Thoroughly
A clean surface is paramount for good adhesion. Any dirt, grease, soap scum, or moisture will prevent the new caulk from sticking.
- Wash the Area: Use warm water and a mild detergent to clean the seam where the sink meets the countertop.
- Degrease: Kitchens can accumulate grease. Wipe down the area with a clean cloth dampened with rubbing alcohol or denatured alcohol. This removes any remaining grease or residue.
- Dry Completely: Ensure the area is bone dry. You can use a clean, lint-free cloth or paper towels. Allow ample time for it to air dry if necessary. You can even use a hairdryer on a cool setting for a quick dry.
This meticulous cleaning ensures your kitchen sink installation or resealing job will last.
Step 3: Applying Painter’s Tape (Optional but Recommended)
For a perfectly straight and professional-looking caulk line, painter’s tape is your best friend.
- Measure and Cut: Cut strips of painter’s tape long enough to cover the seams you want to caulk.
- Apply the Tape:
- Apply one strip of tape along the edge of the countertop, about 1/8 to 1/4 inch away from the seam where the sink meets the counter.
- Apply another strip of tape along the edge of the sink itself, leaving the same gap.
- Ensure the tape is pressed down firmly to create a good seal and prevent caulk from seeping underneath.
- Purpose: This creates a clean border. Once the caulk dries, you simply peel away the tape, leaving a sharp, uniform caulk bead.
Step 4: Preparing the Caulk Tube and Caulk Gun
Proper caulk gun use is essential for a smooth application.
- Cut the Nozzle: Using a utility knife or the cutter on your caulk gun, cut the tip of the caulk tube nozzle at a 45-degree angle. Start with a small opening; you can always make it bigger if needed. A smaller opening gives you more control for finer beads.
- Puncture the Seal: Most caulk tubes have an inner seal. Use the puncture tool on your caulk gun (or a long nail/wire) to break this seal.
- Load the Caulk Gun: Pull back the caulk gun’s plunger rod. Insert the caulk tube into the gun, with the cut nozzle facing outward. Push the plunger rod firmly against the back of the caulk tube.
- Release Pressure: After each bead or when you stop applying caulk, press the release trigger or lever on the caulk gun to stop the flow and prevent dripping.
Step 5: Applying the Caulk
This is where the magic happens! Aim for a consistent, steady bead.
- Positioning: Place the tip of the caulk nozzle at the beginning of the seam, at a slight angle to the surface.
- Squeezing: Apply steady, even pressure to the caulk gun trigger.
- Moving: Move the caulk gun smoothly and consistently along the seam at a steady pace. Try to maintain the same angle and pressure throughout.
- Overlapping: Slightly overlap your caulk beads if you have to stop and restart to ensure a continuous seal.
- Sinking Fixtures: When caulking kitchen faucet connections or around the sink drain, ensure the caulk fills the gap completely. For sealing sink drain components, make sure the caulk creates a watertight barrier around the flange. This is also important for any sink accessories.
Tip: Practice on a piece of scrap cardboard first to get a feel for the caulk gun and nozzle control.
Step 6: Smoothing the Caulk Bead
After applying the caulk, you need to smooth it to create a clean, finished look and ensure it’s properly pressed into the seam.
Methods for Smoothing:
- Caulk Finishing Tool: These tools come with different profiles and can create very clean lines. Drag the tool along the bead at a consistent angle.
- Your Finger: Dip your finger in a bit of water (or a caulk smoothing solution if recommended by the manufacturer). Run your finger smoothly along the bead, pushing the caulk into the gap and wiping away excess onto the painter’s tape or a damp cloth. Be prepared to rinse your finger frequently.
- Damp Cloth or Sponge: A damp cloth or sponge can also be used to wipe away excess and smooth the bead.
Important: Work in sections if you are not using painter’s tape, as caulk can start to skin over quickly. If you are using tape, you can smooth the entire bead before removing the tape.
Step 7: Removing the Painter’s Tape (If Used)
This is the moment of truth!
- Timing: Remove the painter’s tape while the caulk is still wet or slightly tacky, but not fully cured. If you wait too long, the caulk might pull away with the tape.
- Slow and Steady: Gently and slowly peel the tape away from the seam at a 45-degree angle. Pulling too fast can mess up the caulk line.
- Clean Up Excess: If any caulk got onto the tape or slightly onto the cleaned surface, wipe it away immediately with a damp cloth.
Step 8: Cleaning Up
Proper cleanup ensures a professional finish and prevents accidental smudges.
- Wipe Away Excess: Use a damp cloth to immediately wipe away any excess caulk from the surrounding surfaces, tools, and your hands. For silicone caulk, you might need mineral spirits for cleanup, but always check the product instructions.
- Dispose of Materials: Properly dispose of used caulk tubes, rags, and tape.
- Allow to Cure: Let the caulk cure completely according to the manufacturer’s instructions. Avoid using the sink or exposing the caulk to excessive water during this time.
Caulking Specific Areas of Your Kitchen Sink
Beyond the main seam, certain areas require special attention.
Caulking Around the Kitchen Faucet
The base of your kitchen faucet is another potential leak point.
- Preparation: Ensure the area around the faucet base is clean and dry.
- Application: Apply a thin, consistent bead of caulk around the base of the faucet where it meets the countertop or sink deck.
- Smoothing: Use a caulk finishing tool or your finger to smooth the bead, ensuring it seals tightly against the faucet and the mounting surface. Wipe away any excess.
Sealing the Sink Drain
The sink drain assembly, particularly the flange that sits against the sink basin, needs a good seal to prevent leaks from the basin into the cabinet below.
- During Installation: When installing a new sink or drain, apply a bead of plumber’s putty or silicone sealant around the underside of the drain flange before inserting it into the sink opening. Tighten the locking nut firmly to compress the sealant, creating a watertight seal.
- For Existing Drains: If you suspect a leak from the drain flange, you may need to remove the drain assembly to reapply sealant. This is a more involved process, but crucial for sealing sink drain components effectively.
Sink Edge Sealing (For Undermount Sinks)
For undermount sinks, the sink edge sealing is critical as the entire weight and water seal rely on the caulk and adhesive.
- Clean the Underside Lip: Ensure the underside lip of the countertop and the top edge of the sink are perfectly clean and dry.
- Apply Caulk: Apply a continuous bead of silicone sealant around the entire perimeter of the sink’s top edge.
- Positioning: Carefully lift the sink into place and press it firmly against the countertop.
- Securing: Most undermount sinks also have clips or adhesive to hold them in place. Ensure these are properly installed.
- Smoothing: Smooth any excess caulk that squeezes out with a damp cloth or caulk finishing tool.
Maintaining Your Caulk Seal
Once your sink is properly caulked, a little maintenance will help your seal last longer.
- Regular Cleaning: Clean your sink and the caulk lines regularly with mild soap and water. Avoid abrasive cleaners that can damage the caulk.
- Inspect Periodically: Check the caulk for any signs of cracking, peeling, or mold growth. If you notice any damage, it’s time to remove the old caulk and reapply.
- Address Mold Promptly: If you see early signs of mold, clean the area with a diluted bleach solution or a dedicated mold remover.
Troubleshooting Common Caulking Issues
Even with careful application, you might encounter a few hiccups.
Uneven Bead:
- Cause: Inconsistent pressure on the caulk gun, varying speed, or a nozzle that wasn’t cut correctly.
- Solution: For wet caulk, you can try to smooth it out with a damp cloth or caulk tool. If it’s already partially set, you might need to remove it and start over.
Caulk Pulling Away with Tape:
- Cause: Tape removed too late or too aggressively.
- Solution: If it’s a minor pull, you might be able to gently press it back into place with a damp finger. For significant pulls, removal and reapplication are necessary.
Too Much Excess Caulk:
- Cause: Over-application or poor smoothing.
- Solution: Wipe away excess immediately with a damp cloth. If it dries, it can be carefully scraped away with a utility knife.
Gaps in the Caulk Line:
- Cause: Not applying enough caulk or stopping and starting without overlapping.
- Solution: You can try to carefully apply a small additional bead into the gap. If the caulk has already dried, you might need to remove the section and reapply.
Frequently Asked Questions (FAQ)
Q1: How often should I re-caulk my kitchen sink?
A1: The lifespan of caulk varies depending on usage, cleaning habits, and the type of caulk used. Generally, you should inspect your caulk every 6-12 months and consider re-caulking every 1-3 years or whenever you notice signs of wear, cracking, peeling, or mold.
Q2: Can I caulk over old caulk?
A2: It is strongly discouraged to caulk over old caulk. The new caulk will not adhere properly to the old caulk, leading to premature failure, peeling, and potential water leaks. Always remove old caulk completely before applying new sealant.
Q3: What is the best caulk for a kitchen sink?
A3: For most kitchen sinks, a high-quality siliconized acrylic latex caulk or 100% silicone caulk formulated for kitchens and baths is recommended. Look for features like waterproofing and mildew resistance.
Q4: How do I clean caulk before applying new caulk?
A4: Thoroughly remove all old caulk using a utility knife or caulk removal tool. Then, clean the area with warm, soapy water and degrease it with rubbing alcohol or denatured alcohol. Ensure the surface is completely dry before applying new caulk.
Q5: How long does caulk take to dry?
A5: Drying and curing times vary significantly by product. Most latex-based caulks are dry to the touch in 30-60 minutes, but fully cure in 24-48 hours. Silicone caulks can also take 24-48 hours to fully cure. Always check the manufacturer’s label for specific drying and curing times. Avoid using the sink until the caulk has fully cured.
By following these detailed steps, you can confidently caulk your kitchen sink, protecting your home from water damage and maintaining a clean, polished look. Enjoy your newly sealed and leak-free kitchen sink!