
Can I fix my kitchen cabinets myself? Yes, you can fix most common kitchen cabinet issues yourself with a little patience and the right tools.
Your kitchen cabinets are the workhorses of your culinary space. They store everything from pots and pans to dry goods and cleaning supplies. Over time, wear and tear can lead to various problems, from sticky drawers to sagging doors. But before you call in the expensive professionals, know that many common cabinet repair jobs are well within your reach. This guide will walk you through how to tackle these issues, saving you time and money.
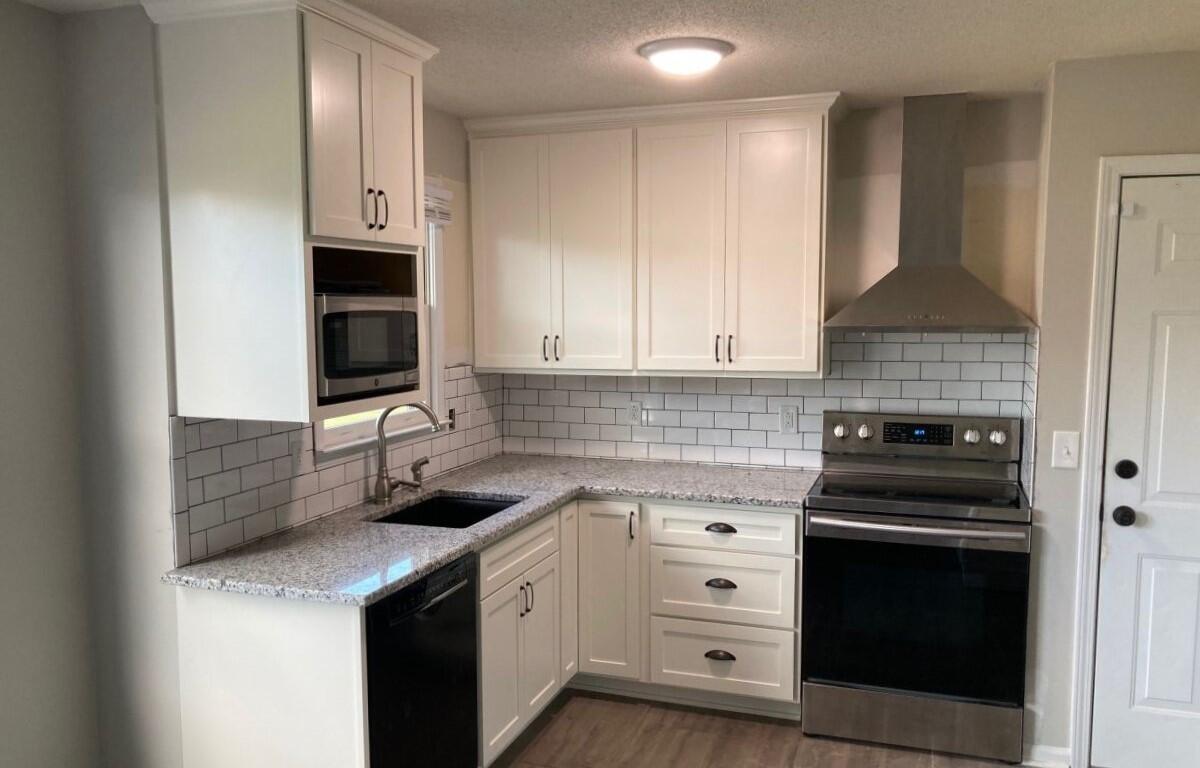
Image Source: clarksvillenow.com
Common Kitchen Cabinet Problems and Their Solutions
Let’s dive into the most frequent cabinet woes and how to get them back in working order.
Drawer Woes: Fixing Sticky and Off-Track Drawers
Drawers that stick, wobble, or refuse to slide smoothly are a common frustration. Often, the culprit is worn-out drawer slides or debris in the tracks.
Diagnosing Drawer Problems
Before you start, figure out what’s causing the drawer to misbehave:
- Sticky Drawer: Does the drawer feel like it’s catching on something?
- Wobbly Drawer: Does the drawer feel loose or unstable when you pull it out?
- Off-Track Drawer: Does the drawer tilt or come off its runners completely?
Repairing Sticky Drawers
Often, sticky drawers are caused by friction. A little lubrication can go a long way.
Lubricating Drawer Slides
- Clear the Tracks: First, pull the drawer out as far as it will go. Inspect the drawer slides (both on the drawer and in the cabinet frame) for any debris, dust bunnies, or old grease. Use a dry cloth or a vacuum cleaner with a brush attachment to clean them thoroughly.
- Apply Lubricant: Once clean, apply a dry lubricant like paraffin wax, a silicone spray, or even a bar of soap to the parts of the slide that make contact. Rub the wax or soap directly onto the metal or plastic slides. For spray lubricants, spray a light, even coat.
- Test the Drawer: Slide the drawer in and out a few times to distribute the lubricant. If it’s still sticking, you might need to reapply.
Addressing Drawer Frame Issues
Sometimes, the drawer itself might be binding against the cabinet frame due to warping or loose screws.
- Check for Warping: Gently try to push the drawer into the cabinet. If you see a specific area where it rubs tightly against the frame, that’s your spot.
- Tighten Screws: Check all screws holding the drawer slides to both the drawer and the cabinet. Loose screws can cause misalignment. Tighten them with a screwdriver.
- Sanding (If Necessary): If the drawer box or the cabinet frame has a slight warp and is causing friction, you might need to very lightly sand the offending area. Use medium-grit sandpaper and sand with the grain of the wood. Clean up the dust immediately.
Repairing Off-Track Drawers (Drawer Repair)
When a drawer comes off its tracks, it usually means the slides are damaged or improperly installed.
Realigning Drawer Slides
- Remove the Drawer: Carefully remove the drawer from its cabinet. You might need to disengage a locking mechanism on the slides.
- Inspect Slides: Look at the drawer slides. Are they bent, broken, or has the roller popped off?
- Bent Slides: If a metal slide is bent, you might be able to gently bend it back into shape using pliers. Be careful not to force it too much, as this can break the metal.
- Broken Rollers/Bearings: If a roller has come off or a bearing is missing, you’ll likely need to replace the entire drawer slide assembly. Measure your existing slides carefully to ensure you purchase the correct replacement size and type.
- Reinstall Slides: Once you’ve repaired or replaced the slides, carefully reinstall them. Ensure they are level and parallel to each other. Most slides have pre-drilled holes for screws; use these to ensure proper alignment.
- Test: Gently slide the drawer back into the cabinet. It should glide smoothly.
Cabinet Door Adjustments: Restoring Alignment and Function
Loose, crooked, or slamming cabinet doors are unsightly and can be annoying. Fortunately, cabinet door adjustment is usually straightforward.
Why Cabinet Doors Sag or Don’t Close Properly
The most common reason for misaligned cabinet doors is that the hinges have loosened over time or have been knocked out of position.
Adjusting Cabinet Hinges
Most modern cabinet hinges have adjustment screws that allow you to fine-tune the door’s position. There are typically three adjustment points:
- In/Out: This screw controls how far the door sits into the cabinet frame.
- Up/Down: This screw usually adjusts the vertical position of the door.
- Left/Right: This screw moves the door horizontally within the cabinet opening.
Step-by-Step Hinge Adjustment
- Identify Adjustment Screws: Open the cabinet door. Look at the hinge attached to the cabinet frame and the door. You’ll see a series of screws.
- Make Small Adjustments: Start with one screw at a time. Turn it slightly (a quarter turn is often enough).
- Observe the Effect: Close the door to see how the adjustment has changed its position.
- Door Too High/Low: Adjust the up/down screw.
- Door Too Close/Far from Frame: Adjust the in/out screw.
- Door Too Far Left/Right: Adjust the left/right screw.
- Repeat as Needed: Continue making small adjustments and testing until the door is perfectly aligned with its neighboring doors and closes flush.
- Tighten: Once you’re happy with the alignment, ensure all adjustment screws are snug, but don’t overtighten.
When Hinges Need More Than Adjustment (Cabinet Hinge Repair)
If a hinge is bent, rusted, or the mounting holes are stripped, you might need to replace the hinge or repair the mounting point.
Replacing Cabinet Hinges
- Identify Hinge Type: Cabinet hinges come in many styles (e.g., overlay, inset, concealed). Take a picture of your existing hinge or bring it to the hardware store to find an exact match or a compatible replacement.
- Remove Old Hinge: Unscrew the old hinge from both the door and the cabinet frame.
- Install New Hinge: Screw the new hinge into place, aligning it with the old screw holes as much as possible.
- Adjust: Use the adjustment screws on the new hinges to get the door sitting perfectly.
Repairing Stripped Screw Holes
If the screw holes in the cabinet frame or door are stripped, the hinge won’t stay put.
- Fill the Hole: A common fix is to fill the stripped hole with wood filler or a wooden toothpick.
- Wood Filler: Apply wood filler into the hole with a putty knife. Let it dry completely according to the product instructions. Then, drill a new pilot hole for the screw.
- Toothpicks/Golf Tees: Insert several wooden toothpicks or a wooden golf tee into the hole, along with a bit of wood glue. Break off any excess flush with the surface. Let the glue dry. Then, drill a new pilot hole into the filled hole.
- Reattach Hinge: Screw the hinge back into the repaired hole.
Cabinet Door Sagging or Binding
Sometimes, the entire door might sag, not just due to the hinges, but because the door panel itself is warped, or the frame is flexing.
Fixing Sagging Doors
- Check Door Squareness: Lay the door flat on a clean surface. Use a carpenter’s square to check if the corners are at a perfect 90-degree angle.
- Reinforce Corners (If Necessary): If the door panel itself is slightly warped, it can be difficult to fully correct without professional refinishing. However, if the warping is minor, reinforcing the corners with small L-brackets on the inside of the door can sometimes help maintain its shape and prevent further sagging.
- Check Cabinet Frame: Ensure the cabinet frame itself is square and sturdy. If the frame is weak or warped, this will affect the door alignment. You might need to reinforce the cabinet box itself with additional screws or bracing.
Loose Cabinet Knobs and Handles (Cabinet Hardware Replacement)
Loose or wobbly cabinet handle replacement is one of the simplest DIY fixes.
Tightening Loose Knobs and Pulls
- Access the Screw: Look at the back of the knob or handle where the screw enters from the inside of the cabinet door or drawer.
- Tighten: Use a Phillips head screwdriver or the appropriate tool for the screw. Simply tighten it until the knob or handle is snug. Be careful not to overtighten, as this can strip the screw or damage the wood.
Replacing Cabinet Hardware
Changing your cabinet hardware is an easy way to update the look of your kitchen.
- Measure Existing Holes: If you’re replacing hardware, measure the distance between the center of the mounting holes (this is called the “center-to-center” measurement). This is crucial for ensuring your new hardware will fit without drilling new holes. Common measurements are 3 inches, 4 inches, or 6 inches.
- Select New Hardware: Choose knobs or pulls that match your style and have the correct center-to-center measurement.
- Remove Old Hardware: Unscrew the old knobs or pulls from the inside of the cabinet door or drawer.
- Install New Hardware: Place the new hardware onto the front of the door or drawer and secure it with the screws from the inside.
Cabinet Refinishing and Refacing: A Deeper Transformation
When the problems go beyond simple adjustments or repairs, you might consider more extensive updates.
Cabinet Refinishing
Cabinet refinishing involves cleaning, sanding, and reapplying a new finish (paint or stain) to your existing cabinets. This can revitalize their appearance and cover up minor scratches and wear.
When to Consider Refinishing
- The cabinet boxes and doors are structurally sound.
- The existing finish is worn, scratched, or dated.
- You want to change the color or sheen of your cabinets.
Key Steps in Refinishing
- Preparation is Key:
- Remove Doors and Hardware: Take off all cabinet doors, drawer fronts, knobs, and hinges. Label them so you know where they go.
- Clean Thoroughly: Wash all surfaces with a degreaser to remove grease and grime.
- Sand: Lightly sand all surfaces to create a smooth base for the new finish. Use fine-grit sandpaper (120-220 grit).
- Wipe Down: Remove all sanding dust with a tack cloth or a damp microfiber cloth.
- Apply Primer: Apply a high-quality primer designed for cabinetry. This ensures better adhesion and a more even finish. Let it dry completely.
- Apply Finish (Paint or Stain):
- Painting: Use a good quality cabinet paint. Apply thin, even coats with a brush, roller, or sprayer. Allow each coat to dry thoroughly before applying the next. You’ll likely need 2-3 coats.
- Staining: Apply wood stain evenly with a brush or cloth, wiping off excess with a clean rag. Let it penetrate for the desired color intensity.
- Apply Topcoat (Polyurethane or Sealer): Once the paint or stain is dry, apply 2-3 coats of a durable topcoat like polyurethane or a cabinet-grade sealer. This protects the finish from wear and moisture. Lightly sand between coats with very fine-grit sandpaper (220-320 grit) for a smoother finish.
- Reassemble: Once the topcoat is fully cured (this can take several days), reattach the hardware and hang the doors.
Cabinet Refacing
Cabinet refacing is a more involved process that involves replacing the visible surfaces of your cabinets. It’s a good option if your cabinet boxes are in good condition but the doors and drawer fronts are damaged, outdated, or you want a completely new look without a full gut renovation.
What Cabinet Refacing Entails
- New Doors and Drawer Fronts: This is the most significant part. You’ll get brand new doors and drawer fronts, often in a different style or material.
- New Veneer: The exposed cabinet frames (the “boxes”) are typically covered with a matching veneer or laminate to give them a fresh look that coordinates with the new doors.
- New Hardware: This is often included as part of the refacing package.
When to Consider Refacing
- The cabinet boxes (the internal structure) are sound and level.
- You want a completely new cabinet style or color.
- The existing doors and drawer fronts are heavily damaged, warped, or you simply dislike their style.
- You want a dramatic facelift without the cost and disruption of a full cabinet replacement.
Cabinet Cleaning and Maintenance
Regular cabinet cleaning and cabinet maintenance are the best ways to prevent major repair issues.
Routine Cleaning
- Daily: Wipe down cabinet fronts with a damp microfiber cloth to remove fingerprints and minor smudges. Use a dry cloth to buff.
- Weekly: For more thorough cleaning, use a mild dish soap mixed with warm water. Wipe down surfaces with a damp cloth, then immediately dry with a clean, soft cloth to prevent water spots or damage, especially on wood finishes.
- Degreasing: Kitchens accumulate grease. For stubborn grease spots, use a dedicated cabinet cleaner or a solution of equal parts white vinegar and water. Always test in an inconspicuous spot first.
Deep Cleaning and Seasonal Maintenance
- Quarterly: Deep clean all cabinet surfaces, paying attention to corners and edges where grime can build up.
- Check Hinges and Slides: Periodically (every 6-12 months), check that all hinges and drawer slides are secure and functioning smoothly. Lubricate as needed.
- Inspect for Damage: Look for any signs of wear, loose joints, or finish damage. Address minor issues promptly before they become major problems.
Repairing Damaged Drawer Fronts or Cabinet Panels
If a drawer front or cabinet panel is chipped, cracked, or gouged, you can often repair it.
Minor Chips and Scratches
- Wood Filler/Putty: For small chips or gouges in wood cabinets, use a matching color wood filler or putty. Apply it with a putty knife, pressing it into the damaged area.
- Smooth and Sand: Once the filler is dry, gently sand the area smooth with fine-grit sandpaper.
- Touch-Up Paint/Stain: Apply a small amount of matching touch-up paint or stain to the repaired area. You might need to use a very fine brush for precision.
Cracks in Wood
- Wood Glue: For small cracks, carefully work wood glue into the crack using a thin piece of plastic or a small brush.
- Clamp: Clamp the cracked area together firmly until the glue dries completely. Use a damp cloth to wipe away any excess glue that squeezes out.
- Sanding and Finishing: Once dry, sand lightly and touch up the finish if necessary.
Tools You’ll Need for Cabinet Repairs
Having the right tools makes all the difference. Here’s a basic list:
- Phillips head screwdriver
- Flathead screwdriver
- Pliers (needle-nose and standard)
- Measuring tape
- Putty knife
- Sandpaper (various grits: 80, 120, 220)
- Clean cloths and rags
- Vacuum cleaner with brush attachment
- Wood glue
- Wood filler or putty
- Lubricant (paraffin wax, silicone spray, or bar of soap)
- Safety glasses and gloves
- Optional: Drill/driver with screwdriver bits, carpenter’s square, tack cloth, paint/stain, primer, topcoat.
When to Call a Professional
While many cabinet repairs are DIY-friendly, there are times when professional help is best:
- Major Structural Damage: If your cabinet boxes are significantly warped, rotted, or structurally unsound.
- Complex Veneer or Laminate Issues: If the veneer is peeling extensively or the laminate is severely damaged.
- Cabinet Refacing or Refinishing (if you lack time or skill): While DIY is possible, achieving a factory-quality finish can be challenging and time-consuming.
- Custom Cabinetry: If you have high-end or custom-built cabinets, it’s often safer to use professionals who specialize in those materials.
- Pest Infestation: If you suspect woodworm or other pests.
Frequently Asked Questions (FAQ)
Q1: How often should I clean my kitchen cabinets?
A1: It’s recommended to wipe down cabinet fronts daily or every other day to remove fingerprints and smudges. A more thorough cleaning with a mild cleaner should be done weekly or bi-weekly, depending on your kitchen’s usage and grease accumulation.
Q2: My cabinet doors won’t stay closed. What’s wrong?
A2: This could be due to misaligned hinges, weak or broken magnetic catches, or a warped cabinet door or frame. Start by checking and adjusting your hinges. If those are fine, inspect and replace any magnetic catches or consider addressing door/frame warping.
Q3: Can I paint over stained cabinets?
A3: Yes, you can paint over stained cabinets, but proper preparation is crucial. You’ll need to clean thoroughly, lightly sand, and apply a high-quality primer before painting to ensure good adhesion and a smooth finish.
Q4: What is the difference between cabinet refinishing and refacing?
A4: Cabinet refinishing involves cleaning, sanding, and reapplying a new finish (paint or stain) to your existing cabinet doors and frames. Cabinet refacing involves replacing the doors and drawer fronts and often covering the exposed cabinet boxes with new veneer or laminate. Refacing offers a more dramatic style change.
Q5: How do I fix a stripped screw hole in my cabinet?
A5: You can fix a stripped screw hole by filling it with wood glue and wooden toothpicks or a golf tee, letting it dry, and then drilling a new pilot hole. Alternatively, use a commercial wood filler.
Regular cabinet maintenance and addressing minor issues promptly will keep your kitchen looking great and functioning smoothly for years to come. With a little effort, you can tackle most common cabinet repair needs yourself!