
Wondering how to build a kitchen table? You absolutely can build your own! It’s a rewarding project that allows you to create a custom kitchen table perfectly suited to your space and style. This guide will walk you through building a sturdy and attractive DIY dining table from start to finish, even if you’re new to woodworking.
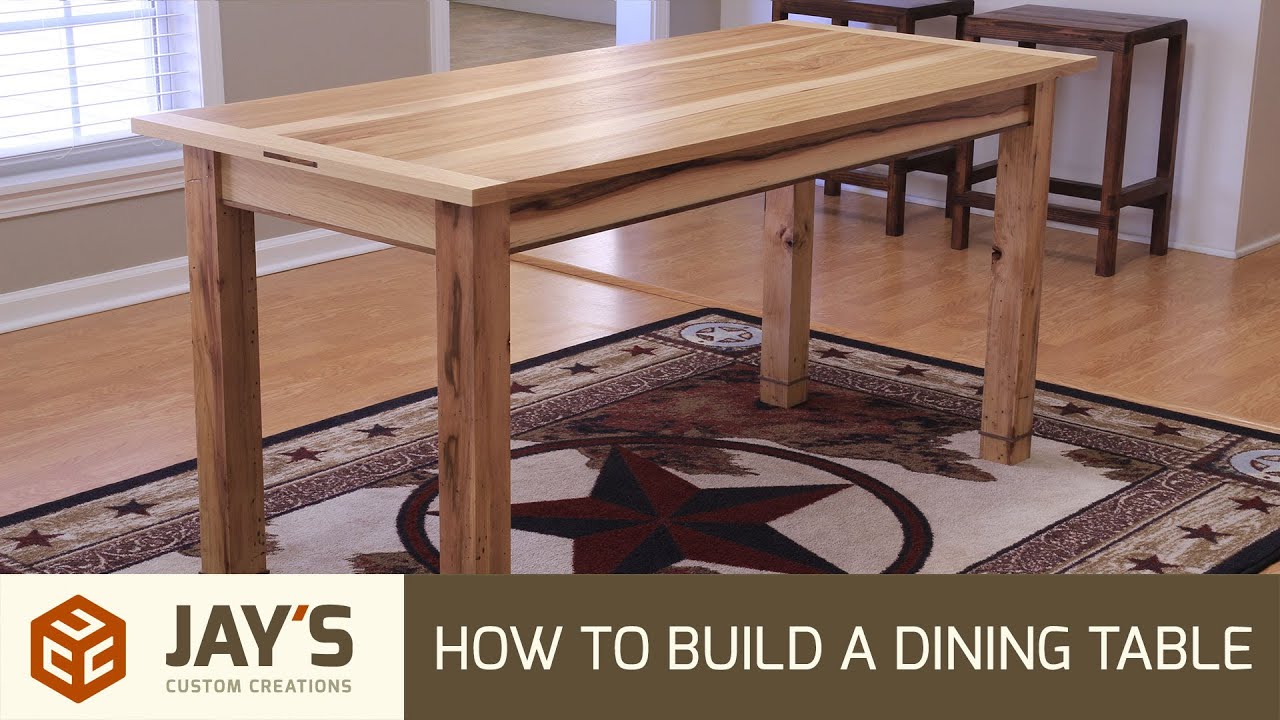
Image Source: i.ytimg.com
Why Build Your Own Kitchen Table?
Creating your own wooden table offers many benefits. You get to choose the exact dimensions, wood type, stain, and finish. This means a table that fits your kitchen perfectly, unlike off-the-shelf options. It’s also often more cost-effective, especially if you’re looking for a quality piece. Plus, the satisfaction of building your own furniture building project is immense. You’ll have a unique piece of functional art in your home. Many people start with a simple dining table design and find they can tackle more complex projects later.
Getting Started: Planning Your DIY Dining Table
Before you grab any tools, it’s crucial to plan. This is the most important step for a successful table construction.
1. Determine the Size and Shape
- Measure your space: How much room do you have? Consider not just the table’s footprint, but also the space needed for chairs and comfortable movement. A good rule of thumb is to allow at least 36 inches of clearance around the table.
- How many people will use it?
- For 2-4 people: A rectangular table around 30-48 inches long and 30-36 inches wide is usually sufficient.
- For 4-6 people: Aim for 48-72 inches long and 36-42 inches wide.
- For 6-8 people: Consider 72-96 inches long and 40-48 inches wide.
- Shape: Rectangular tables are the most common and often the easiest for a beginner. Round or square tables can also be great, but might require slightly different construction techniques.
2. Choose Your Wood
The type of wood you select impacts the look, durability, and cost of your wooden table.
- Pine: Affordable, lightweight, and easy to work with. It’s great for beginners but can dent and scratch more easily.
- Oak: Strong, durable, and has a beautiful grain. It’s a classic choice for a reason. Can be pricier and harder to work with than pine.
- Maple: Similar to oak in strength and durability, with a smoother grain. It takes stains well.
- Walnut: A premium option with a rich, dark color and beautiful grain. It’s more expensive and harder to find.
- Poplar: Relatively inexpensive and paints well. It’s softer than oak or maple but still a good choice for a painted table.
For a beginner-friendly project, pine or poplar are excellent choices for your DIY dining table.
3. Gather Your Tools and Materials
Here’s a list of what you’ll likely need. Don’t worry if you don’t have everything; you can often borrow or rent tools for specific tasks.
Essential Tools
- Measuring Tape: For accurate measurements.
- Pencil: For marking cuts.
- Saw: A circular saw is versatile for straight cuts. A miter saw is excellent for precise angled cuts, especially for table legs. A table saw is ideal for ripping boards to width, but not strictly necessary for a simple table.
- Drill/Driver: For pre-drilling holes and driving screws.
- Screwdriver Bits: To match your screws.
- Clamps: Essential for holding pieces together while gluing or screwing. Bar clamps, pipe clamps, and F-clamps are all useful.
- Sandpaper: Various grits (e.g., 80, 120, 220) for smoothing the wood.
- Orbital Sander: Makes sanding much faster and smoother.
- Safety Glasses: Always protect your eyes!
- Hearing Protection: If using power tools.
- Dust Mask: To avoid inhaling sawdust.
- Wood Glue: A strong adhesive for joining wood pieces.
- Wood Filler (optional): To fill any gaps or imperfections.
- Paintbrush or Rags: For applying stain and finish.
Common Materials for a Simple Rectangular Table
- Tabletop:
- You can buy pre-made tabletops, or join several boards together. For joining boards, you’ll need boards of the same thickness and width, cut to your desired length.
- Table Legs:
- You can buy pre-made table legs (e.g., hairpin legs, wooden turned legs) or build your own from 4×4 posts or by joining smaller boards.
- Apron (Skirt):
- These are boards that run along the sides of the tabletop, connecting the legs and adding stability. Typically 1×4 or 1×6 lumber.
- Screws: Wood screws of appropriate lengths.
- Sandpaper: Various grits.
- Wood Stain (optional): To color the wood.
- Wood Finish: Polyurethane, lacquer, or wax to protect the wood.
4. Find or Create Your Kitchen Table Plans
While this guide provides general steps, having kitchen table plans can be very helpful. You can find free plans online for farmhouse table plans or woodworking table designs, or sketch your own based on your chosen dimensions. The key is to have a clear diagram of how the pieces will fit together.
Table 1: Sample Material List for a 6ft Rectangular Table
| Component | Material Type | Dimensions | Quantity | Notes |
|---|---|---|---|---|
| Tabletop | 1×6 Pine Boards | 72 inches long | 5-6 | Actual width is ~5.5 inches. |
| Apron | 1×4 Pine Boards | Two at 60 inches, Two at 27 inches | 12 feet | For a 72″ x 36″ table. Adjust as needed. |
| Legs | 4×4 Pine Posts | 29 inches long | 4 | For a standard 30-inch table height. |
| Pocket Hole Screws | Wood Screws | 1.25 inch, 2.5 inch | ~50 | For joining apron and legs. |
| Wood Glue | Wood Glue | 8 oz bottle | 1 | |
| Sandpaper | Various Grits | 80, 120, 220 | Assorted | |
| Wood Stain | Oil-based or Water-based | Your chosen color | 1 Quart | |
| Top Coat | Polyurethane (Satin) | 1 Quart | 1 |
Note: Lumber dimensions are nominal (e.g., a 1×4 is actually about ¾ inch thick and 3.5 inches wide). Always check actual dimensions.
Building Your DIY Dining Table: Step-by-Step
Let’s get to the furniture building! This guide assumes you’re building a simple rectangular table with an apron and four legs.
Step 1: Prepare Your Wood
- Cut to Size: Using your chosen kitchen table plans, carefully measure and cut all your lumber to the correct lengths. If you don’t have a miter saw, your local hardware store might be able to make these cuts for you for a small fee.
- Sand Everything: Before assembly, it’s much easier to sand all your individual pieces. Start with a lower grit (80 or 120) to smooth out any rough edges or milling marks, then move to a higher grit (220) for a smooth finish. Wipe away dust with a tack cloth or damp rag between grits.
Step 2: Construct the Tabletop
If you’re joining boards for your tabletop, this is how you do it:
- Edge Jointing (Optional but Recommended): For the strongest glue joints, the edges of your tabletop boards should be perfectly square and smooth. A jointer or a table saw with a good blade is best. If you don’t have these, do your best to get the edges as straight and square as possible with sandpaper and a sanding block.
- Arrange the Boards: Lay out your tabletop boards side-by-side on a flat surface. Arrange them to get the best grain pattern.
- Apply Glue: Apply a generous, even bead of wood glue along one edge of each board that will be joined.
- Clamp: Bring the boards together. Use several clamps to apply firm, even pressure across the width of the tabletop. Wipe away any excess glue that squeezes out with a damp rag immediately. This is important because glue doesn’t take stain well.
- Let it Dry: Allow the glue to dry completely according to the manufacturer’s instructions (usually 24 hours).
- Flatten and Sand: Once dry, remove the clamps. You might have some slight unevenness between boards. Use a hand plane or sand aggressively with a coarser grit sandpaper (80) to level the surface. Then, sand the entire tabletop smooth with higher grits (120, then 220).
Step 3: Build the Apron and Attach the Legs
The apron provides a strong frame for the tabletop and a place to attach the legs.
- Assemble the Apron:
- Take your apron boards (e.g., 1x4s). You’ll have two long boards and two short boards.
- For a strong joint, you can use pocket holes or simple butt joints with glue and screws.
- Pocket Hole Method: Drill pocket holes on the ends of the shorter apron pieces. Then, attach them to the longer apron pieces using wood glue and 1.25-inch pocket hole screws. This creates a rectangular frame.
- Butt Joint Method: Apply wood glue to the ends of the short apron pieces. Butt them against the inside of the long apron pieces. Clamp and secure with screws driven from the outside of the long pieces into the short pieces. Pre-drilling is essential to prevent splitting.
- Attach the Legs to the Apron:
- This is where your woodworking table design comes into play. The apron will sit just inside the outer edges of the legs, creating an overhang for the tabletop.
- Positioning: Lay the apron frame flat. Place a table leg in each corner, ensuring the outside faces of the legs are flush with the outside corners of the apron. You want the apron to be inset a small amount from the outer face of the leg – typically about ¾ inch (the thickness of the apron board). This inset allows the tabletop to overhang the legs.
- Securing: Use wood glue and longer screws (2.5-inch screws are good here) to attach the apron to the legs. You’ll typically attach the apron from the inside into the legs. For maximum strength, consider drilling pilot holes through the apron and into the legs. If using pocket holes, drill pocket holes in the apron pieces where they meet the legs and screw them in place. Make sure the legs are perfectly square to the apron.
Step 4: Attach the Tabletop to the Base
- Flip the Base: Carefully turn the assembled apron and leg base upside down.
- Position the Tabletop: Center your prepared tabletop on top of the upside-down base. Ensure the overhang is even on all sides.
- Secure the Tabletop: There are several ways to do this:
- Pocket Holes (Recommended for beginners): Drill pocket holes along the top inside edge of the apron. Then, drive 1.25-inch pocket hole screws up through the apron into the underside of the tabletop. Space these screws about 8-10 inches apart.
- Figure-8 Fasteners or Z-Clips: These are specialized metal brackets that allow the tabletop to expand and contract with changes in humidity without cracking. They are screwed to the apron and then into the tabletop. This is a more advanced but excellent method.
- Direct Screwing (Least Recommended): You can drill pilot holes through the apron and screw directly into the tabletop. However, wood movement can cause the tabletop to crack if not done carefully, and the screw heads might be visible.
Step 5: Finishing Touches
- Final Sanding: Do a final light sanding with 220-grit sandpaper all over the assembled table. Again, wipe down with a tack cloth to remove all dust.
- Staining (Optional): If you want to stain your wooden table, apply the stain evenly with a brush or rag, following the grain of the wood. Wipe off excess stain after the recommended time. Let the stain dry completely.
-
Applying Finish: This protects the wood and gives it a polished look.
- Polyurethane: A durable and common choice. Apply thin, even coats with a good quality brush or foam applicator. Lightly sand with 220 or 320-grit sandpaper between coats once they are dry, and wipe away dust. Apply 2-3 coats for good protection.
- Other Finishes: Oil finishes (like Danish oil or Tung oil) penetrate the wood and give a more natural, matte look. They may require more frequent reapplication. Varnish and lacquer are other options.
-
Allow to Cure: Let the finish cure fully before using the table. This can take several days to a week, depending on the product.
Building Variations: Farmhouse Table Plans
Many DIYers are drawn to the classic charm of a farmhouse table. These often feature thicker tops, sturdy legs (sometimes with a slight taper), and a robust apron.
- Thicker Top: Instead of 1×6 boards, you might use 2×6 or 2×8 boards for a chunkier tabletop. You can also glue up thinner boards with a thicker piece of plywood underneath for added stability and a budget-friendly option.
- Legs: Large 4×4 posts are common for farmhouse legs. You can also build tapered legs by cutting angles on the sides of 4x4s or by laminating narrower boards together.
- Apron: A 1×6 or 1×8 board is often used for the apron to give it a more substantial look.
- Joinery: Pocket holes are still a great method for attaching the apron to the legs and the tabletop. For a more traditional look, some farmhouse table plans might incorporate mortise and tenon joinery for a more robust, heirloom-quality build.
When following farmhouse table plans, pay close attention to the proportions to achieve that distinctive look.
Tips for a Professional Finish
- Practice cuts: If you’re new to using saws, practice on scrap wood first.
- Sharp blades: Use sharp saw blades for cleaner cuts and less tear-out.
- Pre-drilling: Always pre-drill pilot holes for screws, especially in hardwoods or near the ends of boards, to prevent splitting.
- Clamping pressure: Don’t overtighten clamps, as this can squeeze out too much glue and potentially warp the wood.
- Grain direction: When sanding and staining, always work with the direction of the wood grain.
- Test finishes: Before applying stain or finish to your main project, test it on a scrap piece of the same wood to see how it looks.
Troubleshooting Common DIY Table Issues
- Wobbly Table:
- Cause: Uneven leg lengths, loose joints, or an uneven floor.
- Solution: Ensure all legs are the same length and that all joints are securely fastened. You can add felt pads to the bottom of the legs to compensate for slightly uneven floors. Check the apron-to-leg connections for looseness.
- Gap Between Tabletop Boards:
- Cause: Insufficient clamping pressure during glue-up, or wood that wasn’t properly jointed.
- Solution: You can try to fill small gaps with wood filler that matches your stain color. For larger gaps, you might need to re-glue the top or consider adding decorative elements like bowties.
- Uneven Stain Application:
- Cause: Inconsistent wood porosity, not wiping off excess stain evenly, or using the wrong type of stain for the wood.
- Solution: Ensure the wood is smooth and dust-free before staining. Apply stain in thin, even coats and wipe off excess promptly. Using a pre-stain wood conditioner can help achieve a more uniform color, especially on pine.
- Sanding Marks Visible After Finishing:
- Cause: Not progressing through sandpaper grits smoothly enough, or not wiping off dust between grits.
- Solution: Ensure you use at least three grits (e.g., 80, 120, 220) and that each grit completely removes the scratches from the previous one. Always wipe down with a tack cloth before applying finish.
Frequently Asked Questions About Building a Kitchen Table
Q: How much does it cost to build a DIY kitchen table?
A: The cost can vary greatly depending on the wood you choose, the size of the table, and whether you buy pre-made legs or build them yourself. For a simple pine table, you might spend $150-$300 on materials. More premium woods like oak or walnut will increase the cost significantly.
Q: Can I build a kitchen table without a lot of tools?
A: Yes, you can. While power tools make the job faster and easier, you can build a simple table with basic hand tools like a hand saw, a good measuring tape, sandpaper, a screwdriver, and clamps. You might need to get cuts made at the hardware store.
Q: What is the easiest way to attach table legs?
A: For beginners, using pocket holes to attach the apron to the legs is often the easiest and most secure method. You can also use L-brackets or heavy-duty corner braces, though pocket holes generally offer a cleaner look and stronger joint.
Q: How do I make sure my table is level?
A: Ensure all your leg pieces are cut to the exact same length. When assembling, use a carpenter’s square to make sure the legs are perfectly perpendicular to the apron. After assembly, you can place the table on a flat surface and check for any rocking. Adding felt pads to the bottom of the legs can help level a slightly wobbly table.
Q: What kind of finish is best for a kitchen table?
A: A durable, water-resistant finish is essential for a kitchen table. Polyurethane (oil-based or water-based) is a popular and effective choice. Applying 2-3 coats with light sanding in between will provide excellent protection against spills and wear.
Building your own DIY dining table is a fulfilling project that adds a personal touch to your home. With careful planning and these steps, you can create a beautiful and functional piece of furniture building that you’ll be proud of for years to come. Enjoy the process of creating your own custom kitchen table!