
Can you repair a kitchen sink sprayer? Yes, you can! Many common issues with kitchen sink sprayers are surprisingly easy to fix yourself, saving you money and the hassle of calling a plumber. Whether you’re dealing with a leaky sink sprayer, a sprayer hose leak, or a sink sprayer not working at all, this guide will walk you through the most common problems and their solutions for kitchen faucet sprayer repair.
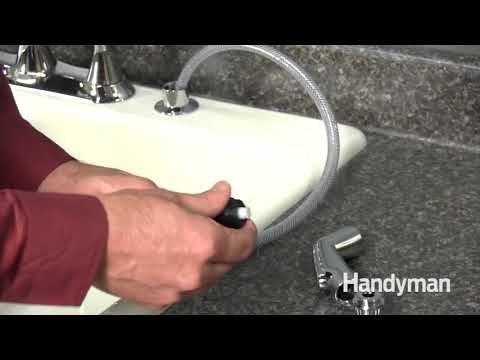
Image Source: i.ytimg.com
Why Is My Kitchen Sink Sprayer Leaking?
A leaky sink sprayer is a common annoyance. The most frequent culprits are worn-out O-rings or washers, a loose connection, or a damaged sprayer hose. Sometimes, the issue is as simple as a crack in the spray head. Let’s delve into the common reasons for a leaky sink sprayer.
Common Causes of a Leaky Sink Sprayer
- Worn O-rings or Washers: These small rubber rings create a seal between different parts of the sprayer and faucet. Over time, they can dry out, crack, or wear down, allowing water to escape.
- Loose Connections: The connections for the sprayer hose to the faucet body or the water supply line can loosen due to vibration or improper installation.
- Damaged Sprayer Hose: The flexible hose connecting the faucet to the sprayer can develop cracks, kinks, or punctures, leading to leaks. A sprayer hose leak is often visible.
- Faulty Spray Head: The spray head itself might have internal seals that have failed, or a crack might have developed on its surface. This is a common reason for a kitchen sink spray head replacement.
- Cartridge Issues: While less common for the sprayer specifically, a problem with the faucet’s main cartridge could sometimes affect the sprayer’s function and cause leaks.
Troubleshooting Your Sink Sprayer Not Working
When your sink sprayer isn’t working, it can be frustrating. A common problem is a blockage in the spray head, or a disconnected or kinked hose. Let’s look at how to troubleshoot a sink sprayer not working.
Step-by-Step Troubleshooting for a Non-Working Sprayer
- Check the Diverter Valve: Most kitchen faucets have a diverter valve that switches water flow between the main faucet spout and the sprayer. This valve is often located inside the faucet body or under the handle. If it’s stuck or faulty, water won’t go to the sprayer.
- Inspect the Sprayer Hose: Ensure the hose isn’t kinked or bent sharply, which can restrict water flow.
- Clean the Spray Head Nozzle: Mineral buildup can clog the small holes in the spray head, preventing water from coming out. This is a key step to fix kitchen sprayer nozzle issues.
- Check Water Supply: Make sure the water supply valves under the sink are fully open.
- Examine Connections: Ensure all hose connections are secure.
How to Fix a Leaky Sink Sprayer: A Practical Guide
Fixing a leaky sink sprayer often involves replacing small, inexpensive parts. Here’s how to tackle common leaks.
Fixing a Leaky Sprayer Hose
A sprayer hose leak can manifest as drips from the hose itself or from the connection points.
Materials You Might Need:
- Adjustable wrench
- Pliers
- Teflon tape (pipe thread tape)
- Replacement O-rings or washers (specific to your faucet model)
- Replacement sprayer hose
- Bucket or towel to catch water
- Gloves
Steps to Repair a Sprayer Hose Leak:
- Turn Off Water Supply: Locate the shut-off valves under your kitchen sink. Turn them clockwise until they are fully closed. Turn on the faucet to drain any remaining water.
- Disconnect the Hose: Place a bucket or towel under the sink. Locate where the sprayer hose connects to the faucet body. Use an adjustable wrench or pliers to carefully unscrew the hose from the faucet. Be prepared for a small amount of water to drip out.
- Inspect the Hose and Connections: Examine the hose for any visible cracks or damage. Check the threaded ends for worn-out O-rings or washers. Often, a sprayer hose leak is due to a faulty O-ring at the connection.
- Replace O-rings/Washers: If you find worn O-rings, carefully remove the old ones and replace them with new ones of the same size. A small flathead screwdriver can help.
- Tighten Connections: If the leak was at a connection, try gently tightening it. If it continues to leak, you may need to unscrew it again, clean the threads, apply Teflon tape, and then re-tighten.
- Replace the Hose (If Necessary): If the hose itself is damaged or old, it’s time for replacing the sink sprayer hose. You’ll need to know your faucet’s brand and model to buy the correct replacement. Unscrew the old hose from both the faucet and the spray head.
- Install the New Hose:
- Connect the new hose to the spray head.
- Connect the other end of the new hose to the faucet body. Ensure you use Teflon tape on the threads if recommended by the manufacturer.
- Tighten securely, but avoid over-tightening, which can damage the threads.
- Turn Water Back On: Slowly turn the shut-off valves back on. Check for leaks at all connection points. Test the sprayer.
Fixing a Leaky Sink Sprayer Nozzle
If the leak is coming directly from the spray head, it’s usually a sign of internal wear or a damaged seal within the nozzle. This is a common scenario for a kitchen sink spray head replacement.
Steps to Fix a Leaky Sprayer Nozzle:
- Turn Off Water: Shut off the water supply under the sink and drain the faucet.
- Remove the Sprayer Head: The spray head usually unscrews from the end of the sprayer hose. Some might have a small set screw or a different attachment mechanism.
- Inspect and Clean the Nozzle: Look for any visible damage or mineral deposits. You can try soaking the spray head in vinegar for a few hours to dissolve mineral buildup. Use a soft brush or toothpick to clear any clogged holes.
- Check Internal Seals: Some spray heads have small rubber seals inside. If you can see them, check for wear or damage. You might be able to find replacement seals specific to your model.
- Replace the Sprayer Head: If cleaning doesn’t solve the leak, or if internal parts are damaged, you’ll need a kitchen sink spray head replacement.
- Unscrew the old spray head from the hose.
- Screw on the new spray head securely.
- Test: Turn the water back on and check for leaks.
Troubleshooting a Sprayer Hose Leak at the Faucet Connection
Leaks at the connection point where the sprayer hose meets the faucet body are common.
Steps to Address a Hose Connection Leak:
- Shut Off Water and Drain: As always, start by turning off the water supply under the sink and draining the lines.
- Access the Connection: You’ll likely need to remove any access panels or covers under the sink to get a clear view of the connection.
- Inspect the Fitting: Look at the fitting where the hose attaches to the faucet. There’s often an O-ring or a gasket inside this fitting.
- Tighten Gently: First, try gently tightening the connection with a wrench. Sometimes vibrations loosen things over time.
- Check and Replace O-ring/Washer: If tightening doesn’t work, unscrew the hose from the faucet. Carefully examine the O-ring or washer in the fitting. If it’s cracked, flattened, or missing, this is your problem.
- Remove the old O-ring with a small screwdriver or pick.
- Take the old O-ring to a hardware store to find an exact match.
- Install the new O-ring.
- Apply Teflon Tape: If there isn’t an O-ring or the threads themselves seem to be the issue, you can try applying Teflon tape to the male threads of the fitting before screwing the hose back on. Wrap the tape clockwise around the threads 2-3 times.
- Reassemble and Test: Screw the hose back onto the faucet securely. Turn the water on slowly and check for leaks.
How to Replace a Kitchen Sink Sprayer Hose
If your hose is cracked, brittle, or has multiple leaks, replacing the sink sprayer hose is the best solution. This is a common task when dealing with pull-out faucet sprayer repair as well.
When to Replace the Hose:
- Visible cracks, punctures, or fraying.
- The hose feels stiff, brittle, or is permanently kinked.
- Leaks persist even after replacing O-rings at the connections.
Steps for Replacing a Kitchen Sink Sprayer Hose:
- Identify Your Faucet Model: Knowing your faucet’s brand and model number is crucial for getting the correct replacement hose. Look for a label on the faucet body itself, or check your original purchase documentation.
- Shut Off Water Supply: Close the hot and cold water shut-off valves under the sink. Open the faucet to release pressure and drain remaining water.
- Prepare Your Workspace: Place a bucket or towels under the sink to catch any residual water.
- Disconnect the Old Hose:
- At the Faucet: Unscrew the sprayer hose from the faucet body using an adjustable wrench.
- At the Spray Head: Unscrew the spray head from the other end of the hose. Some spray heads might have a different attachment.
- Thread the New Hose:
- Most modern faucets have a quick-connect system or a threaded connection where the hose attaches to the faucet body. If it’s threaded, you might need Teflon tape.
- Carefully thread the new hose onto the spray head.
- Connect the New Hose to the Faucet:
- Align the hose with the faucet connection.
- Screw it in securely by hand first, then use a wrench to tighten it slightly. Do not over-tighten.
- Secure Any Weights or Brackets: If your faucet has a pull-out sprayer, there’s usually a weight that attaches to the hose to help it retract. Make sure to reattach this weight to the new hose in the same position.
- Turn Water Back On and Test: Slowly open the shut-off valves. Check all connections for leaks. Operate the sprayer to ensure it works correctly and the hose retracts properly.
Installing a New Kitchen Sprayer: When It’s Time for an Upgrade
Sometimes, the existing sprayer is beyond repair, or you might want to upgrade your kitchen faucet. Installing a new kitchen sprayer can revitalize your sink’s functionality.
Replacing the Entire Sprayer Assembly
This usually involves replacing the hose and the spray head together, and potentially dealing with the connection to the faucet body.
Steps for Installing a New Kitchen Sprayer:
- Choose Your New Sprayer: Select a sprayer assembly that is compatible with your existing faucet. Many are universal, but some brands have proprietary connectors.
- Shut Off Water: Close both hot and cold water supply valves under the sink. Drain the faucet.
- Remove the Old Sprayer:
- Disconnect the old sprayer hose from the faucet body under the sink.
- Remove the old spray head from the end of the hose.
- If the entire sprayer assembly needs replacement, you might need to disconnect the hose from a mounting bracket or a specialized faucet fitting.
- Connect the New Sprayer Hose:
- Attach the new hose to the spray head.
- Connect the other end of the new hose to the faucet’s supply line or dedicated port. Again, use Teflon tape on threaded connections if required.
- Secure the Hose and Weight: Ensure the hose is properly routed and any retraction weight is attached correctly.
- Turn On Water and Test: Slowly turn the water supply back on. Check all connections for leaks. Test the sprayer’s function and retraction.
Pull-Out Faucet Sprayer Repair: Specific Considerations
Pull-out sprayers have a flexible hose that retracts into the faucet body. Repairing these can sometimes be trickier due to the mechanics involved.
Common Issues with Pull-Out Sprayers
- Retraction Problems: The hose may not retract smoothly or completely. This is often due to the retraction weight being dislodged, or the hose getting snagged inside the faucet body.
- Leaks at the Swivel: The point where the hose connects to the faucet spout can have a swivel joint that might leak if seals wear out.
- Hose Kinks: The flexible hose can develop kinks inside the faucet body, hindering water flow or retraction.
Tips for Pull-Out Faucet Sprayer Repair
- Weight Placement: Ensure the retraction weight is attached correctly and isn’t obstructing the hose’s path. Sometimes, adjusting the weight’s position can solve retraction issues.
- Hose Path: Check that the hose isn’t getting caught on pipes or other plumbing under the sink.
- Swivel Seals: For leaks at the swivel point, you might need to disassemble the spout (following manufacturer instructions) to access and replace O-rings or seals within the swivel mechanism.
Fixing a Clogged Kitchen Sprayer Nozzle
A clogged nozzle is one of the simplest kitchen sprayer problems to fix. Mineral deposits from hard water are the usual culprits.
Methods to Unclog Your Sprayer Nozzle
1. Vinegar Soak:
- Materials: White vinegar, a plastic bag, a rubber band or twist tie.
- Steps:
- Fill the plastic bag with enough white vinegar to submerge the spray head.
- Secure the bag around the spray head using the rubber band, ensuring the nozzle is fully immersed.
- Leave it to soak for several hours or overnight.
- Remove the bag and rinse the spray head thoroughly with water.
- Run water through the sprayer to flush out any loosened debris.
2. Toothpick or Pin Method:
- Materials: Toothpick, needle, or a thin piece of wire.
- Steps:
- After soaking or if the clog is minor, gently use a toothpick or pin to dislodge any remaining debris from the nozzle holes. Be careful not to enlarge the holes or damage the nozzle.
3. Disassembly and Cleaning:
- Materials: Small screwdriver, vinegar, soft brush.
- Steps:
- If your spray head can be disassembled (check your faucet’s manual), carefully take it apart.
- Clean individual parts, paying attention to any internal screens or seals.
- Soak parts in vinegar if necessary.
- Reassemble carefully.
Essential Tools for Sprayer Repair
Having the right tools makes the job much easier and prevents damage to your faucet.
| Tool Name | Purpose | Notes |
|---|---|---|
| Adjustable Wrench | Loosening and tightening threaded fittings and connections. | Choose one with smooth jaws to avoid scratching chrome finishes. |
| Pliers (e.g., Channel Locks) | Gripping various sizes of pipes and fittings, especially if access is tight. | Be cautious not to overtighten or damage components. |
| Flathead Screwdriver | Prying off caps, removing O-rings, or dislodging small debris. | Have a set of various sizes. |
| Phillips Head Screwdriver | For any screws that might be present on the faucet assembly or handle. | |
| Teflon Tape (Pipe Thread Tape) | Creating a watertight seal on threaded connections. | Apply clockwise for best results. |
| Small Bucket or Towel | Catching dripping water and protecting the sink basin. | Essential for minimizing mess. |
| Gloves | Protecting your hands from dirt and hot water. | |
| Plumber’s Grease (Optional) | Lubricating O-rings and threads for easier installation and future disassembly. | Use sparingly and ensure it’s safe for potable water systems. |
| Replacement Parts | O-rings, washers, sprayer hose, or spray head. | Always buy parts specific to your faucet model for a perfect fit. |
When to Call a Professional Plumber
While many kitchen sink sprayer repairs are DIY-friendly, there are times when it’s best to call in a professional.
Situations Requiring a Plumber:
- Unfamiliarity with Plumbing: If you’re uncomfortable working with plumbing or are unsure about any step, a plumber can do the job efficiently and correctly.
- Persistent Leaks: If you’ve tried multiple fixes and the leak continues, there might be a more complex issue with the faucet body or internal plumbing.
- Damaged Faucet Body: If the faucet body itself is cracked or corroded, it might need replacement by a professional.
- Complex Faucet Designs: Some high-end or unusually designed faucets may require specialized tools or knowledge.
- Lack of Proper Tools: If you don’t have the necessary tools and don’t want to invest in them.
- Major Leaks or Water Damage: If you suspect a significant leak that could cause water damage, call a plumber immediately.
Frequently Asked Questions (FAQ)
Q1: How often should I replace my kitchen sink sprayer hose?
A1: There’s no fixed schedule. Replace it when you notice leaks, brittleness, kinks, or damage. On average, a hose might last 5-10 years depending on usage and water quality.
Q2: Can I use a universal replacement hose for my kitchen faucet sprayer?
A2: While some are universal, it’s always best to try and find a replacement hose specifically designed for your faucet brand and model. This ensures a proper fit and seal.
Q3: My sprayer is only spraying weakly. What could be the problem?
A3: This is often due to a clogged spray nozzle or a partially closed water supply valve. First, try cleaning the nozzle. If that doesn’t help, check your water supply valves to ensure they are fully open. A kink in the hose could also be a cause.
Q4: How do I know if I need to replace the entire faucet or just the sprayer?
A4: If the faucet itself is leaking from the base, the handle is loose and cannot be tightened, or the finish is severely damaged, it might be time for a new faucet. If only the sprayer is malfunctioning and you can’t easily replace its parts, you can buy a new sprayer assembly.
Q5: Is Teflon tape necessary for all sprayer hose connections?
A5: It’s generally recommended for threaded metal-to-metal connections to ensure a watertight seal. Some connections might use rubber gaskets or O-rings that don’t require tape, or they may have quick-connect fittings. Always check your faucet’s manual or look at the connection type.
Q6: How tight should I make the sprayer hose connections?
A6: Tighten them snugly by hand, then use a wrench for an additional quarter to half turn. Over-tightening can strip threads or crack fittings, leading to worse leaks. It’s better to tighten slightly, test, and then tighten a bit more if needed, rather than going too tight initially.
By following these steps, you can effectively tackle most common kitchen sink sprayer issues. Performing these repairs yourself can save you money and give you a sense of accomplishment. Remember to always prioritize safety and turn off the water supply before beginning any work.